Documentation Index
Fetch the complete documentation index at: https://signatureapi-daf4ee54.mintlify.app/llms.txt
Use this file to discover all available pages before exploring further.
Overview
This tutorial shows you how to filter SignatureAPI webhook notifications in Microsoft Power Automate so that only the right department receives alerts for relevant signing events. By using envelope topics as labels, you can route completed documents (such as signed contracts or financial agreements) to the correct team automatically, without writing custom code or building complex conditional logic.What You’ll Learn
- How to configure a SignatureAPI trigger in Power Automate to listen for specific events.
- How envelope topics work as a labeling system for routing notifications.
- How to filter webhook notifications so only matching envelopes trigger your flow.
- How to retrieve a signed deliverable from SignatureAPI.
- How to send a targeted email notification with the signed document attached.
- How to test and verify the end-to-end filtering workflow.
The Problem
Organizations that process many signature requests often face challenges when all webhook notifications flow into a single channel. Common pain points include:- Notification overload - every department receives alerts for every completed envelope, creating noise and causing important documents to get buried.
- Manual sorting - team members spend time reviewing notifications to determine which ones are relevant to their department.
- Delayed responses - when the right people are not notified promptly, follow-up actions (filing, countersigning, client communication) are delayed.
How Automation Helps
Automation simplifies notification routing by:- Filtering webhook events at the trigger level using envelope topics, so irrelevant envelopes never start the flow.
- Delivering signed documents directly to the responsible department’s inbox without manual intervention.
- Eliminating the need for shared inboxes or manual forwarding between teams.
- Scaling effortlessly as you add new departments or document types, since each topic can have its own dedicated flow.
Requirements
Before starting, make sure you have:- Power Automate - To build the automated workflow.
- SignatureAPI account - For electronic signatures and webhook triggers.
- Microsoft Outlook account - To send email notifications to the target department.
sales-department.
Flow Overview
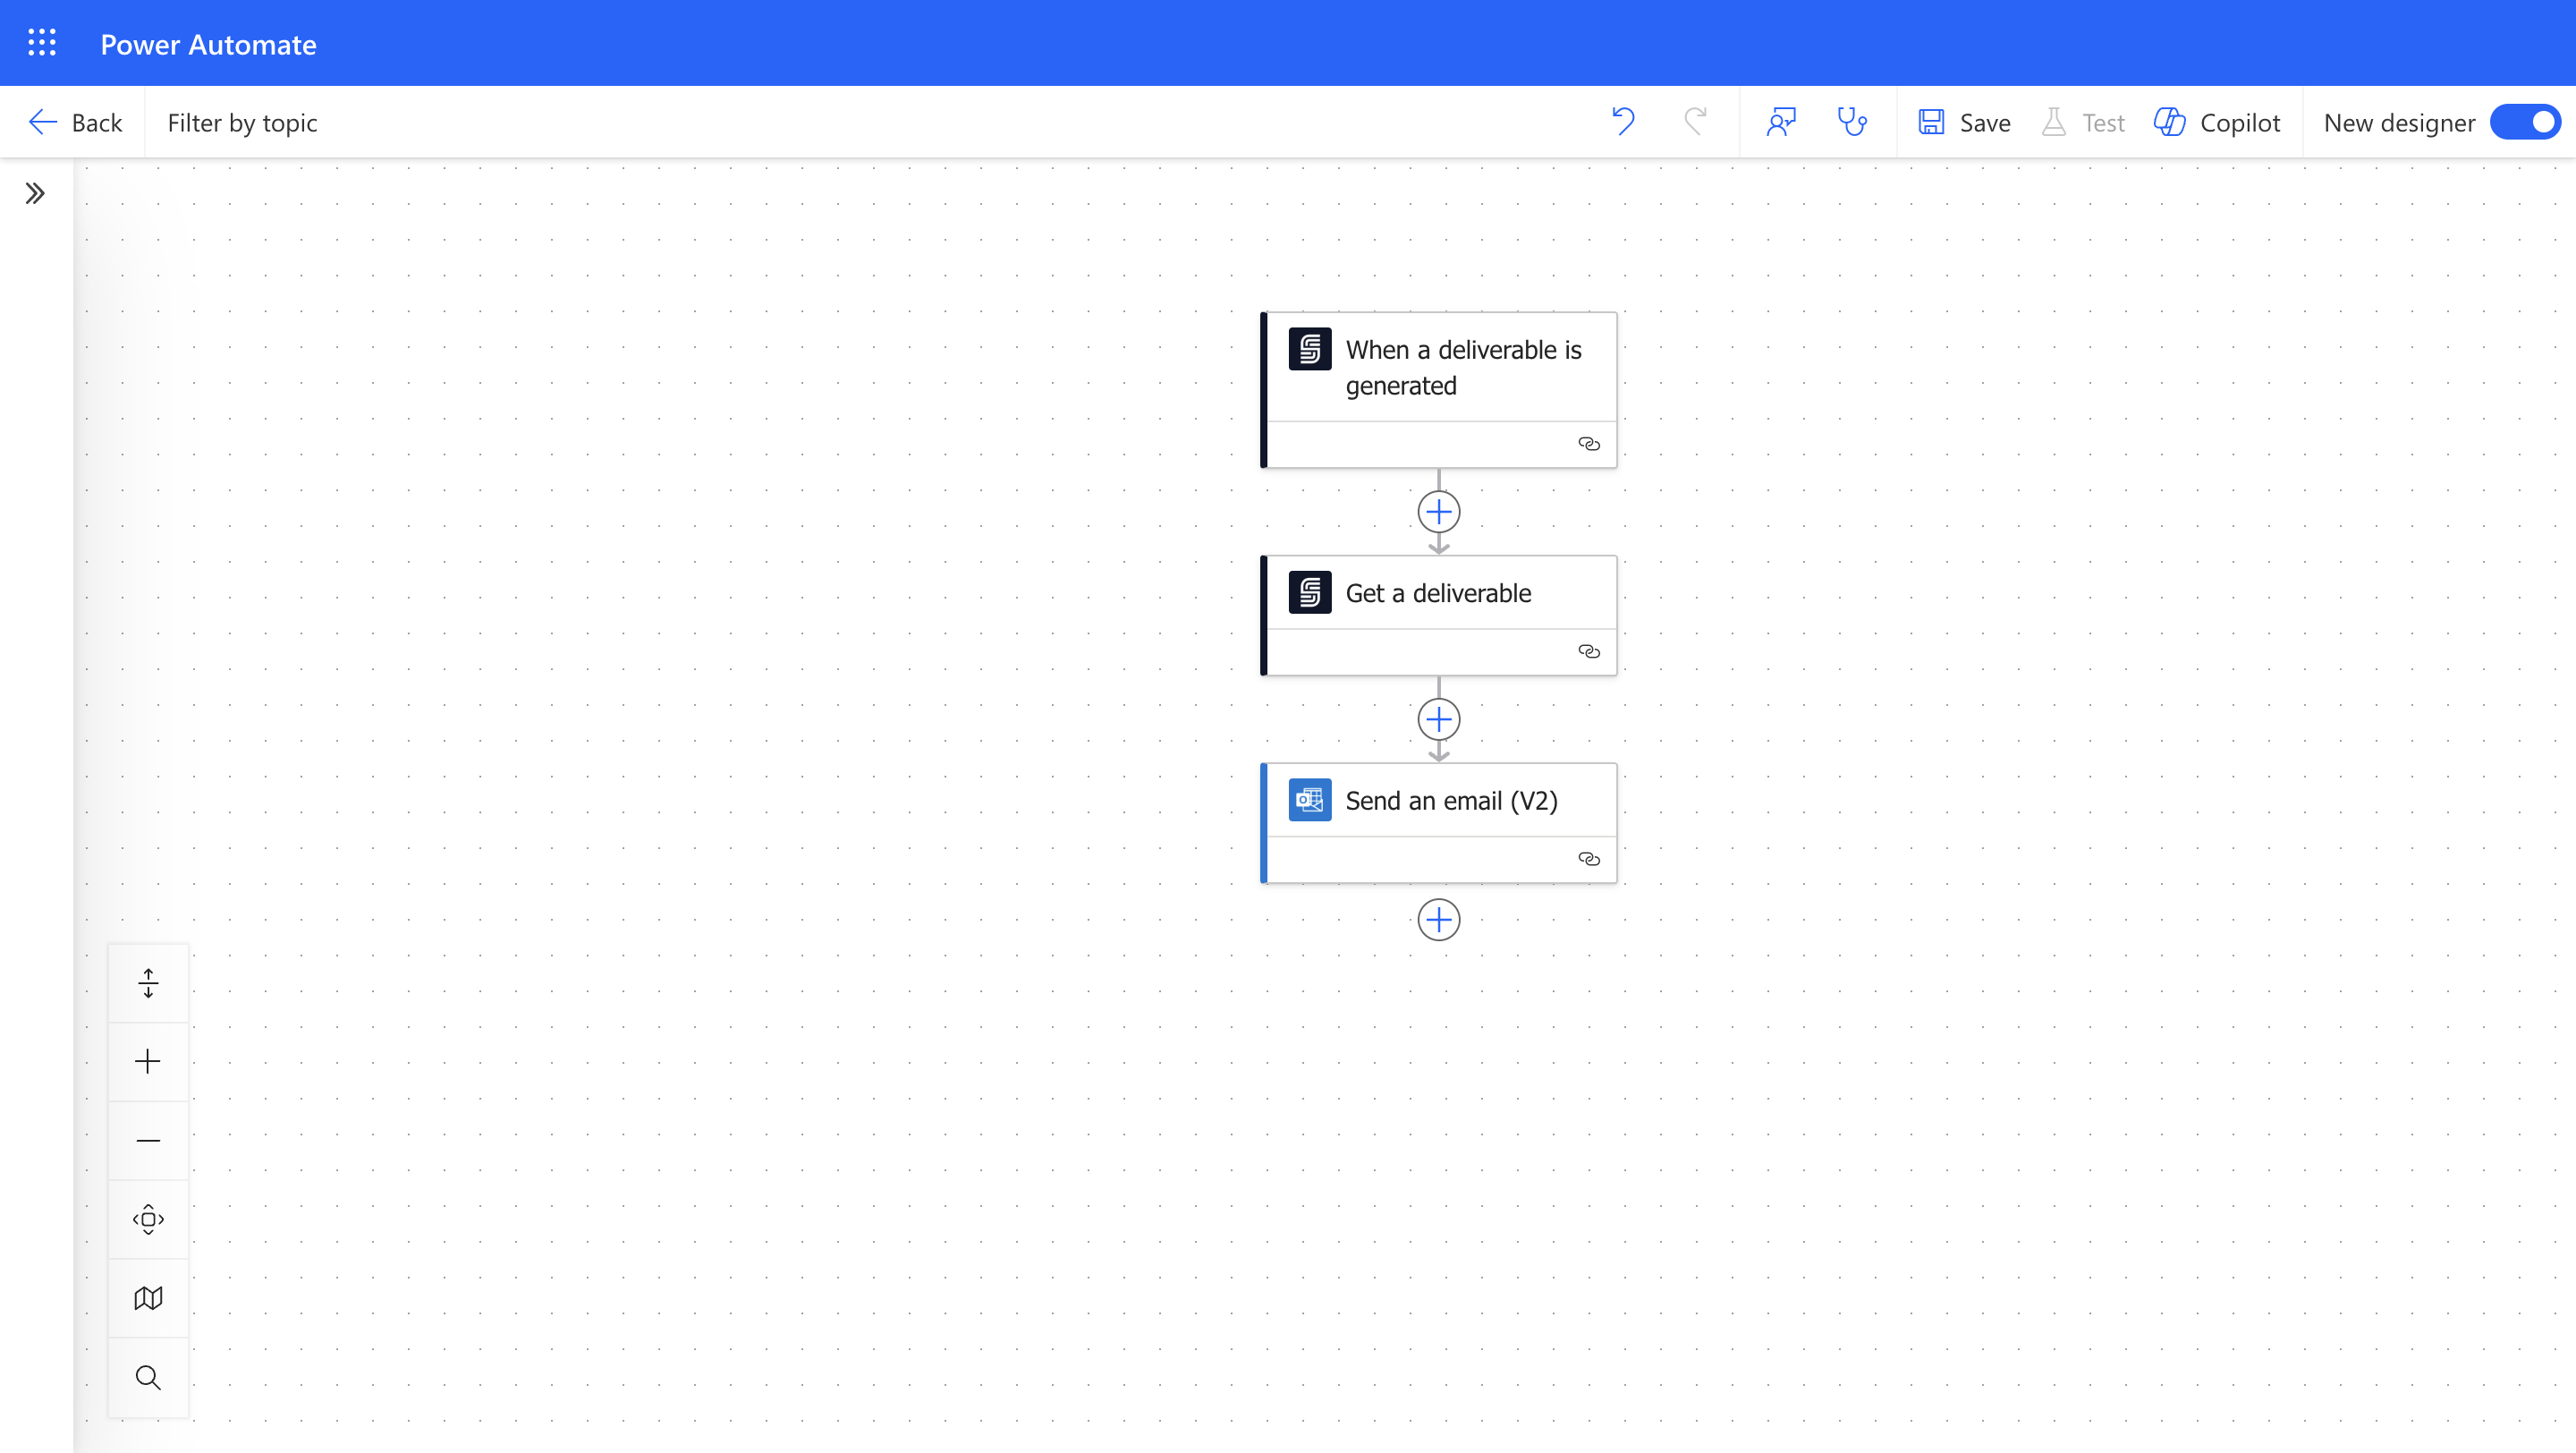
The automation process follows these steps:- Trigger: A SignatureAPI webhook fires when a deliverable is generated (a signed document becomes available).
- Filter: The trigger’s topic filter ensures the flow only runs for envelopes tagged with the matching topic (for example,
sales-department). - Retrieve: The flow fetches the signed deliverable from SignatureAPI.
- Notify: An email with the signed document attached is sent to the designated department.
Step-by-Step Tutorial
Follow these steps to build a Power Automate flow that filters SignatureAPI webhook notifications by topic and sends targeted email alerts to the appropriate department.Step 1: Create the Flow and Configure the Trigger
Start by creating a new automated flow with a SignatureAPI trigger that listens for deliverable generation events.1.1 Create the Flow
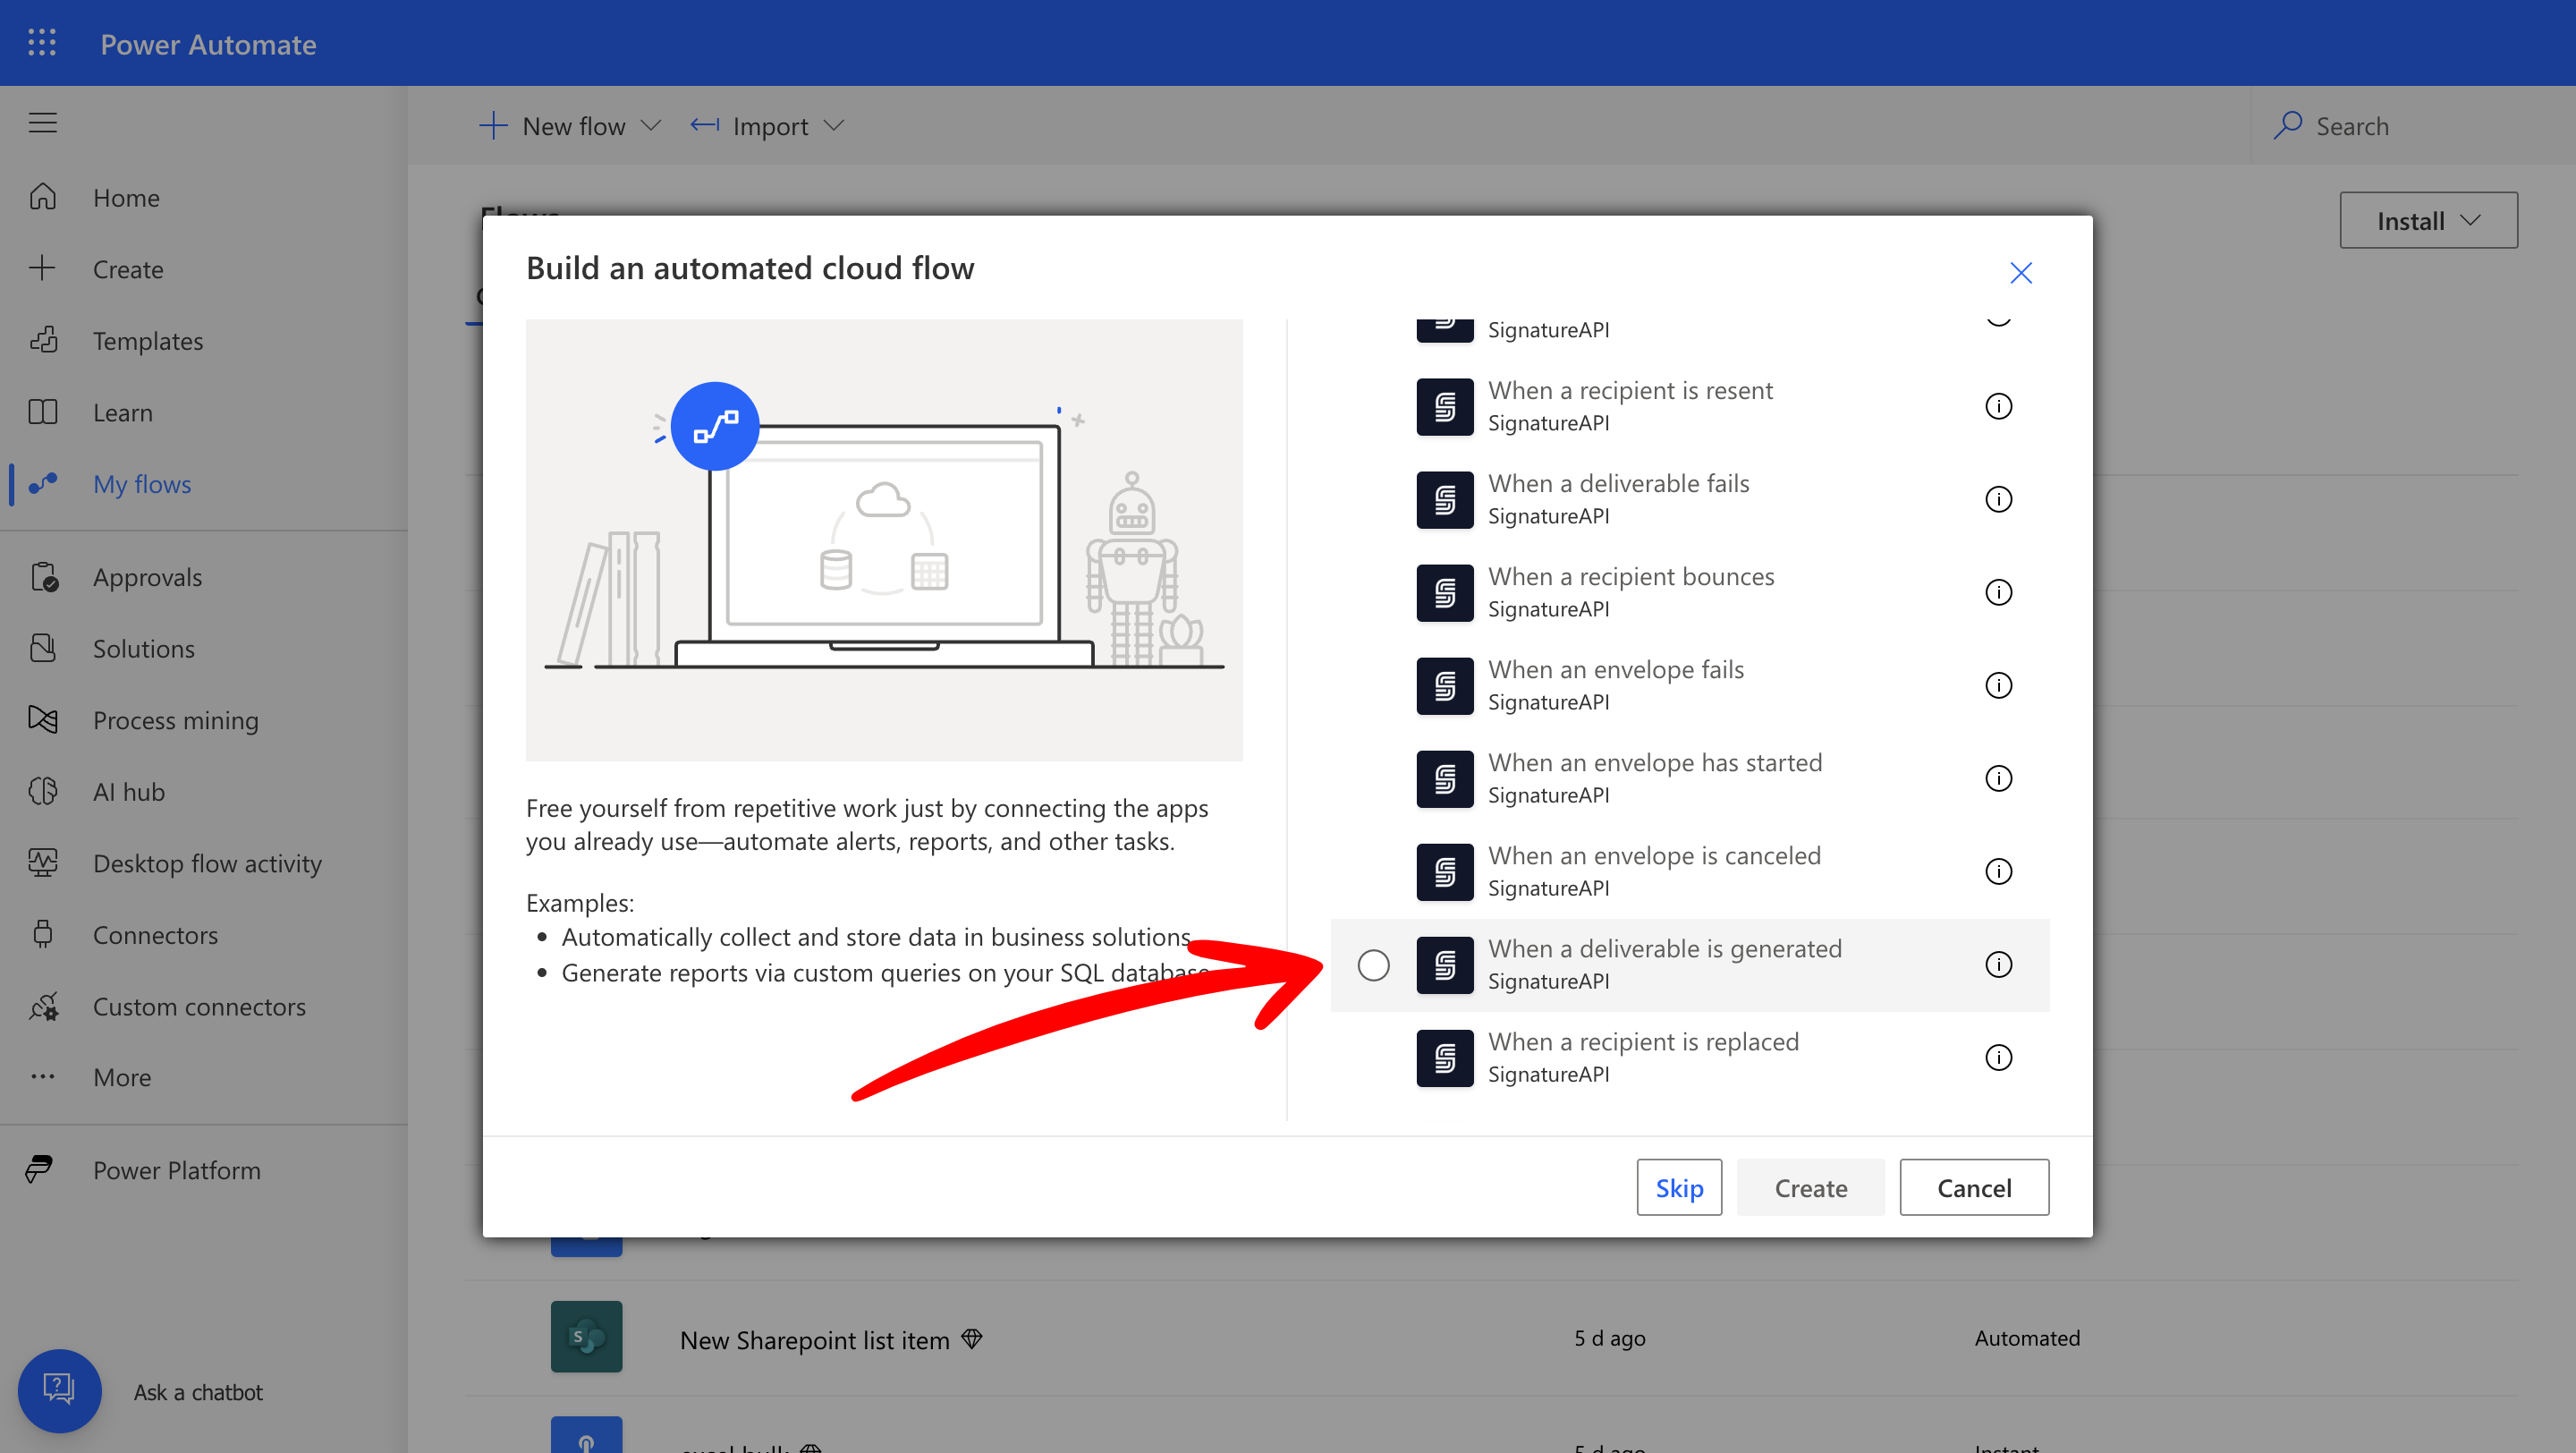
- Go to Power Automate and select Automated Cloud Flow.
- Give your flow a descriptive name (for example, “Sales Department - Signed Document Notification”).
-
Choose the trigger When a deliverable is generated from the SignatureAPI connector.
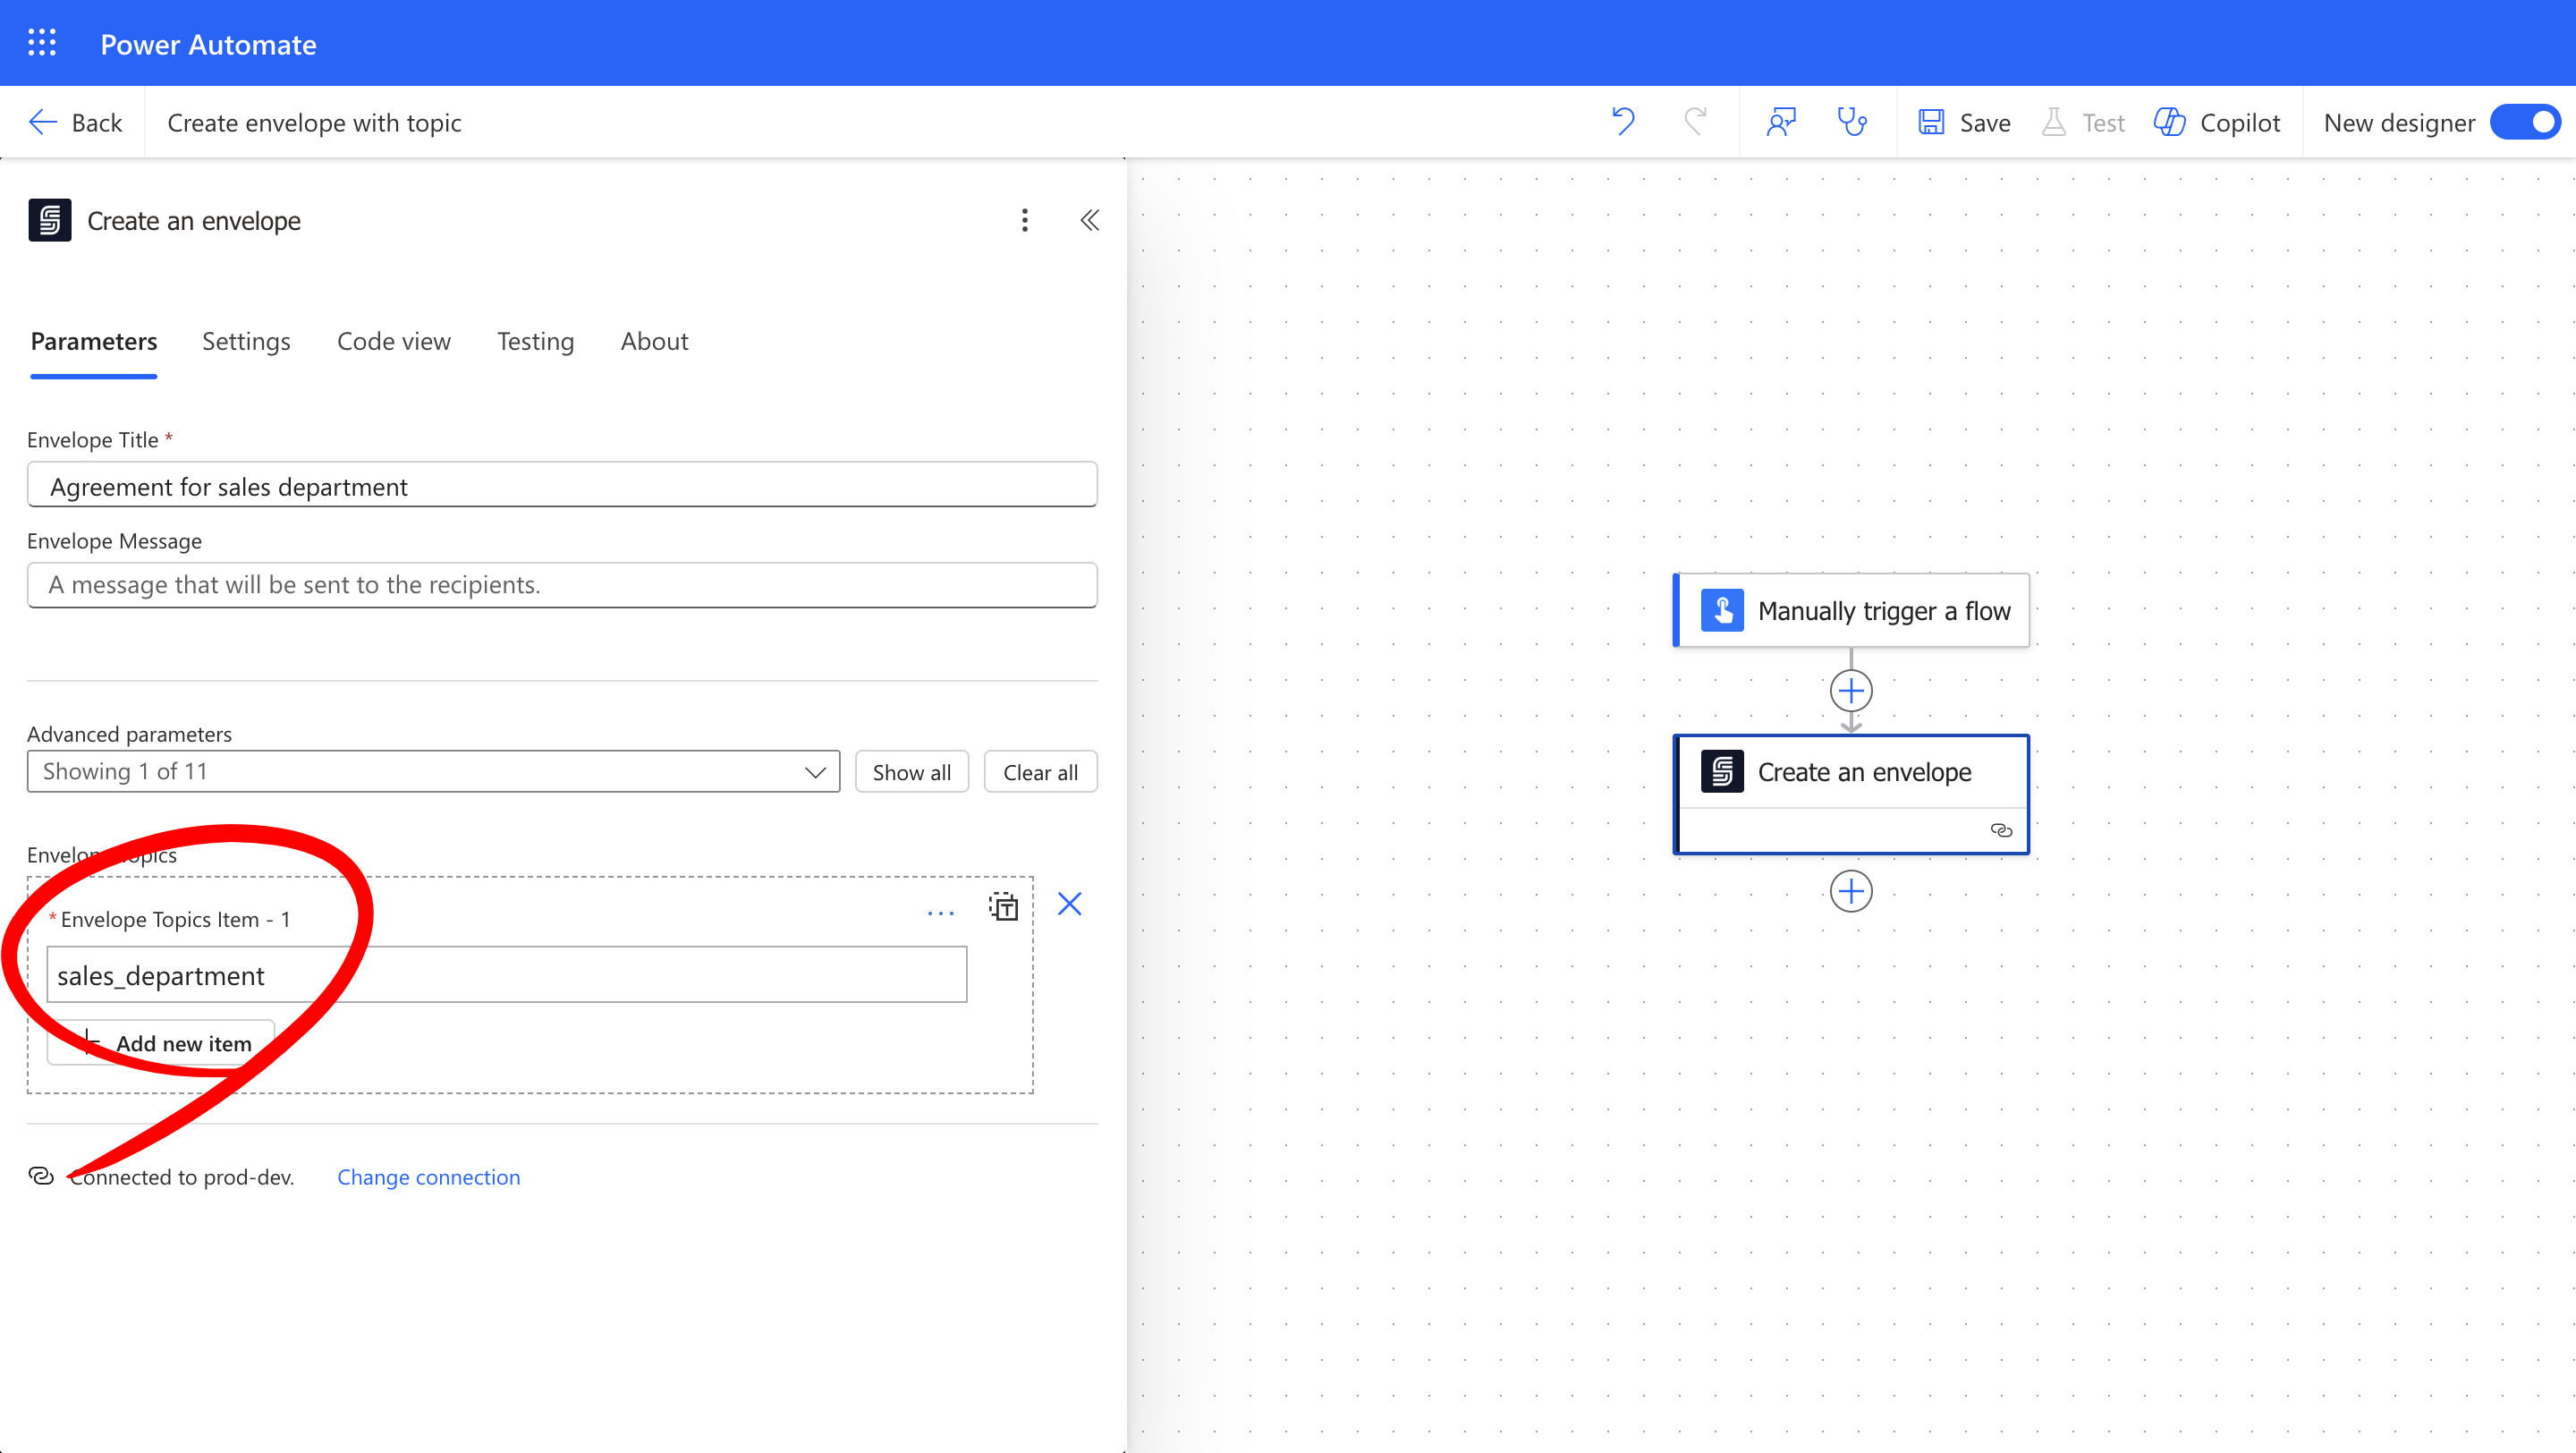
1.2 Add a Topic Filter to the Trigger
The topic filter is what makes this flow department-specific. By setting a topic on the trigger, you ensure that only envelopes created with the same topic will activate this flow.- In the trigger configuration, locate the Topics field.
-
Enter the topic value that matches the one used during envelope creation. In this example, enter
sales-department. This means the trigger will only fire when a deliverable is generated for an envelope that was created with thesales-departmenttopic. Envelopes with different topics (or no topic at all) will not activate this flow.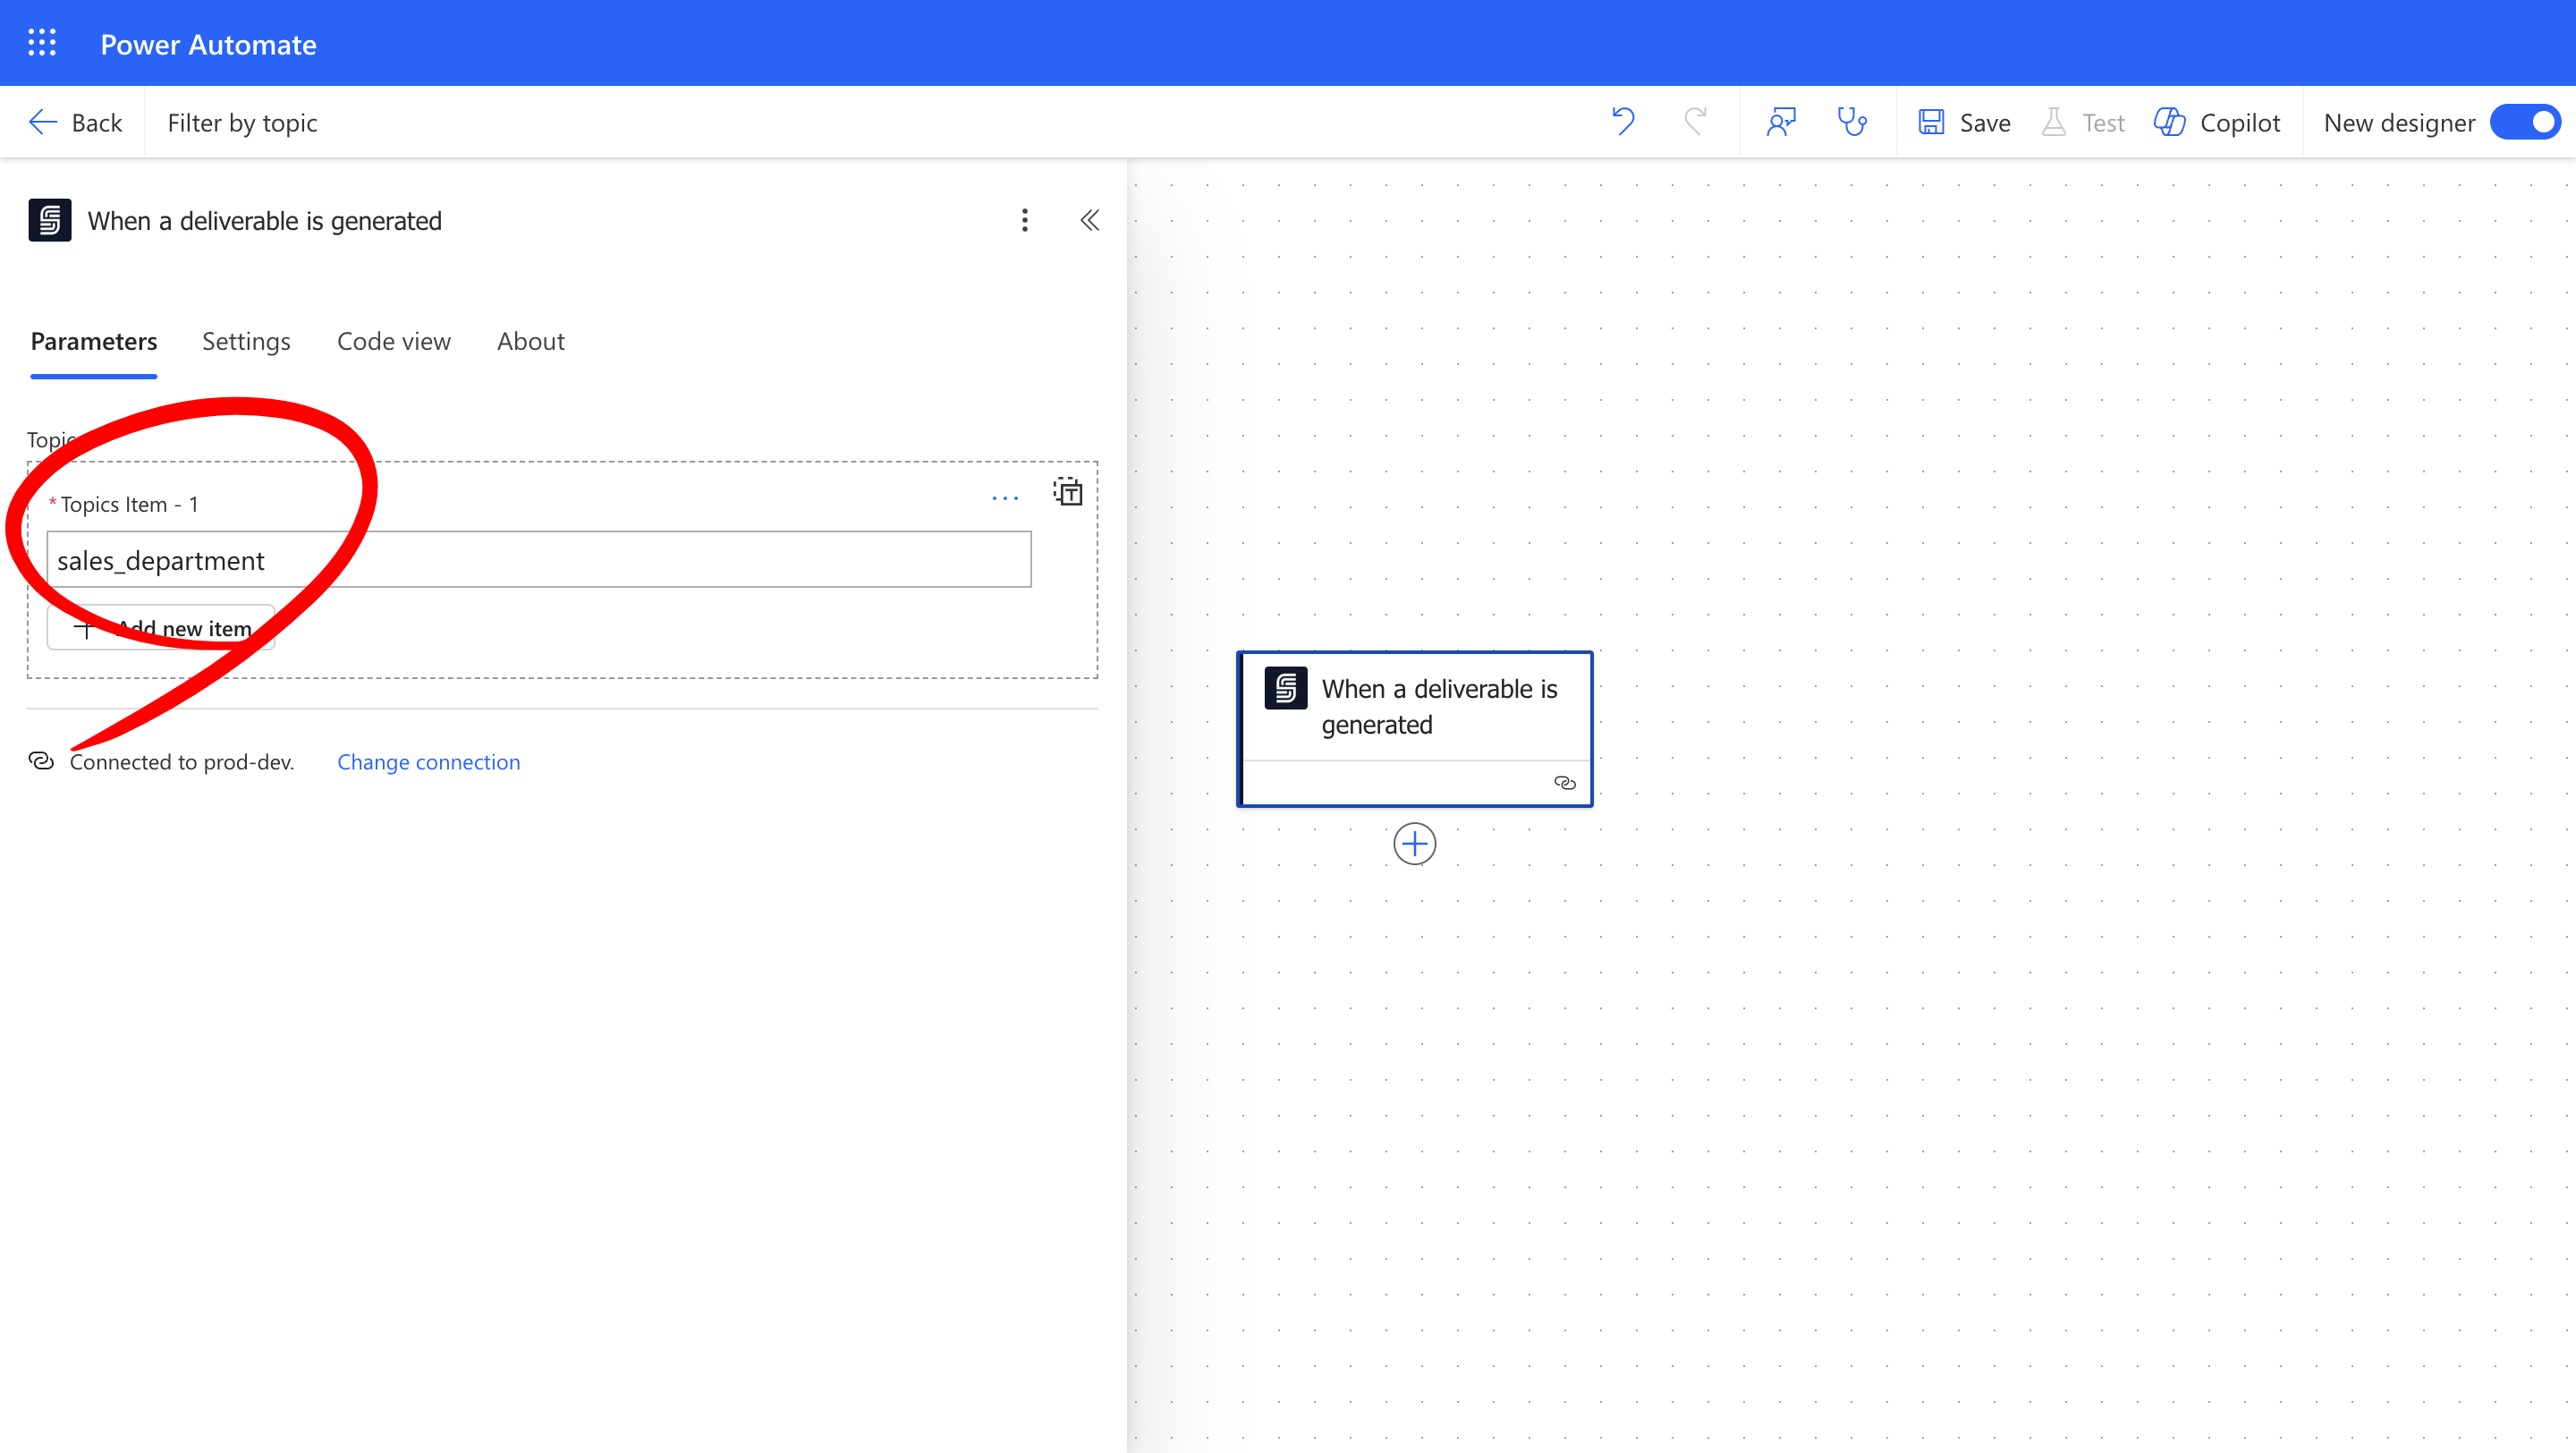
sales-department and Sales-Department are treated as different values.
Step 2: Retrieve the Signed Document
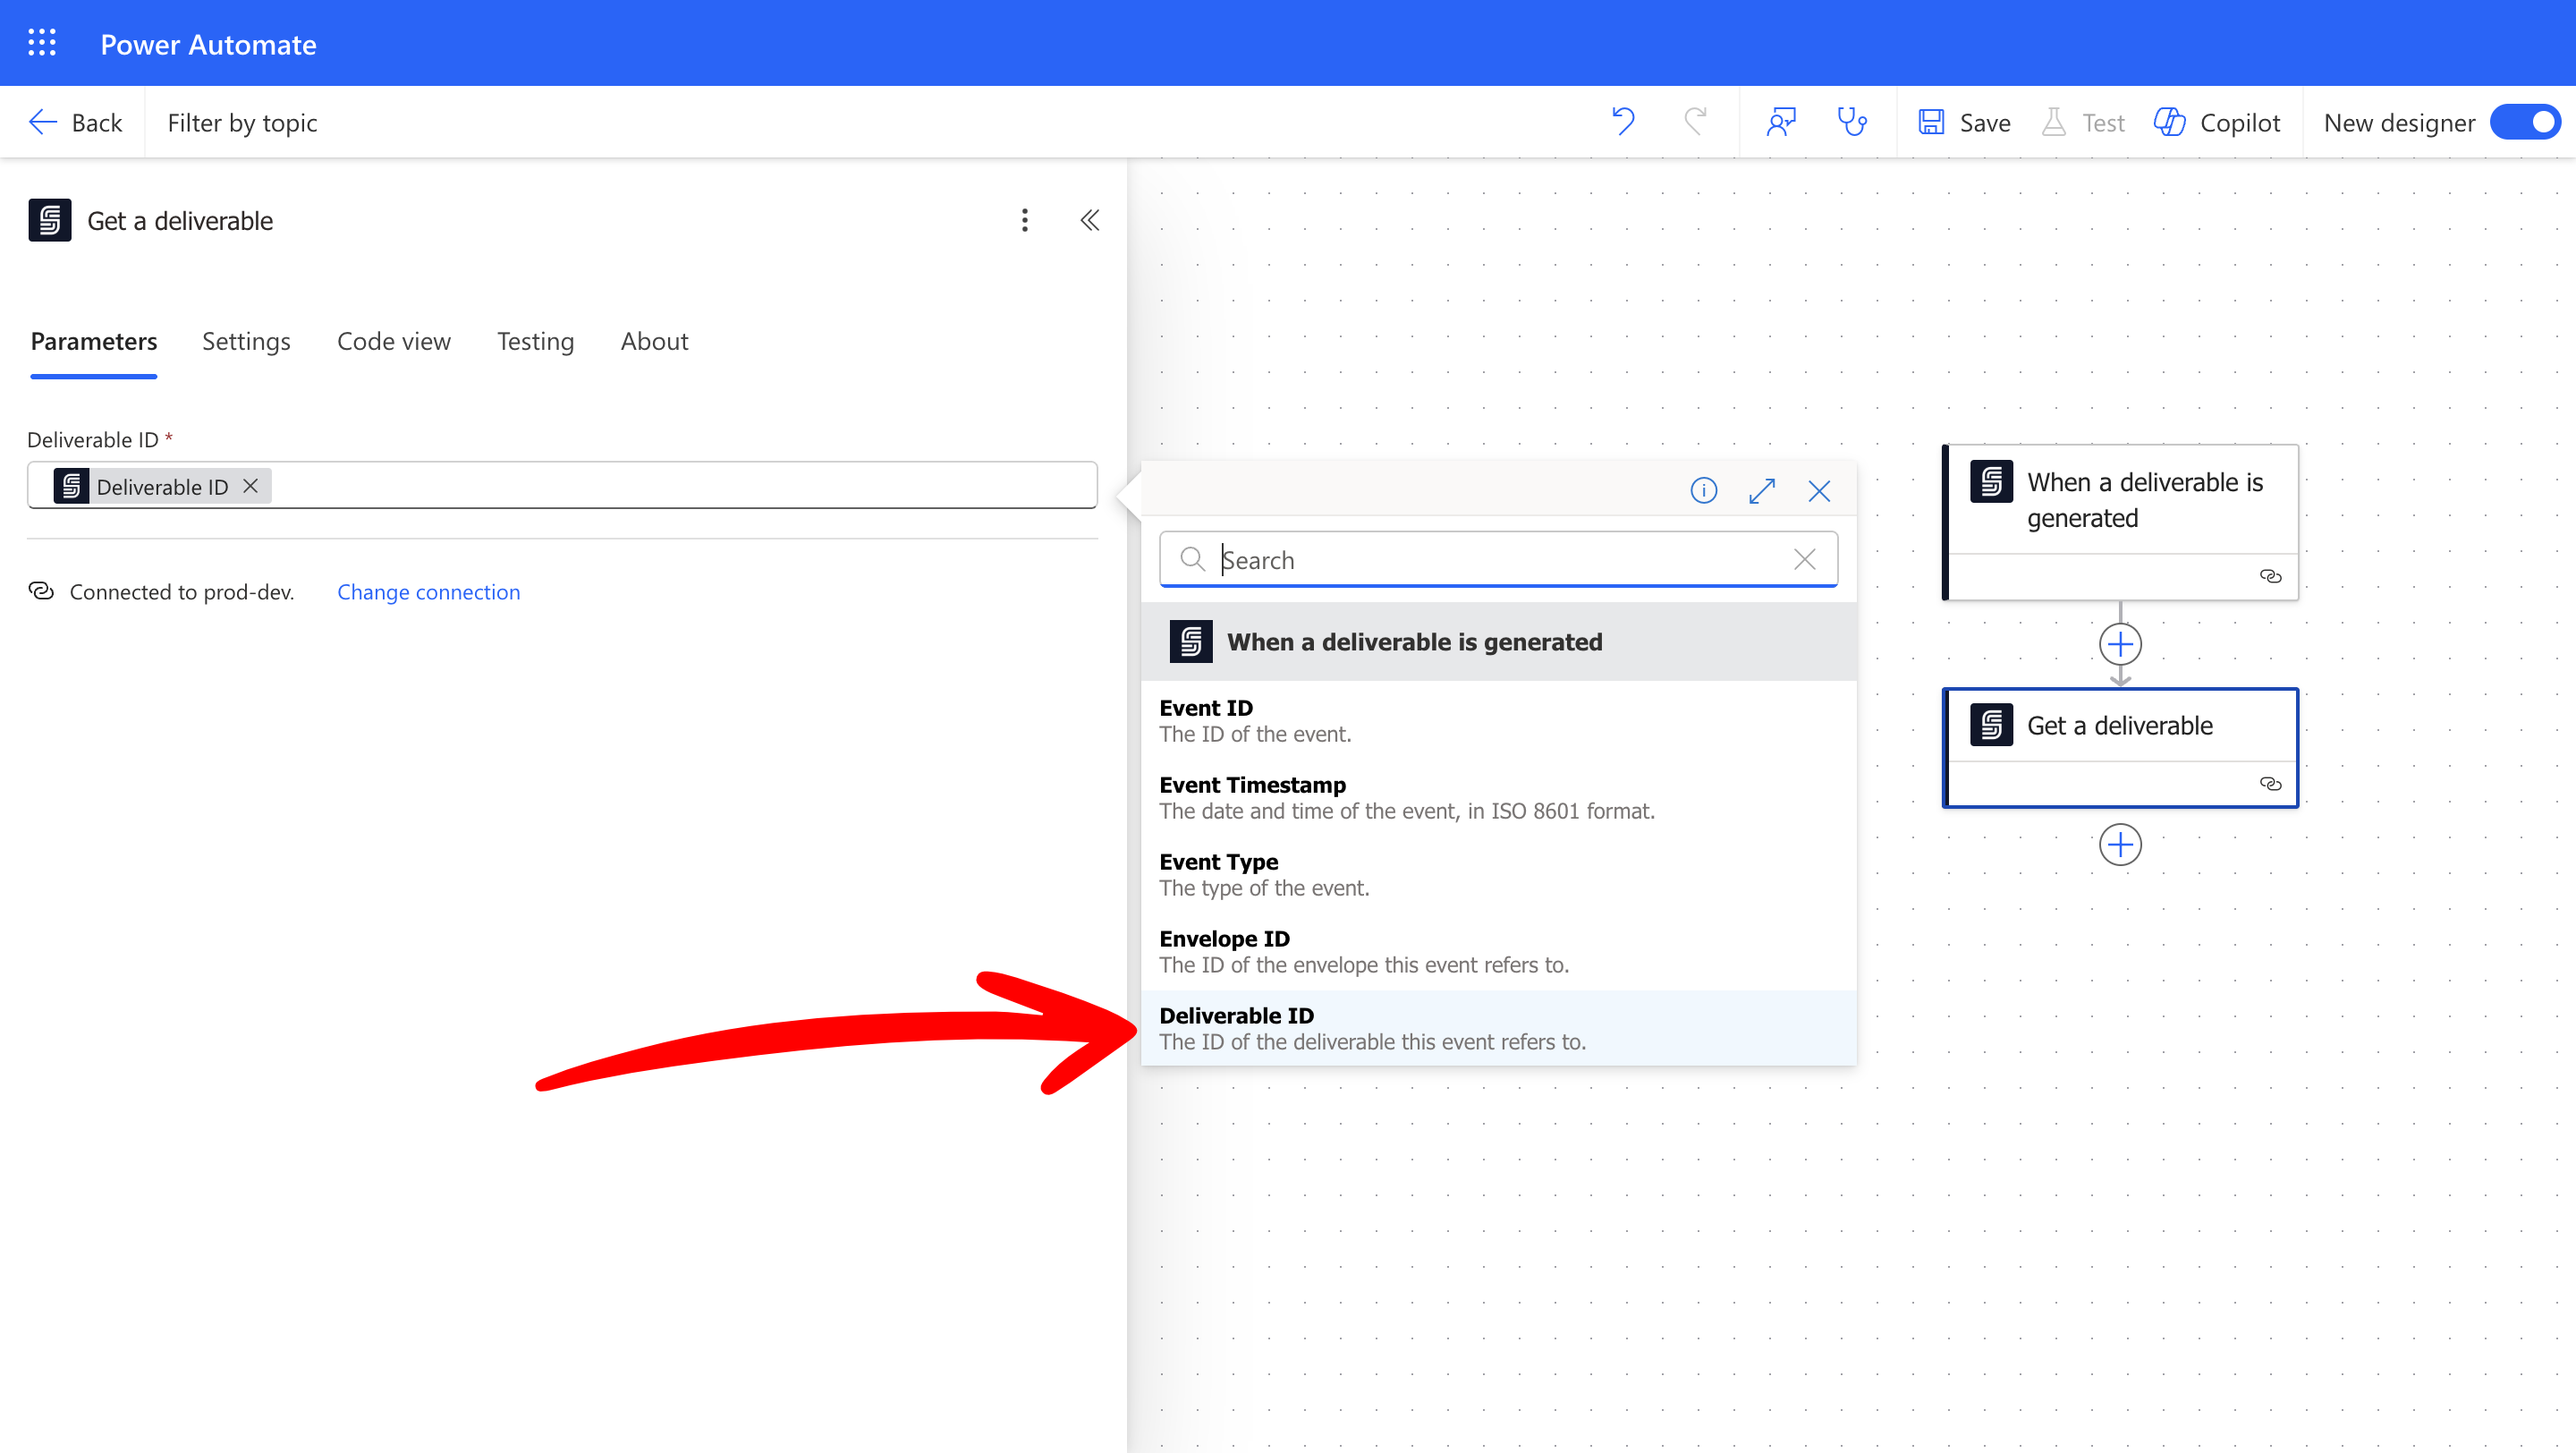
Once the trigger fires, you need to fetch the actual signed document so you can attach it to the notification email.- Add a new action and select Get a Deliverable from the SignatureAPI connector.
-
In the Deliverable ID field, use dynamic content to select the deliverable ID provided by the trigger.
This action downloads the signed PDF so it can be used in subsequent steps.
Step 3: Send the Email Notification
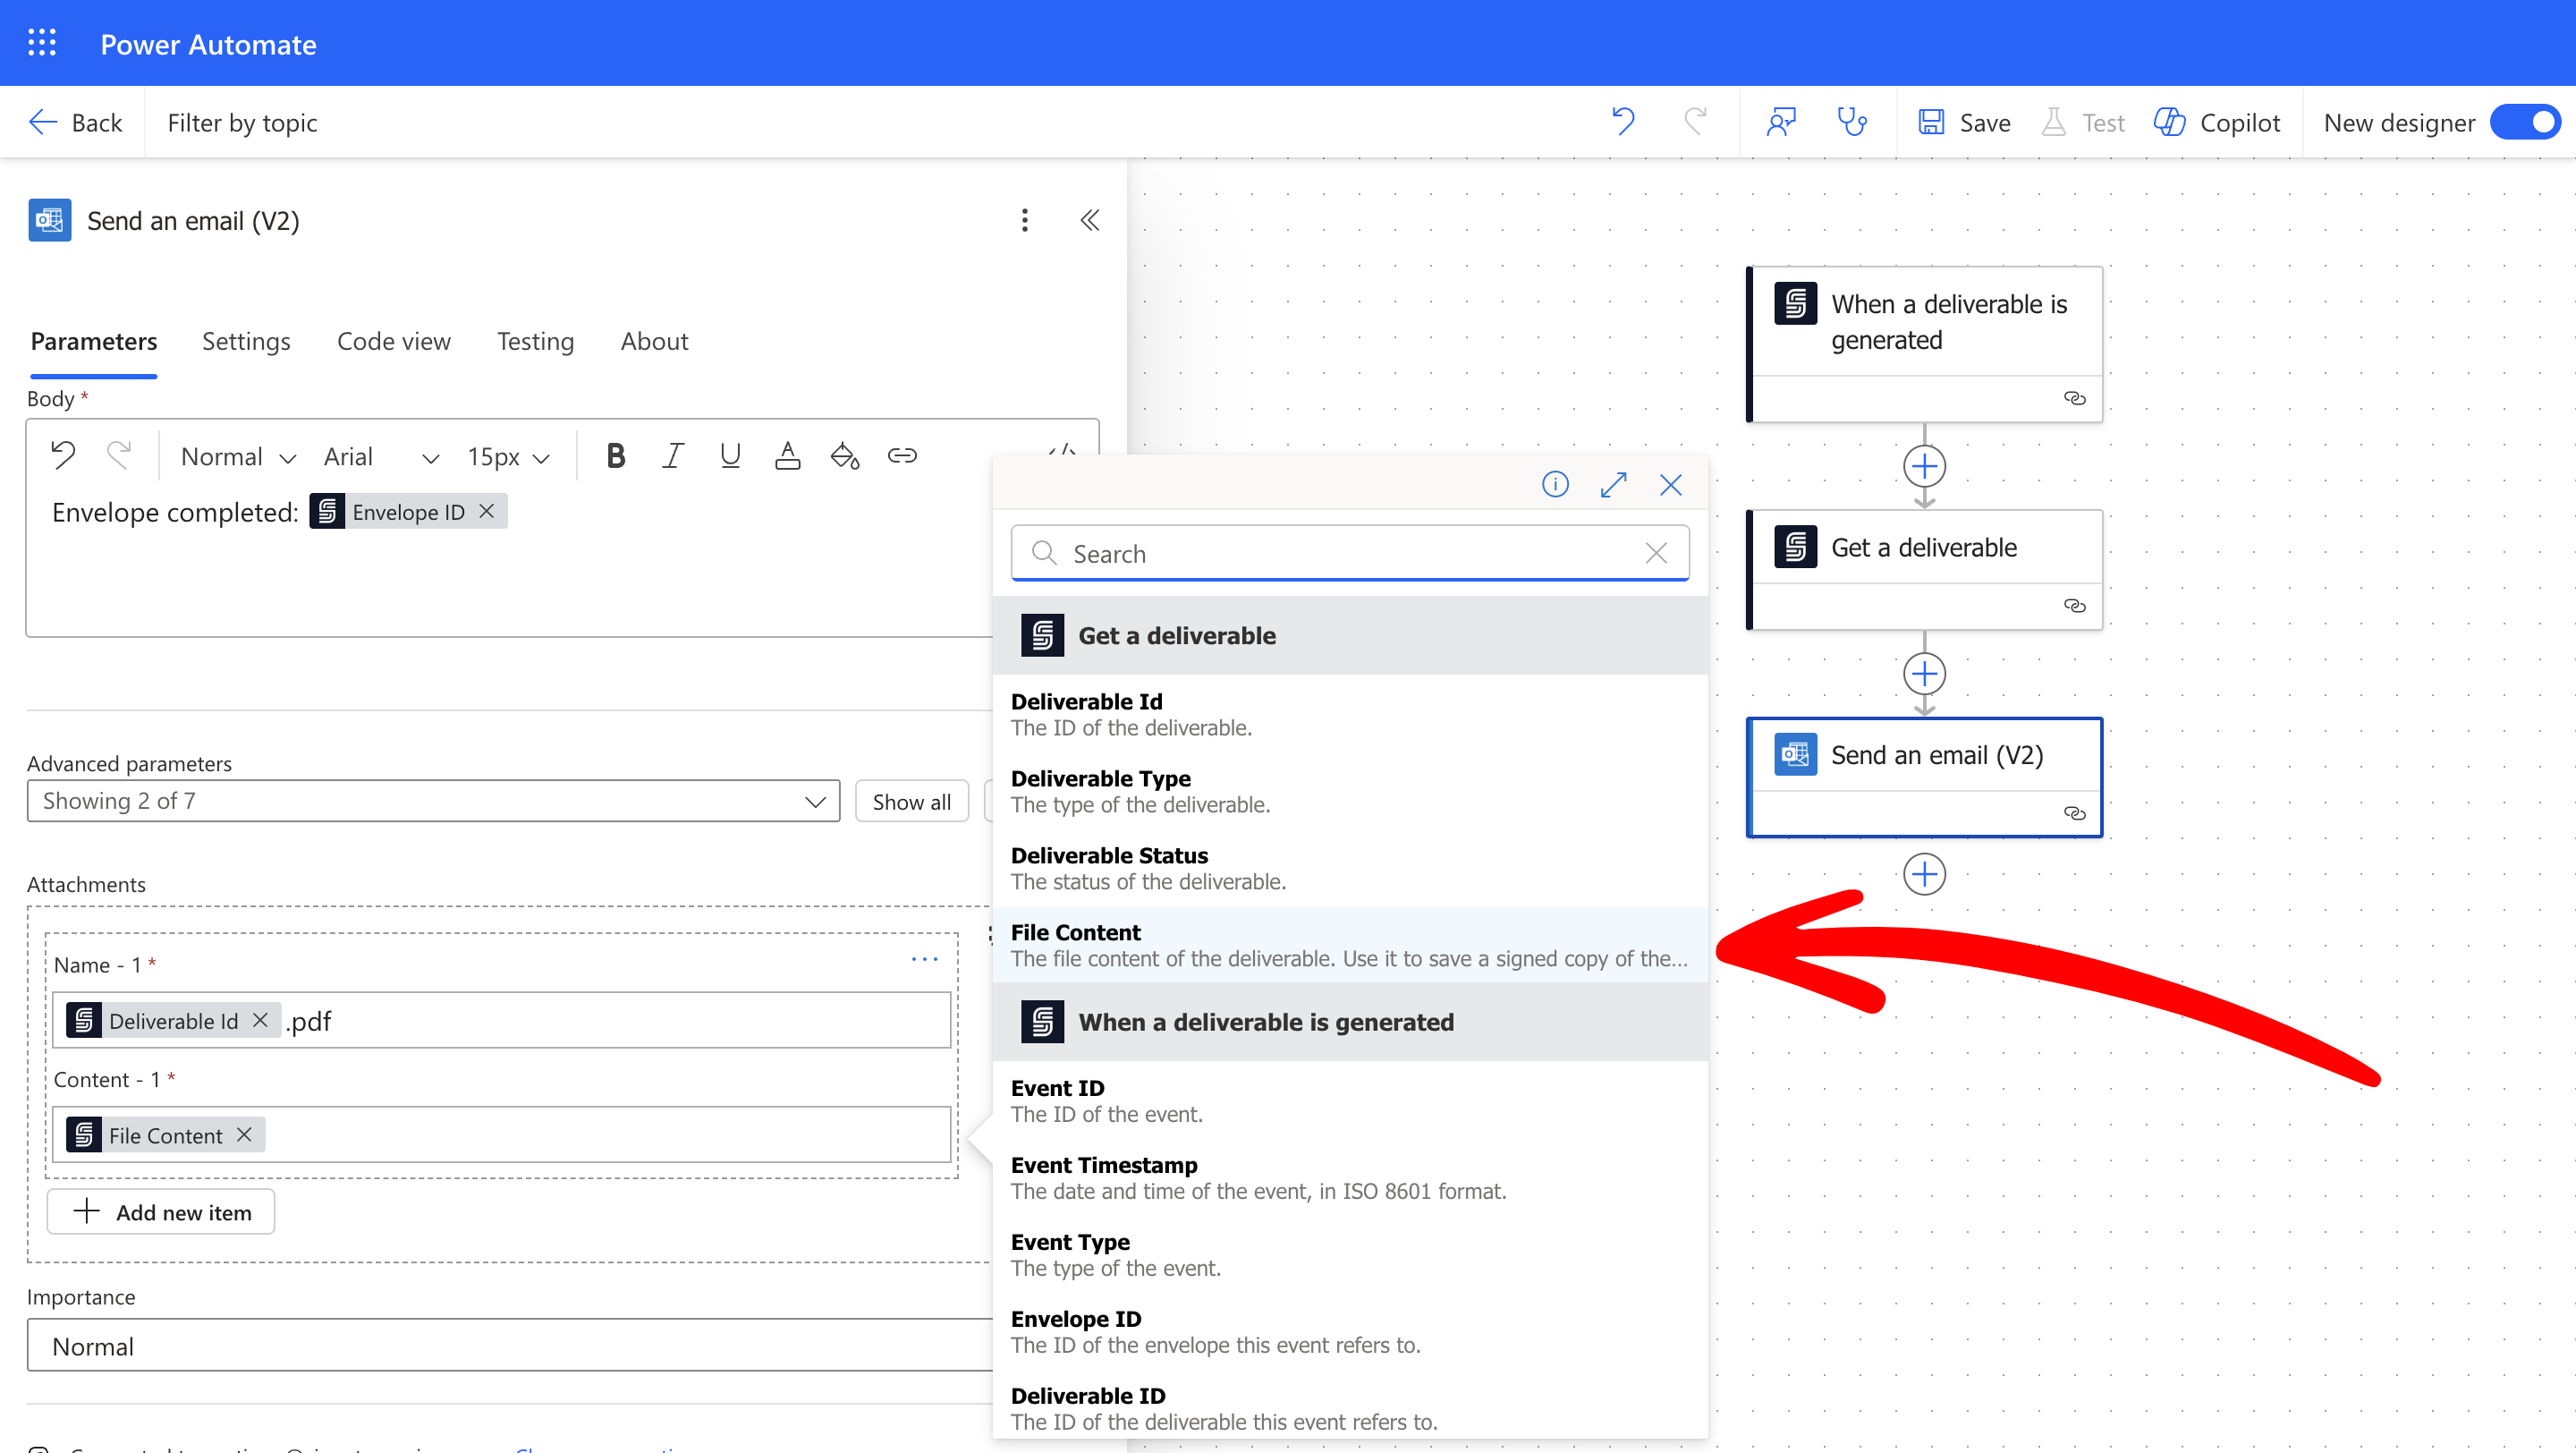
Now configure the email that will deliver the signed document to the target department.- Add the action Send an email (V2) from the Microsoft Outlook connector.
-
In the To field, enter the email address of the department or team that should receive the notification (for example,
sales-team@yourcompany.com). - Fill in the Subject and Body fields with a clear message indicating a signed document is ready for review.
-
In the Attachments section, use dynamic content to attach the file:
- Set Attachments Name to a descriptive filename ending in
.pdf(for example,signed-contract.pdf). - Set Attachments Content to the File Content value from the Get a Deliverable action.
- Set Attachments Name to a descriptive filename ending in
Step 4: Test Your Automation
With the flow saved, run an end-to-end test to confirm everything works correctly.- Save your Power Automate flow and make sure it is turned on.
- Using your envelope creation flow (or the SignatureAPI dashboard), create a new envelope with the topic
sales-department. - Complete the signing process for that envelope.
- Verify the following:
- The flow run appears in Power Automate’s run history with a Succeeded status.
- The target department receives an email with the signed PDF attached.
- Envelopes created without the
sales-departmenttopic do not trigger this flow.
- Flow run shows as Succeeded in Power Automate.
- Email notification arrives at the correct department inbox.
- The signed PDF is attached and can be opened.
- Envelopes with different (or no) topics do not trigger the flow.
Troubleshooting & FAQ
Common Issues:
- Flow does not trigger: Confirm that the topic on the envelope matches the topic in the trigger exactly, including case sensitivity. Also verify that the SignatureAPI connection in Power Automate is authenticated and active.
- API key or connection errors: Open the SignatureAPI connection in Power Automate and re-authenticate if needed. Make sure you are using a valid API key for the correct environment (test or live).
- Email not received: Check the recipient address for typos, review the Outlook connector’s run output for errors, and look in the recipient’s spam or junk folder.
Frequently Asked Questions:
- Can I filter by multiple topics in a single flow? Each trigger supports one topic value. If you need to route notifications for multiple topics into the same flow, create a trigger for each topic or use a condition action after the trigger to check the topic value.
-
How do I set up filtering for additional departments?
Duplicate this flow and change the topic in the trigger to match the new department’s topic (for example,
legal-departmentorhr-department). Then update the recipient email address accordingly. - Can I send notifications to Slack or Teams instead of email? Yes. Replace the Outlook Send an email action with a Slack or Microsoft Teams action. The rest of the flow (trigger, topic filter, and deliverable retrieval) remains the same.
Best Practices & Security
- Store your SignatureAPI API key securely using Power Automate’s connection management. Never hard-code keys directly in flow expressions.
- Monitor your flow runs regularly in Power Automate to catch failures early, especially after making changes to envelope topics or connector settings.
- Document each department’s topic value and corresponding flow in a shared location so your team can onboard new departments or update routing without confusion.