Documentation Index
Fetch the complete documentation index at: https://signatureapi-daf4ee54.mintlify.app/llms.txt
Use this file to discover all available pages before exploring further.
Overview
This tutorial shows you how to streamline customer agreement signing by automatically sending, signing, and storing agreements. By integrating Power Apps (for data collection), SharePoint Documents (for storing contract templates), and the SignatureAPI connector (for electronic signatures), you can eliminate manual errors and delays in your customer agreements workflow.What You’ll Learn
- How to trigger a flow from a Power Apps form submission.
- Retrieving and pre-filling a DOCX contract template from SharePoint.
- Creating and sending a signature envelope using SignatureAPI.
- Monitoring the signing process and retrieving the signed document.
- Saving the signed contract and automatically notifying the business.
The Problem
Businesses often struggle with manually handling customer agreements, causing delays in customer onboarding. Common issues include:- Slow processing caused by manual, repetitive tasks.
- Errors from manual data entry and document handling.
- Tracking difficulty when monitoring signing status across multiple agreements.
How Automation Helps
Automation simplifies this process by:- Automatically sending agreements when a Power Apps form is submitted.
- Using templates pre-filled with customer details.
- Tracking signature status and storing documents automatically.
- Instantly informing the business once agreements are signed.
Requirements
Before starting, make sure you have:- Power Automate for building workflows.
- SignatureAPI account for electronic signatures.
- Power Apps for collecting customer information.
- SharePoint Documents for storing your DOCX templates.
- Outlook for sending notifications (other email providers also work).
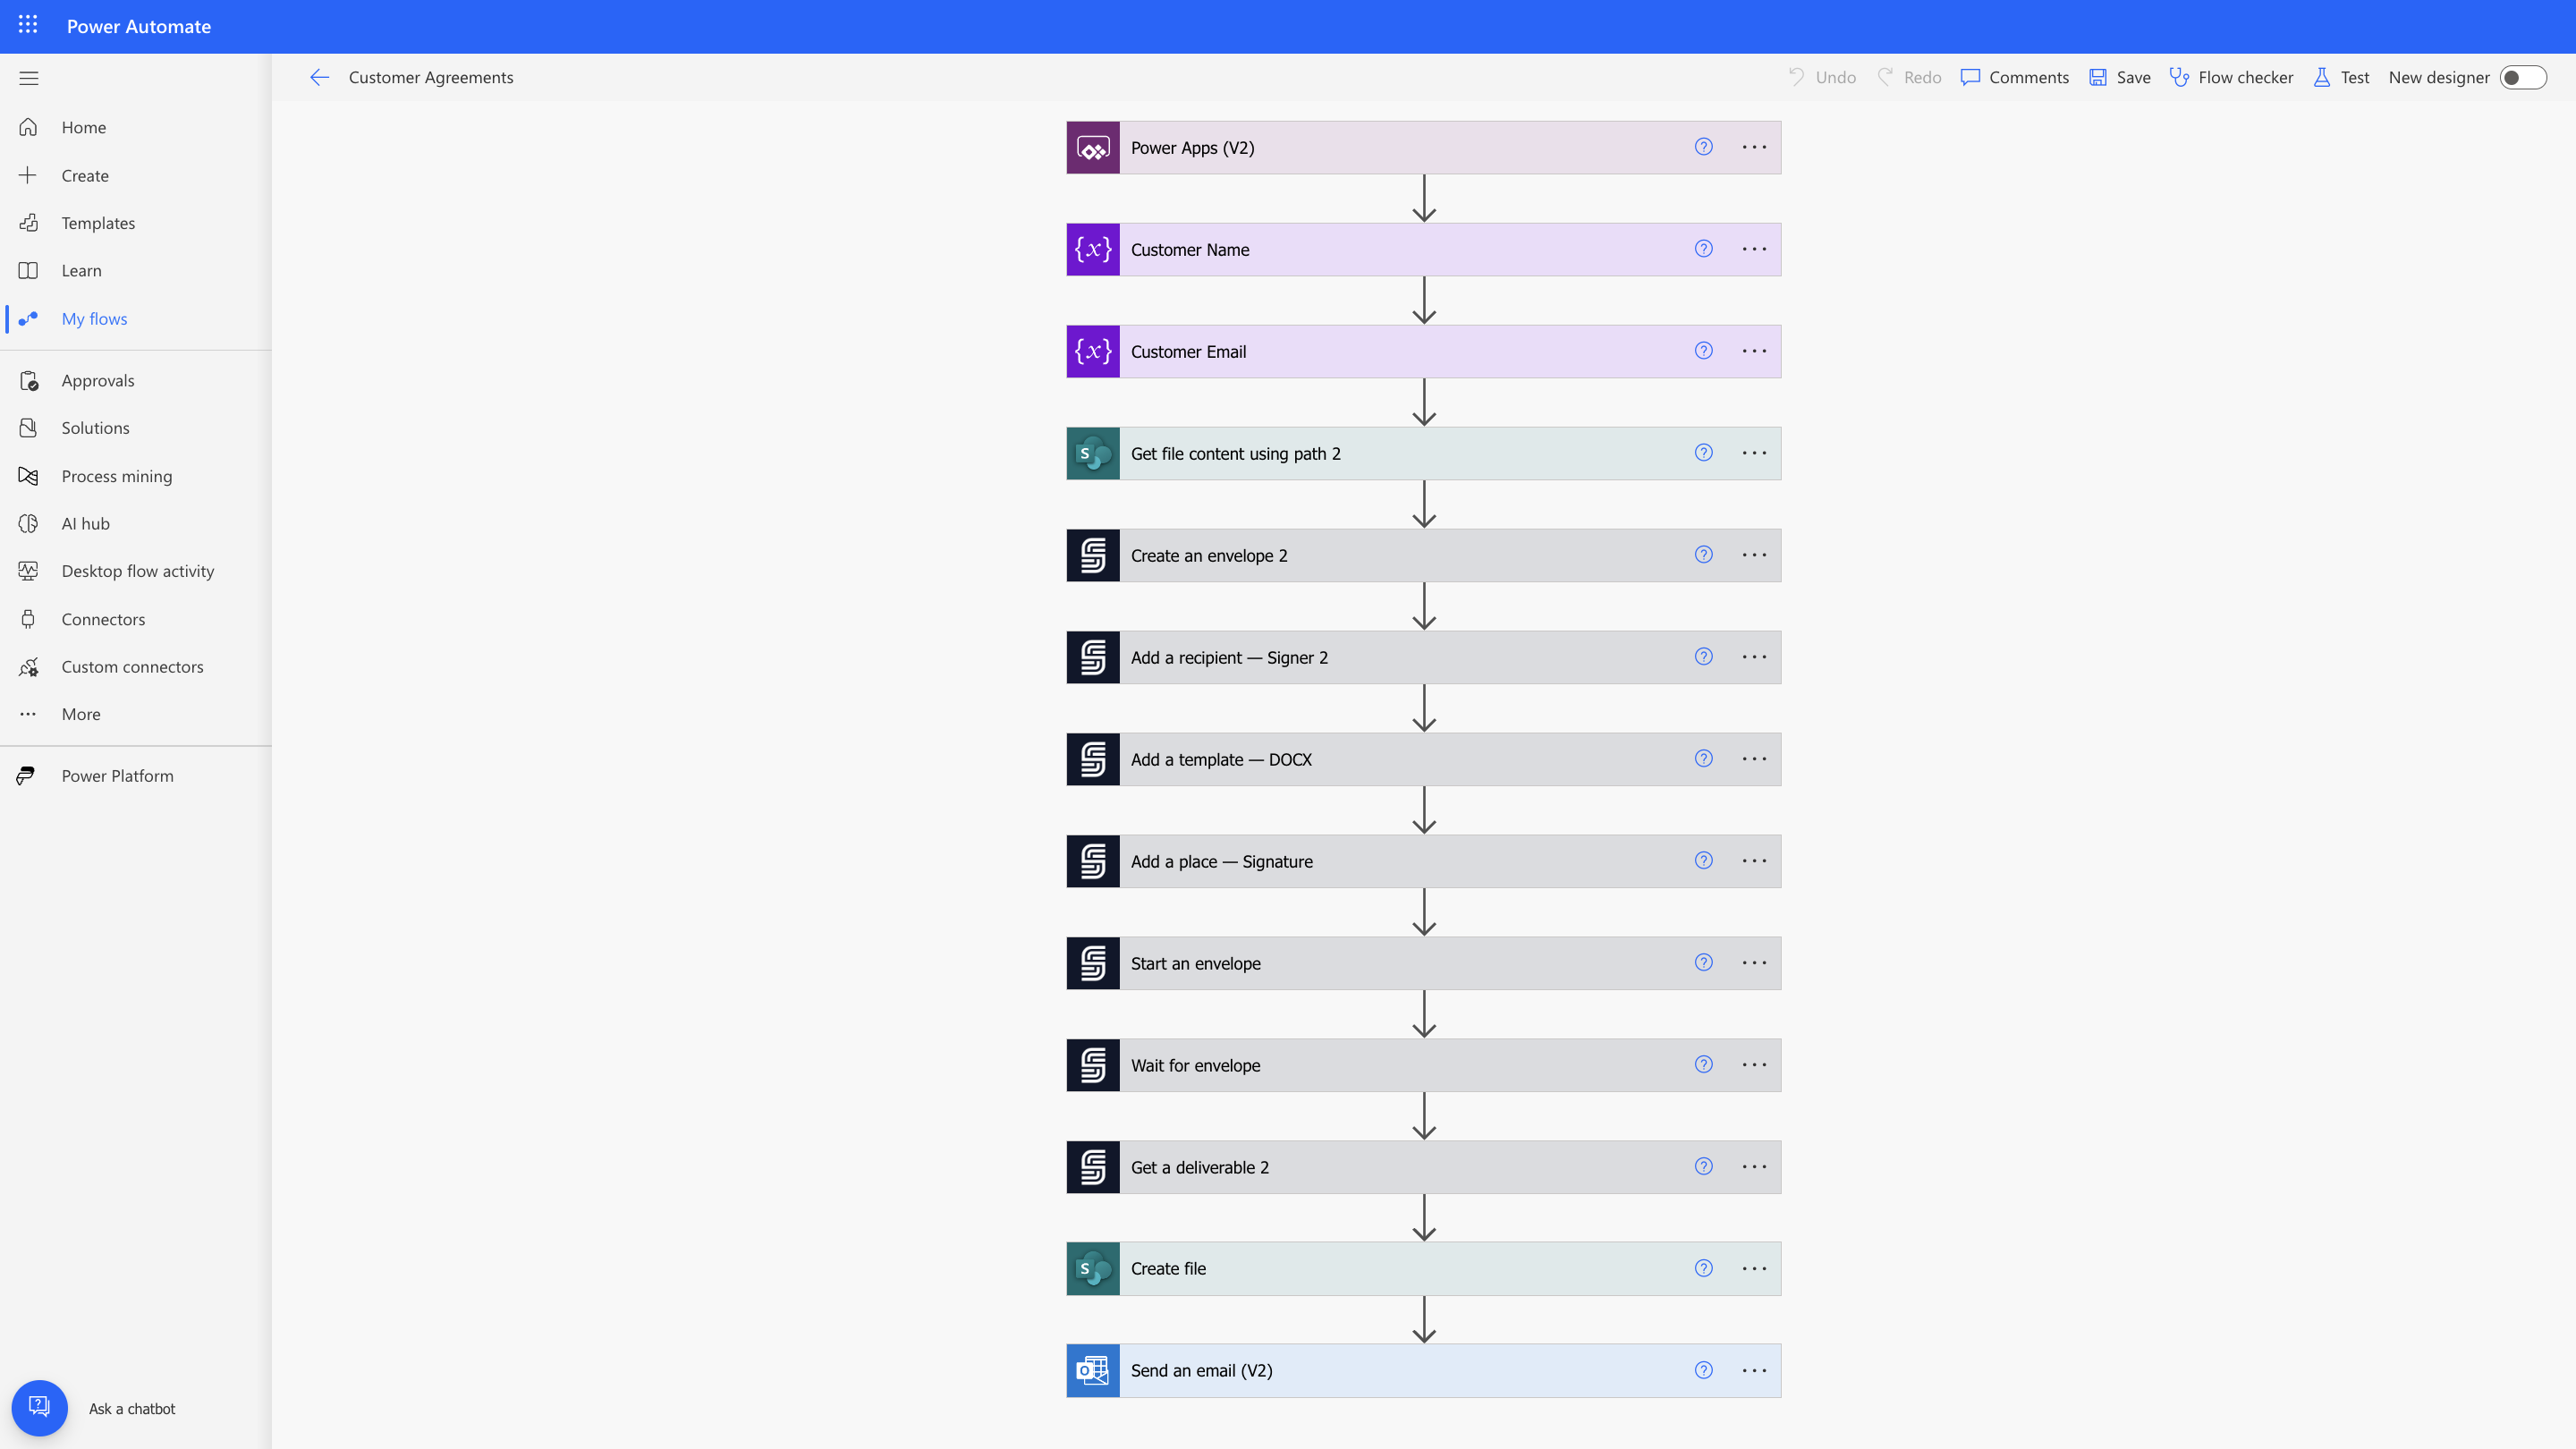
Flow Overview
The automation process follows these steps:- Trigger: A Power Apps form submission starts the flow.
- Data Retrieval: Get customer details and fetch the agreement template from SharePoint Documents.
- Signature Process: Create an envelope via SignatureAPI, add recipient details, and attach the DOCX template.
- Monitoring: Wait for the agreement to be signed.
- Storage and Notification: Save the signed document in SharePoint and notify the business via email.
Step-by-Step Tutorial
Follow these steps to automate your customer agreements signing process using Power Apps, SignatureAPI, and Microsoft Power Automate.Step 1: Prepare the Agreement Template
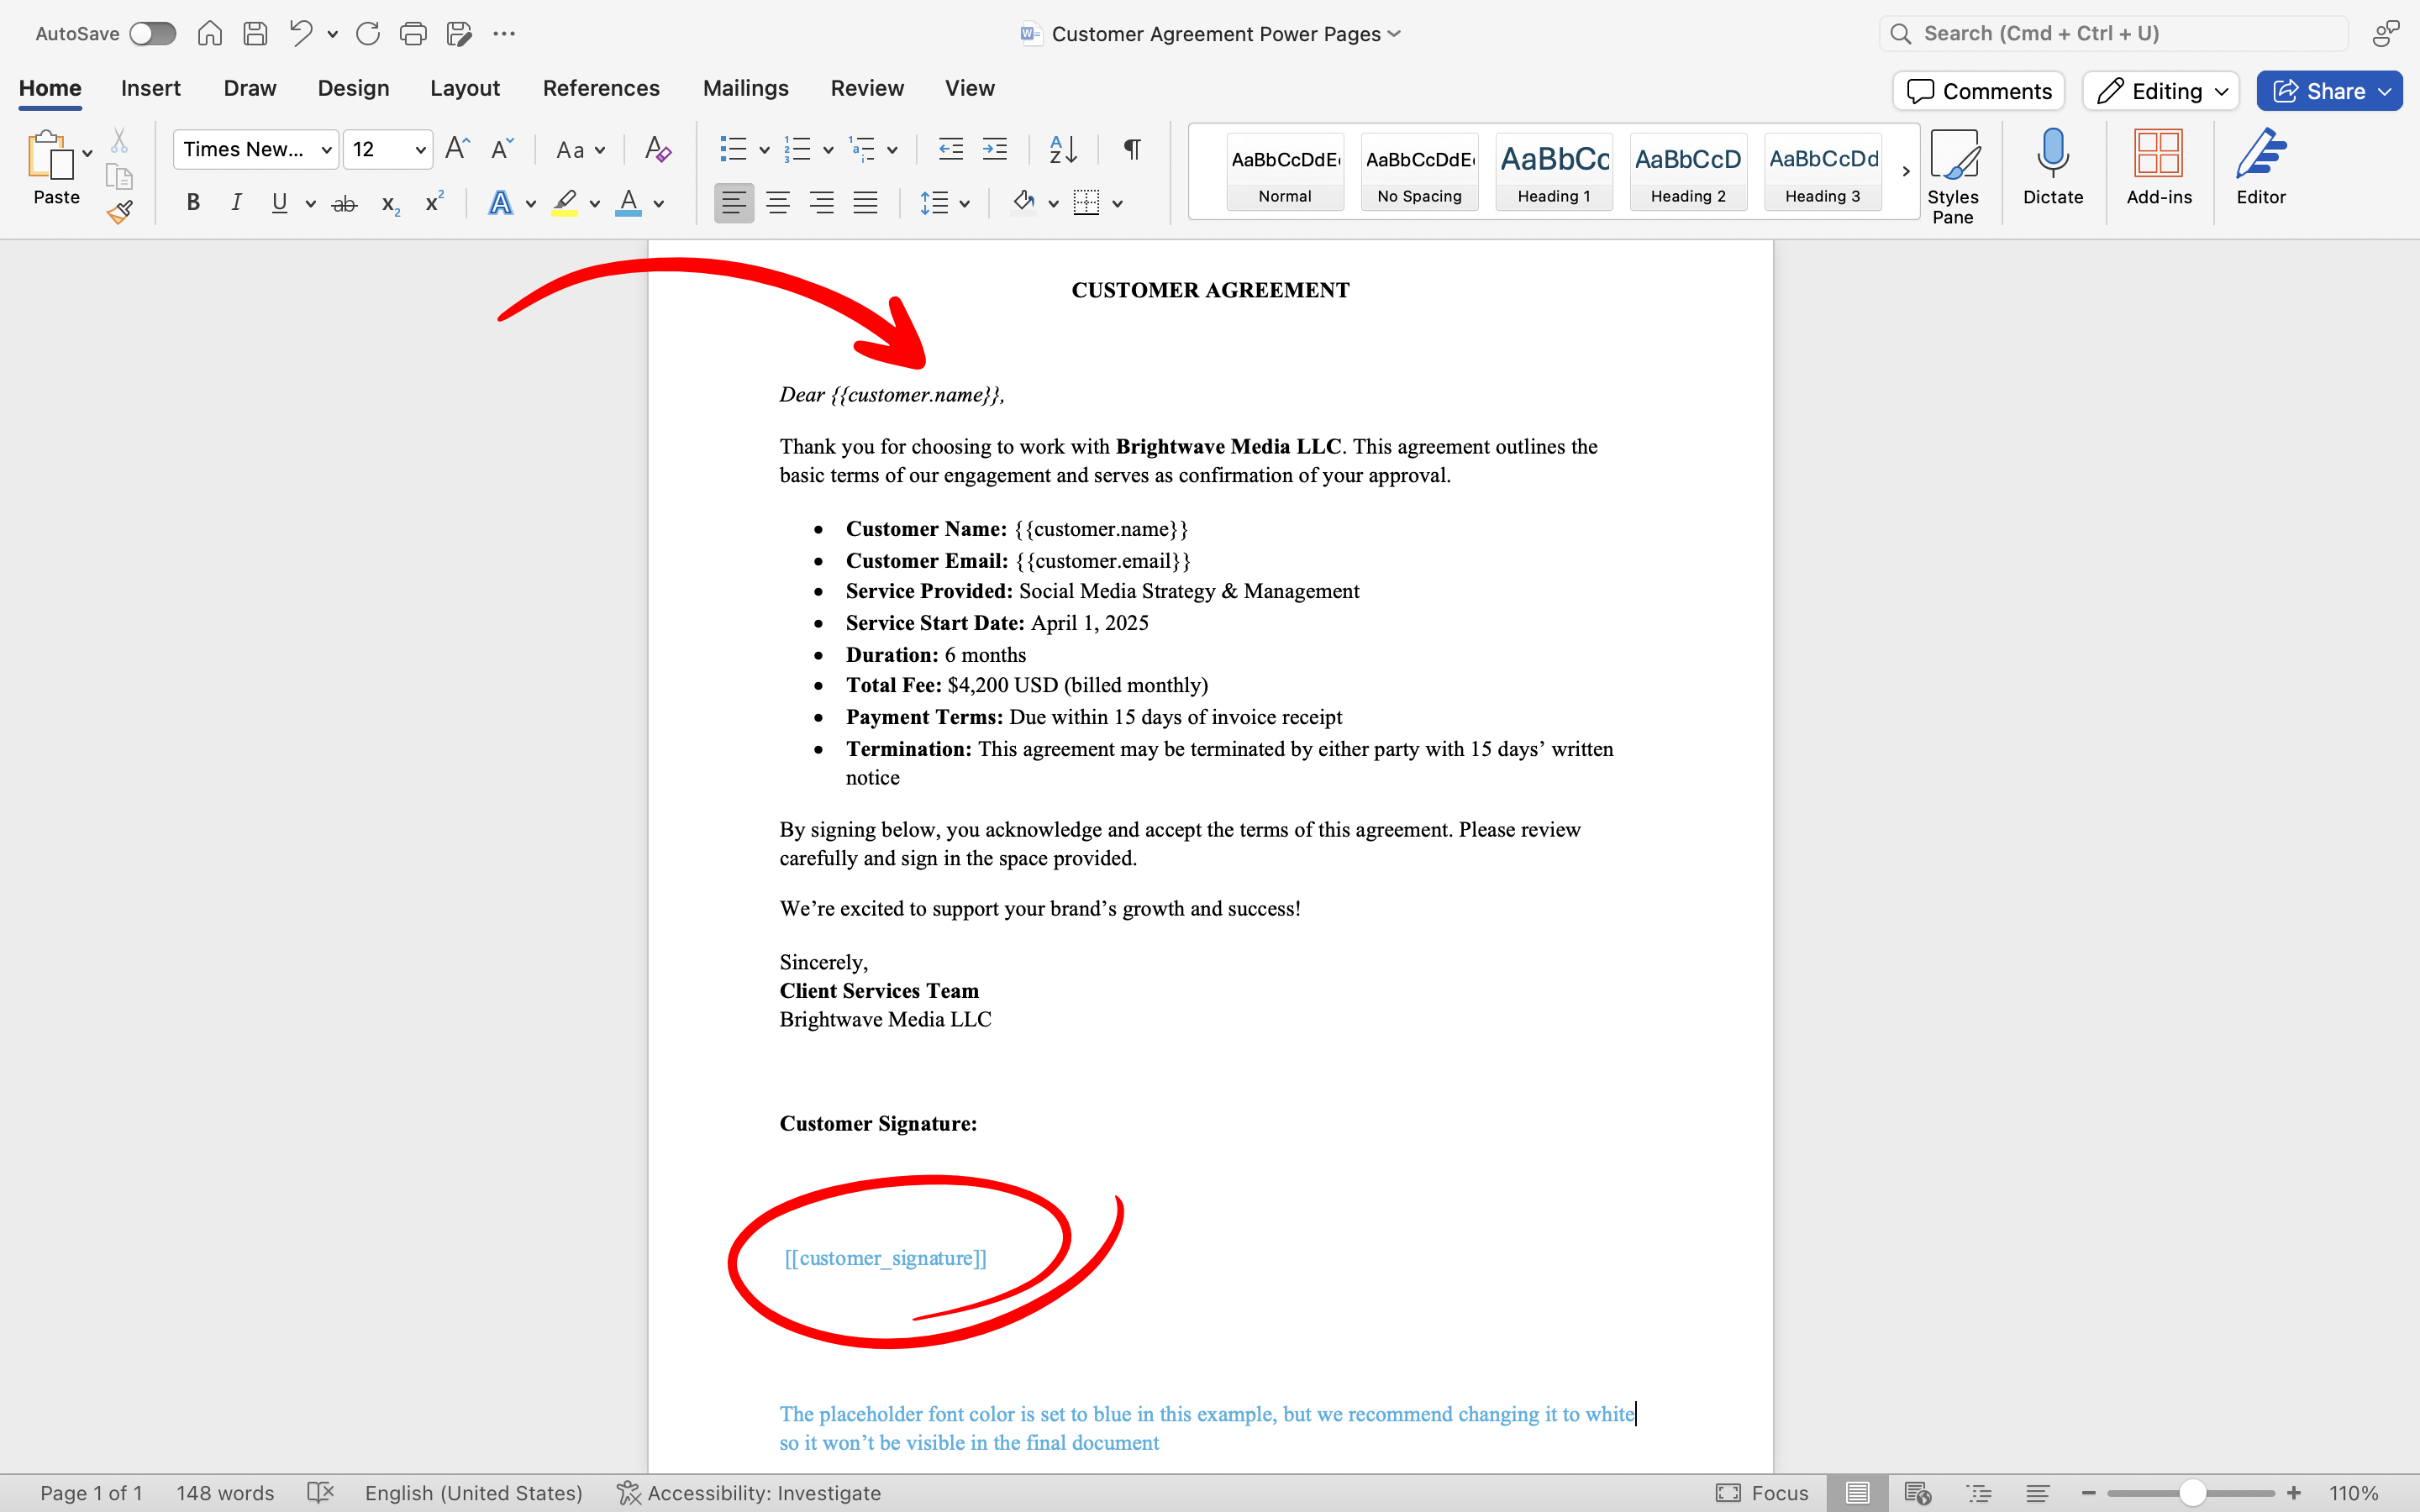
First, create or update your agreement template by adding placeholders for dynamic fields (customer details) and defining where the customer will sign. To prepare your template:- Open your existing customer agreement document (DOCX format) in Microsoft Word.
- Identify each place where customer details should be dynamically inserted (e.g., name, email).
- Insert placeholders using double curly brackets around descriptive keys. Examples:
- Customer name:
{{customer.name}} - Customer email:
{{customer.email}}
- Define the location for the signature clearly by inserting a signature placeholder using double square brackets, e.g.:
[[customer_signature]]
Dear{{customer.name}}, Please review and sign your agreement below:[[customer_signature]]
- Save your template and upload it to Documents in the SharePoint Site.
- Ensure placeholder keys match exactly with what you will use later in Power Automate.
- Keep your template simple and clear to avoid confusion during dynamic insertion.
Step 2: Create a Power App and Initialize Variables
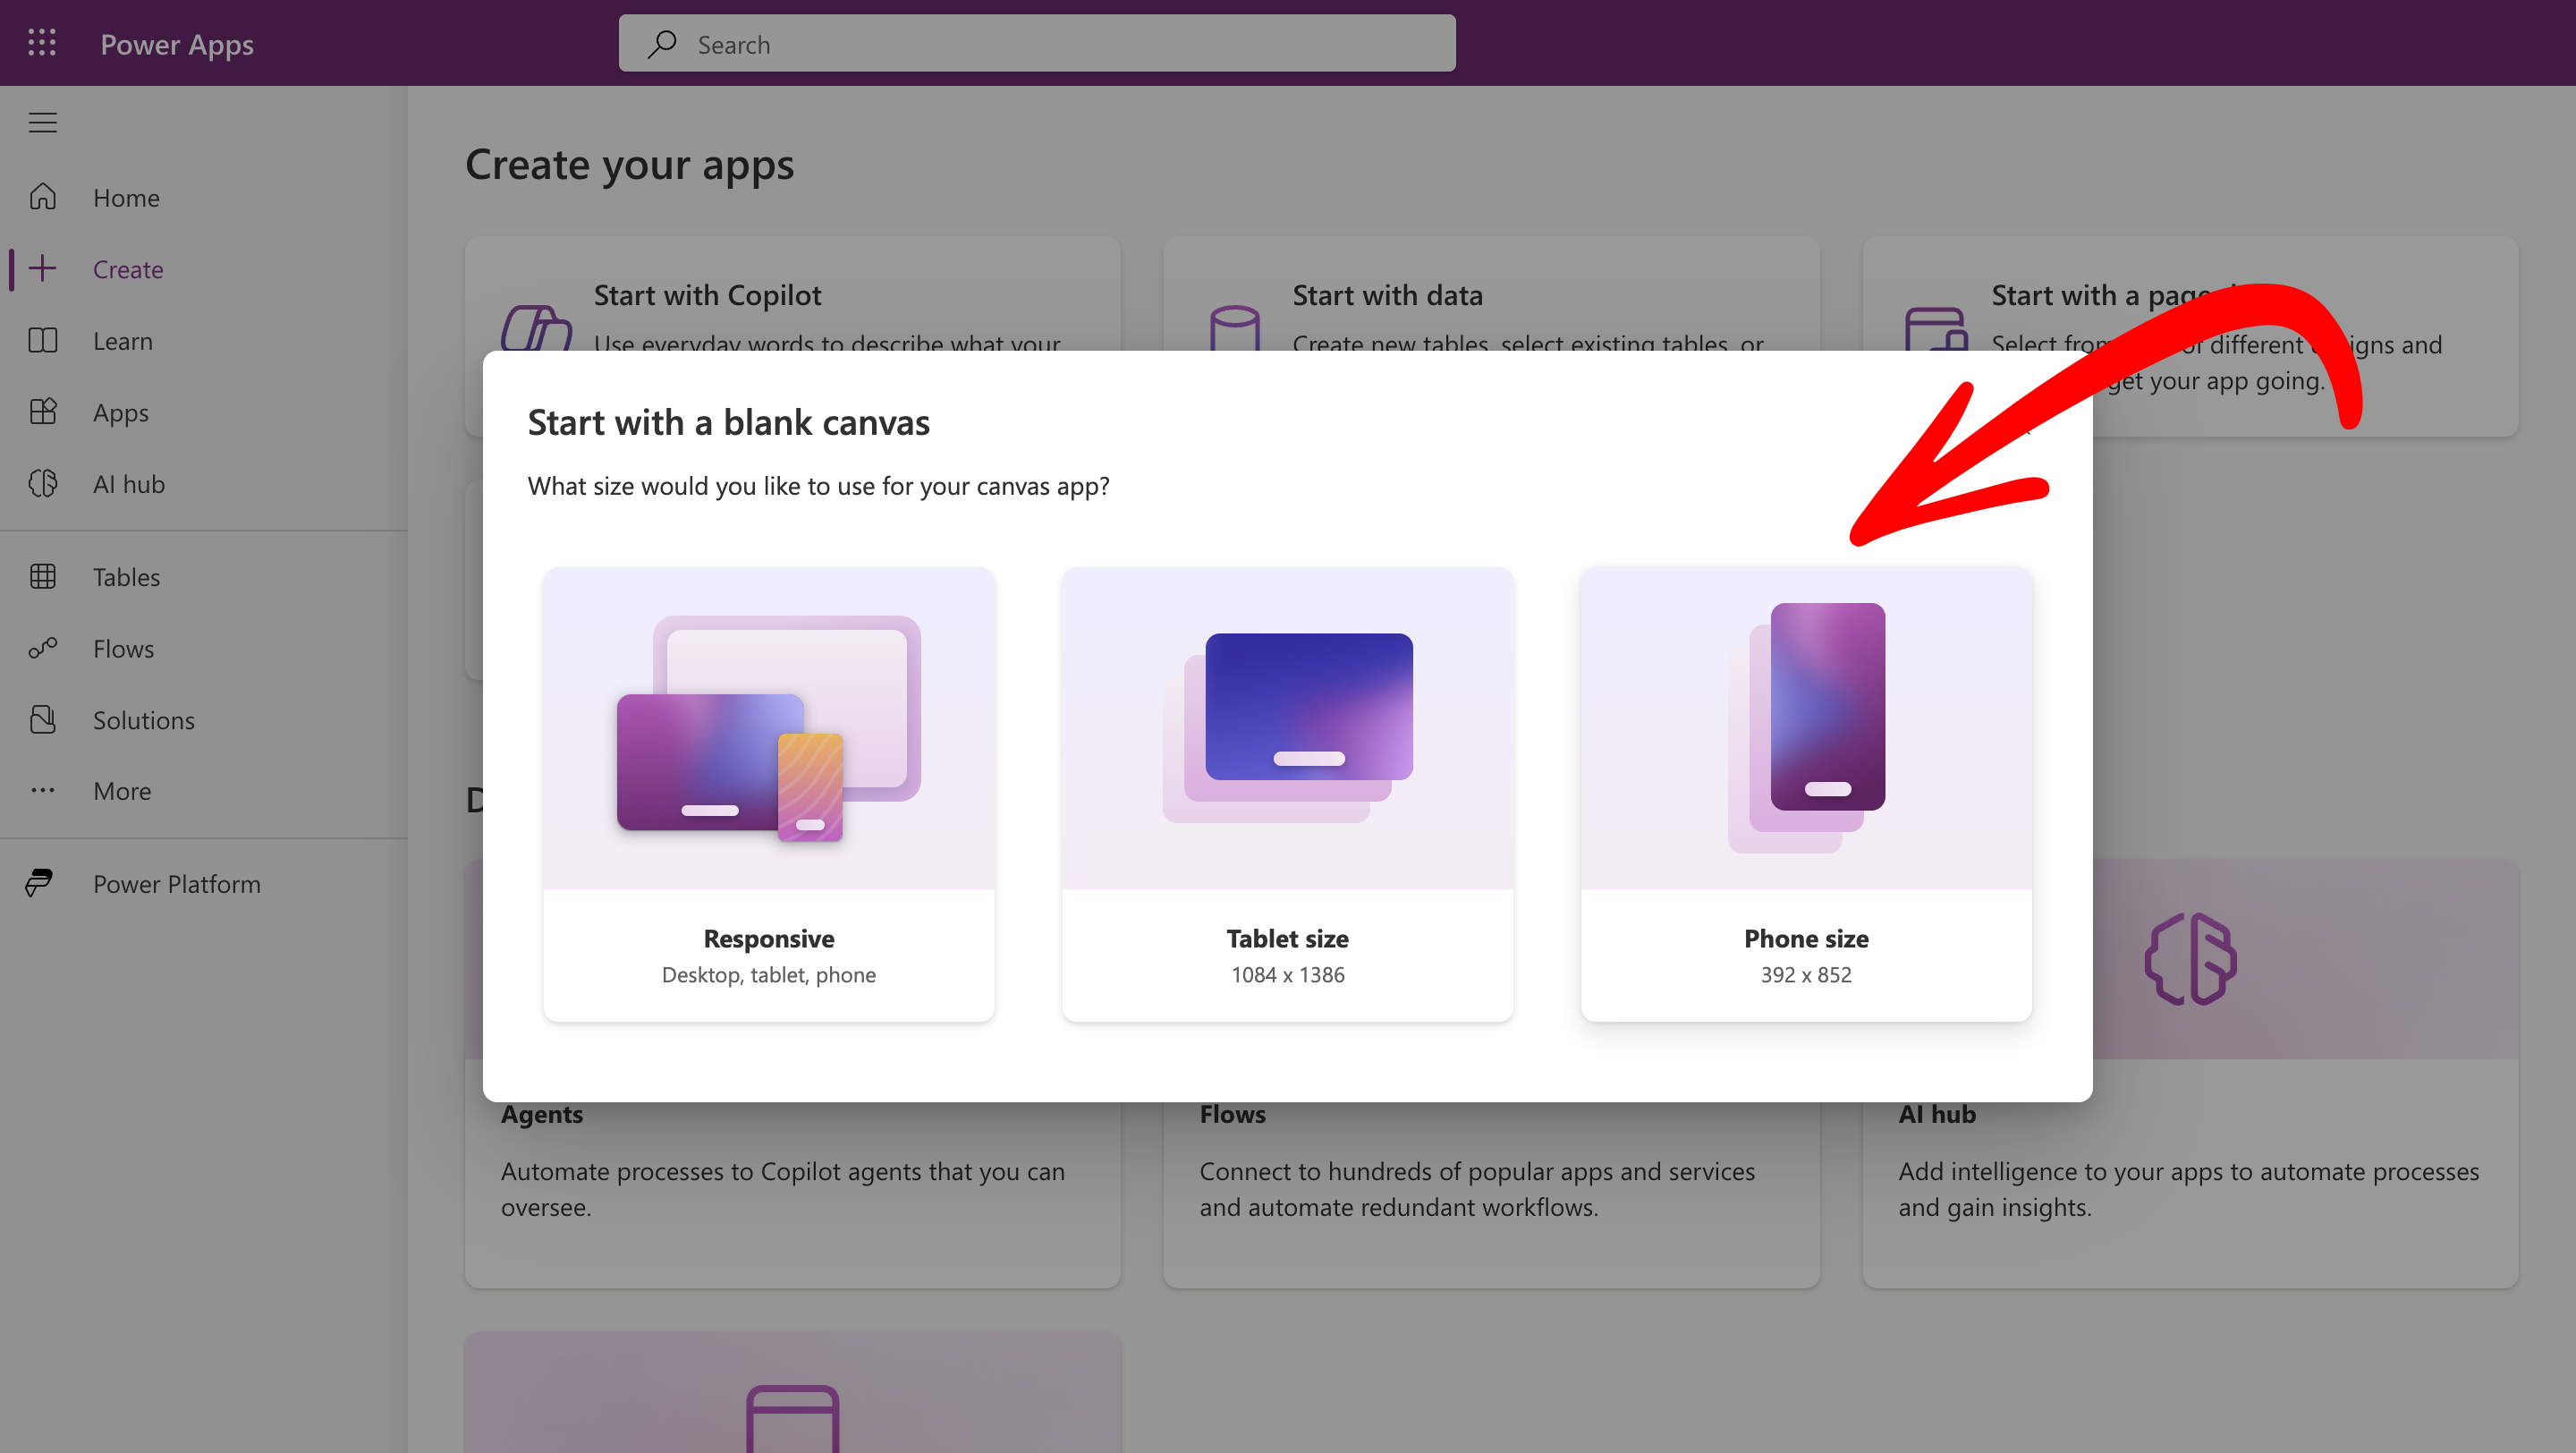
First, create a Power App to collect the necessary customer details (Name, Email Address).- Visit Power Apps and sign in.
-
Create a new Blank Canvas App and choose the format type. For this example, choose the Phone format.
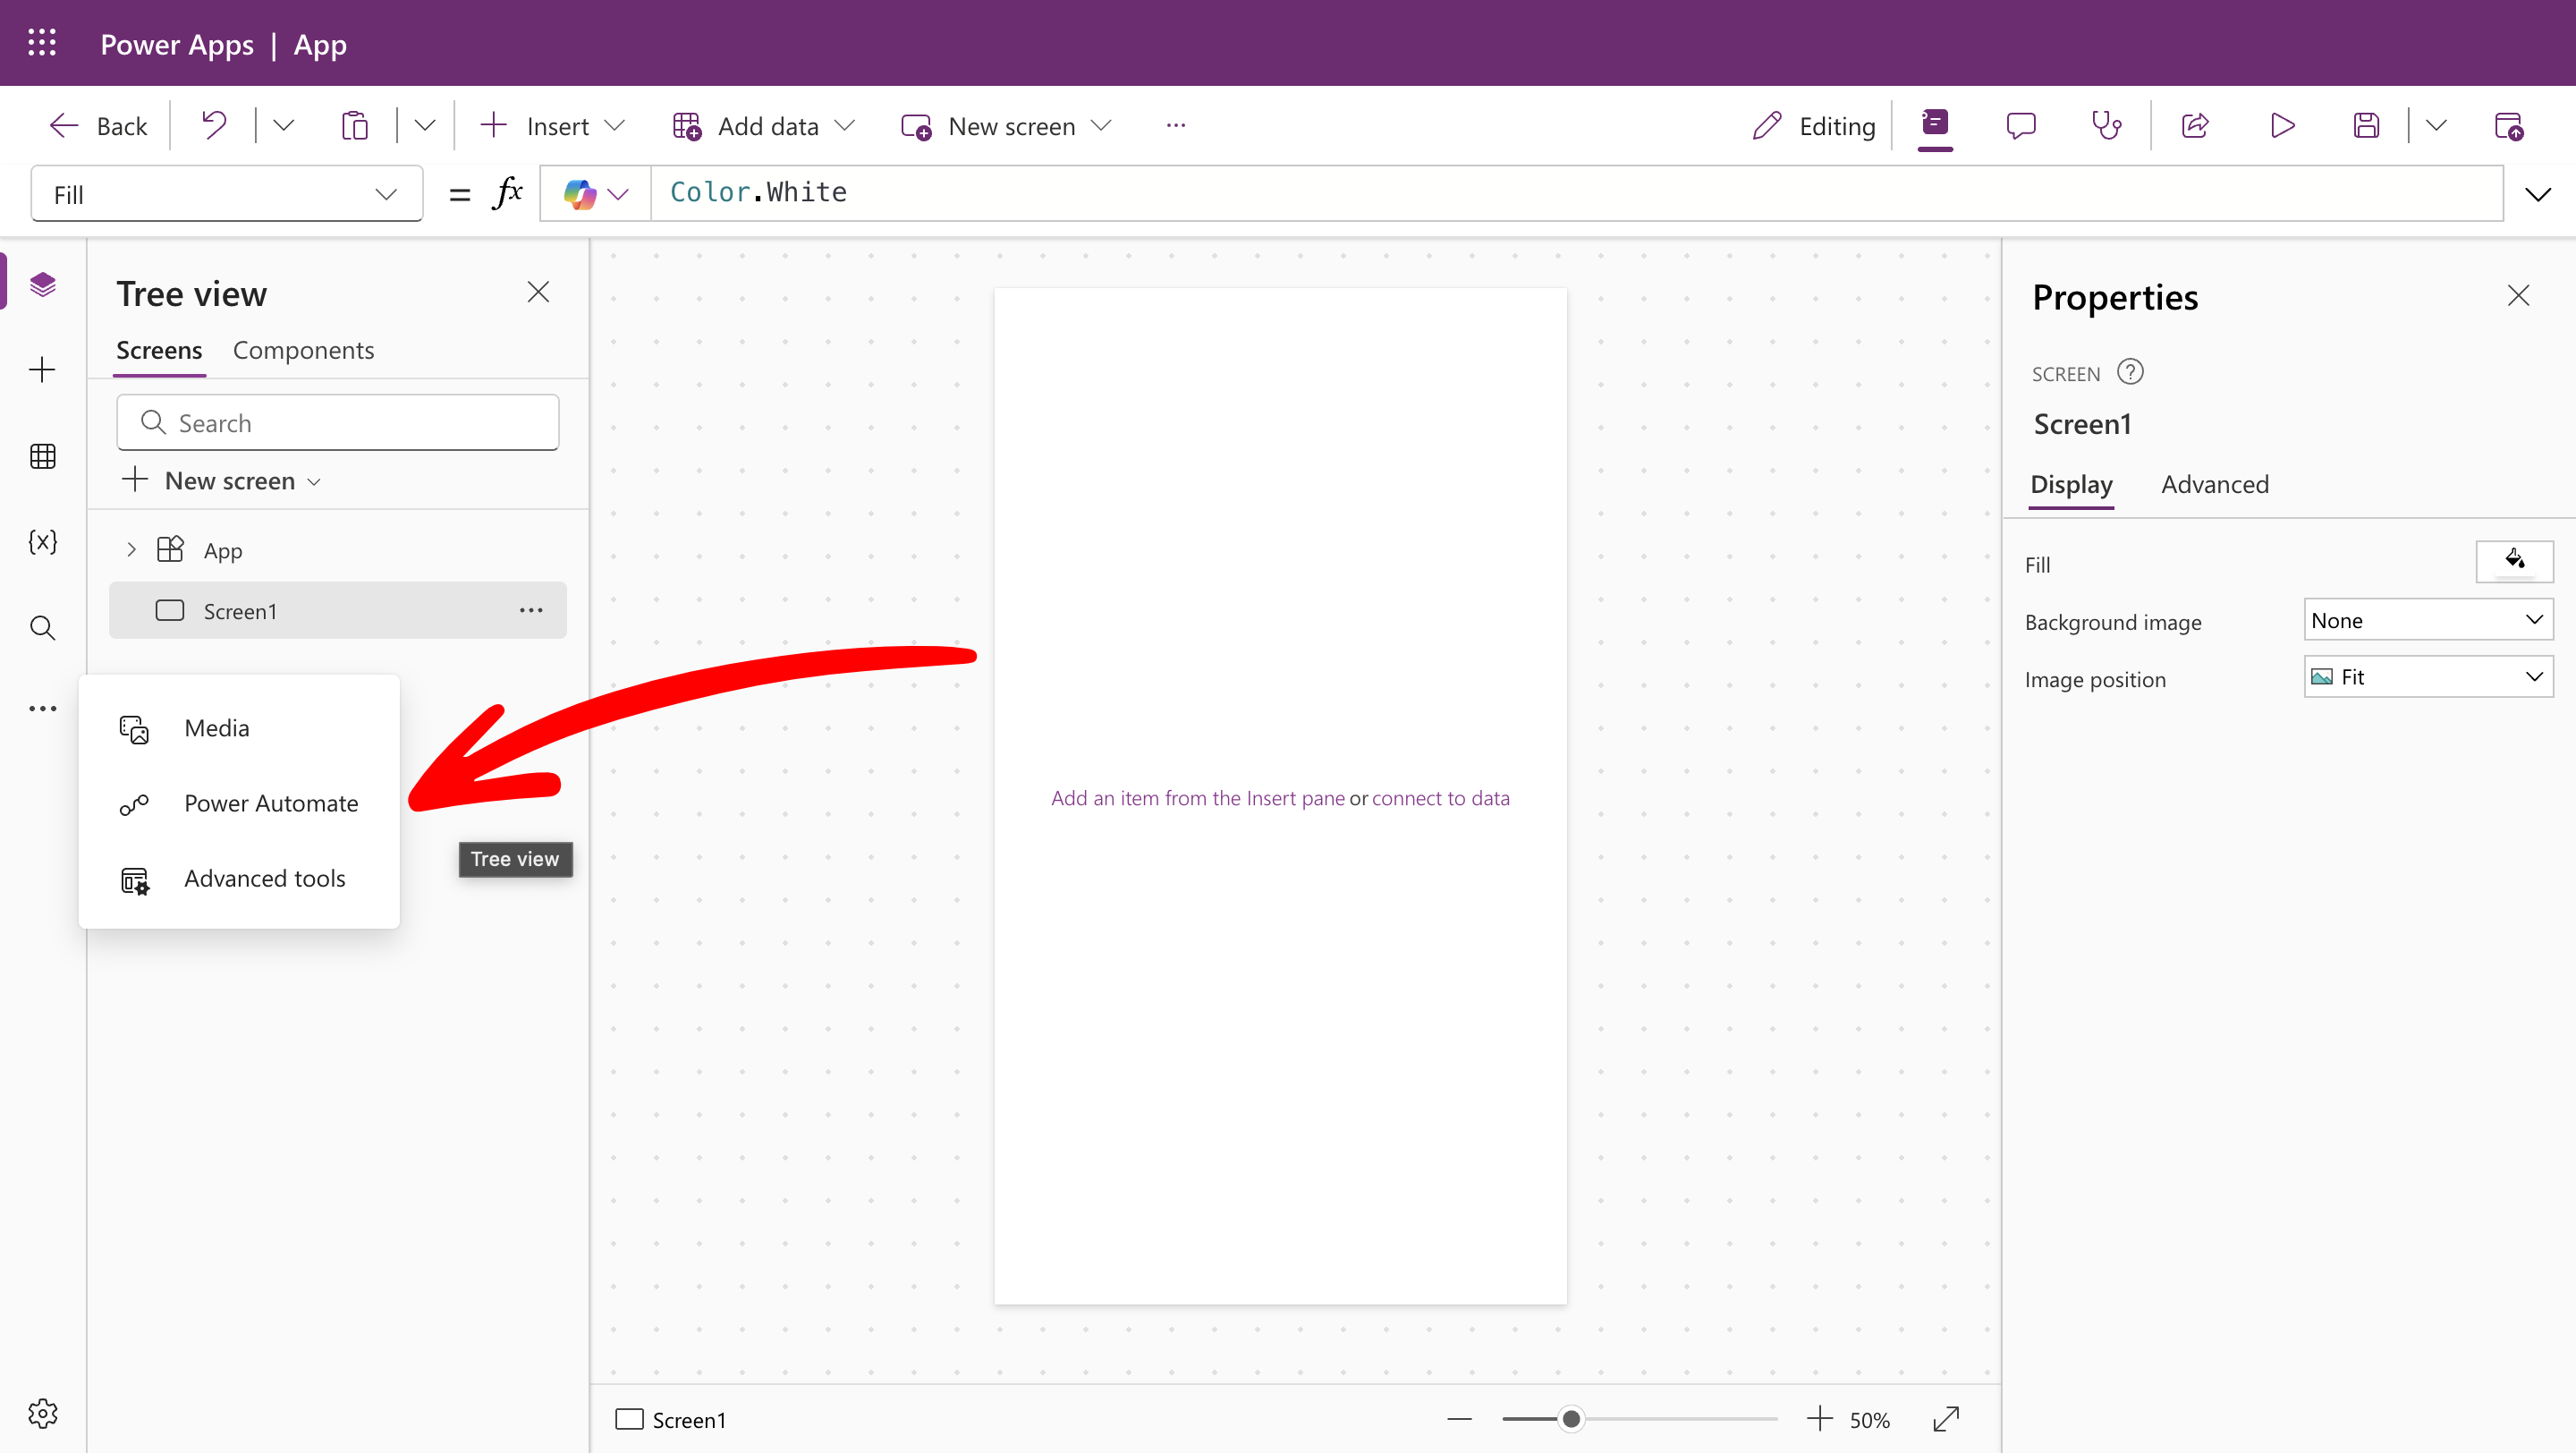
-
From the left-hand menu bar, click on the three dots, select Power Automate, and select Create New Flow.
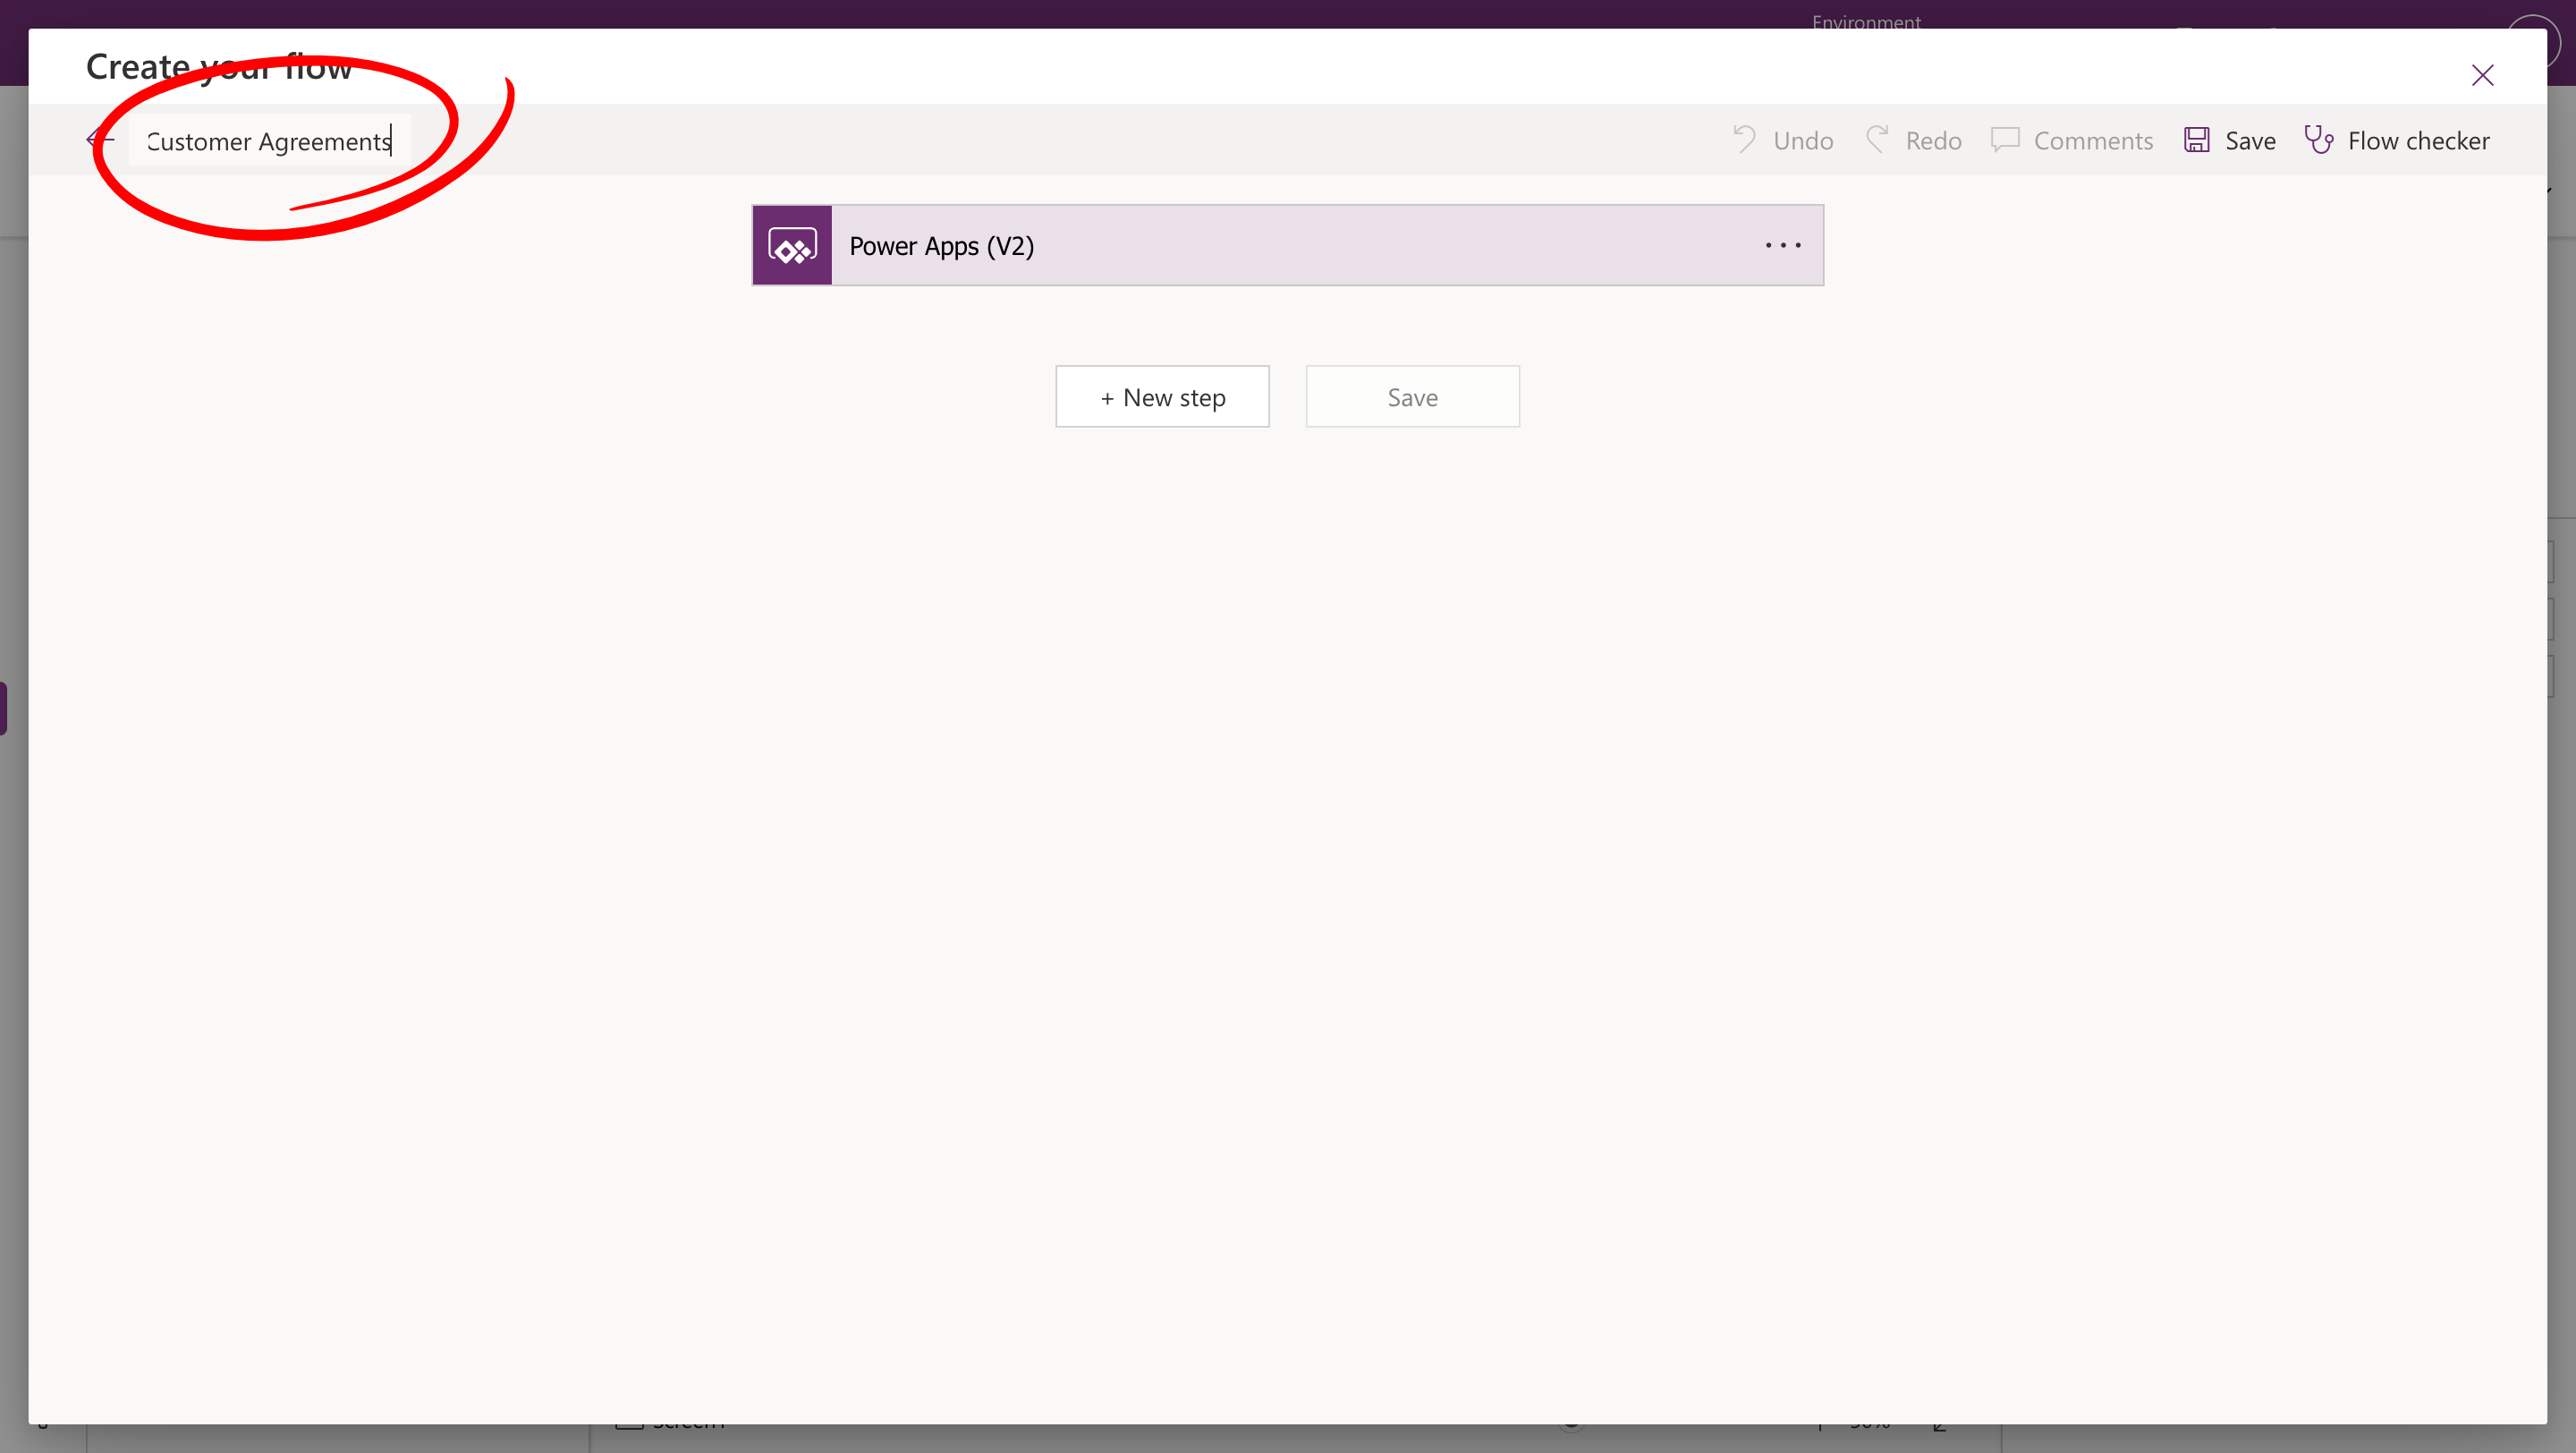
- Select Create From Blank.
-
Enter a name for the Flow. Notice that Power Apps has automatically been selected to trigger the Flow.
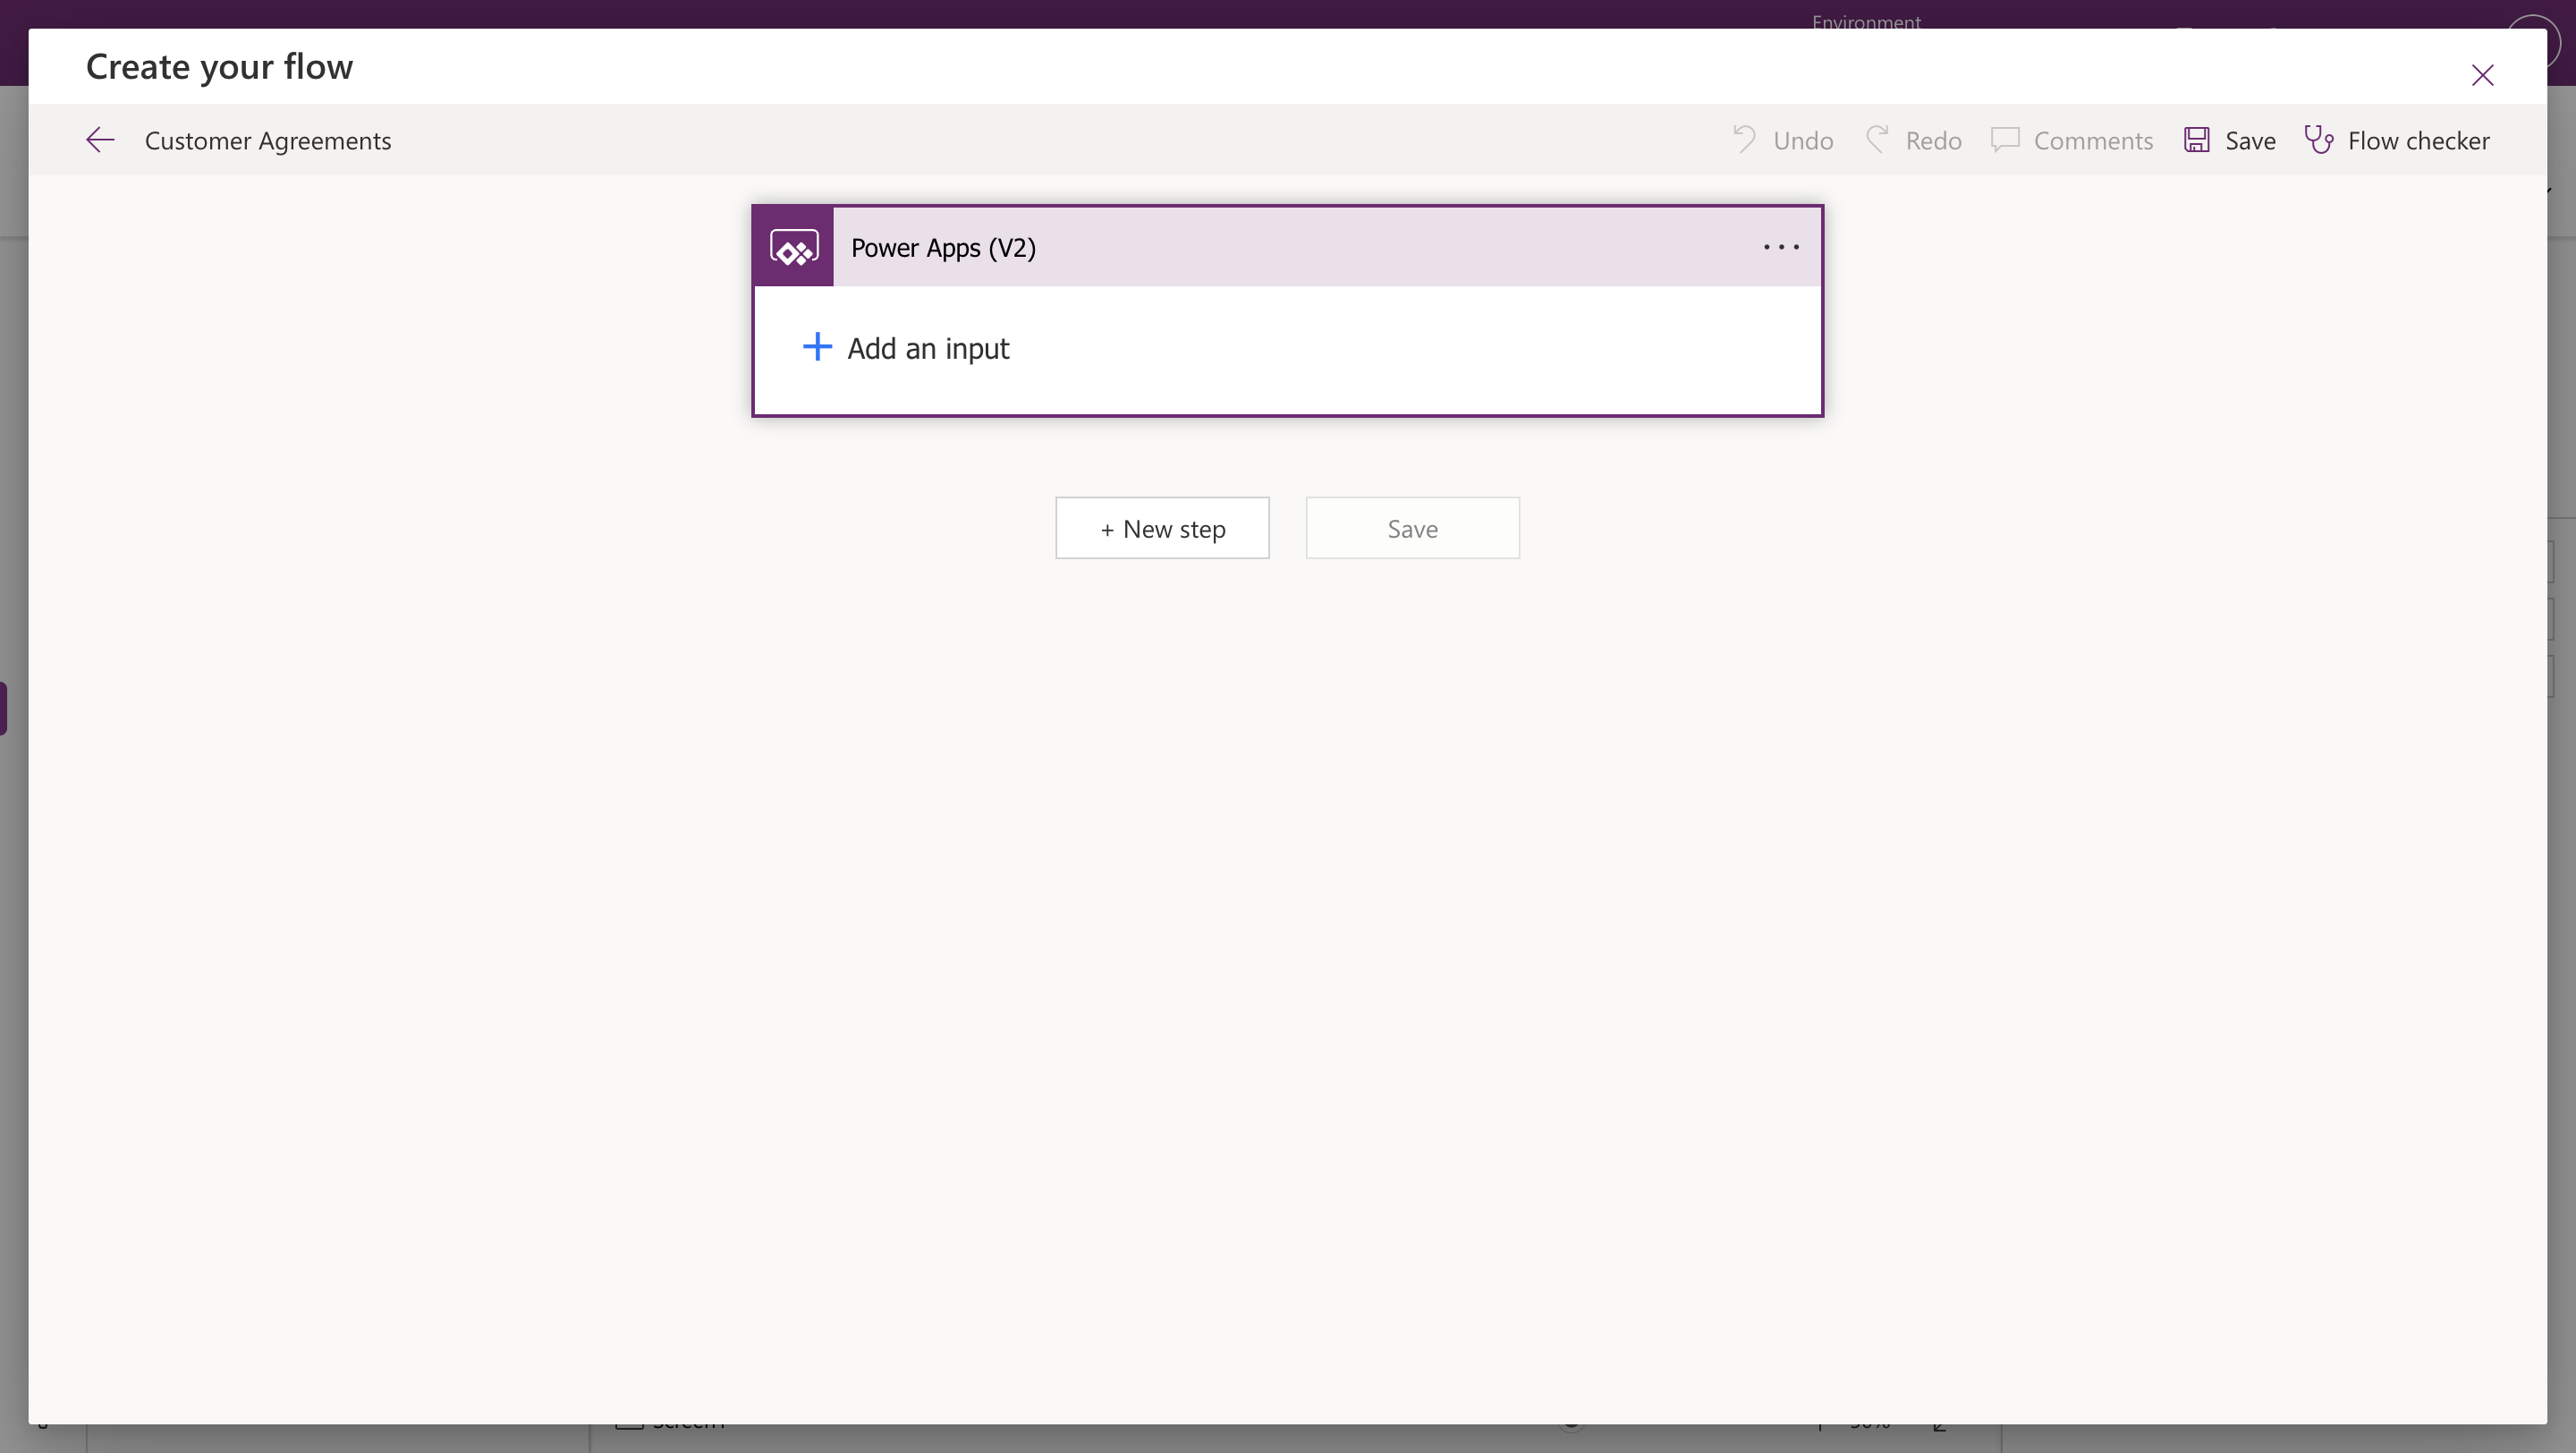
-
Click on the trigger (Power Apps (V2)) and select Add an input.
-
Select the Text type and enter a name for the input (for example,
Customer Name). Repeat this for the other variable (Customer Email).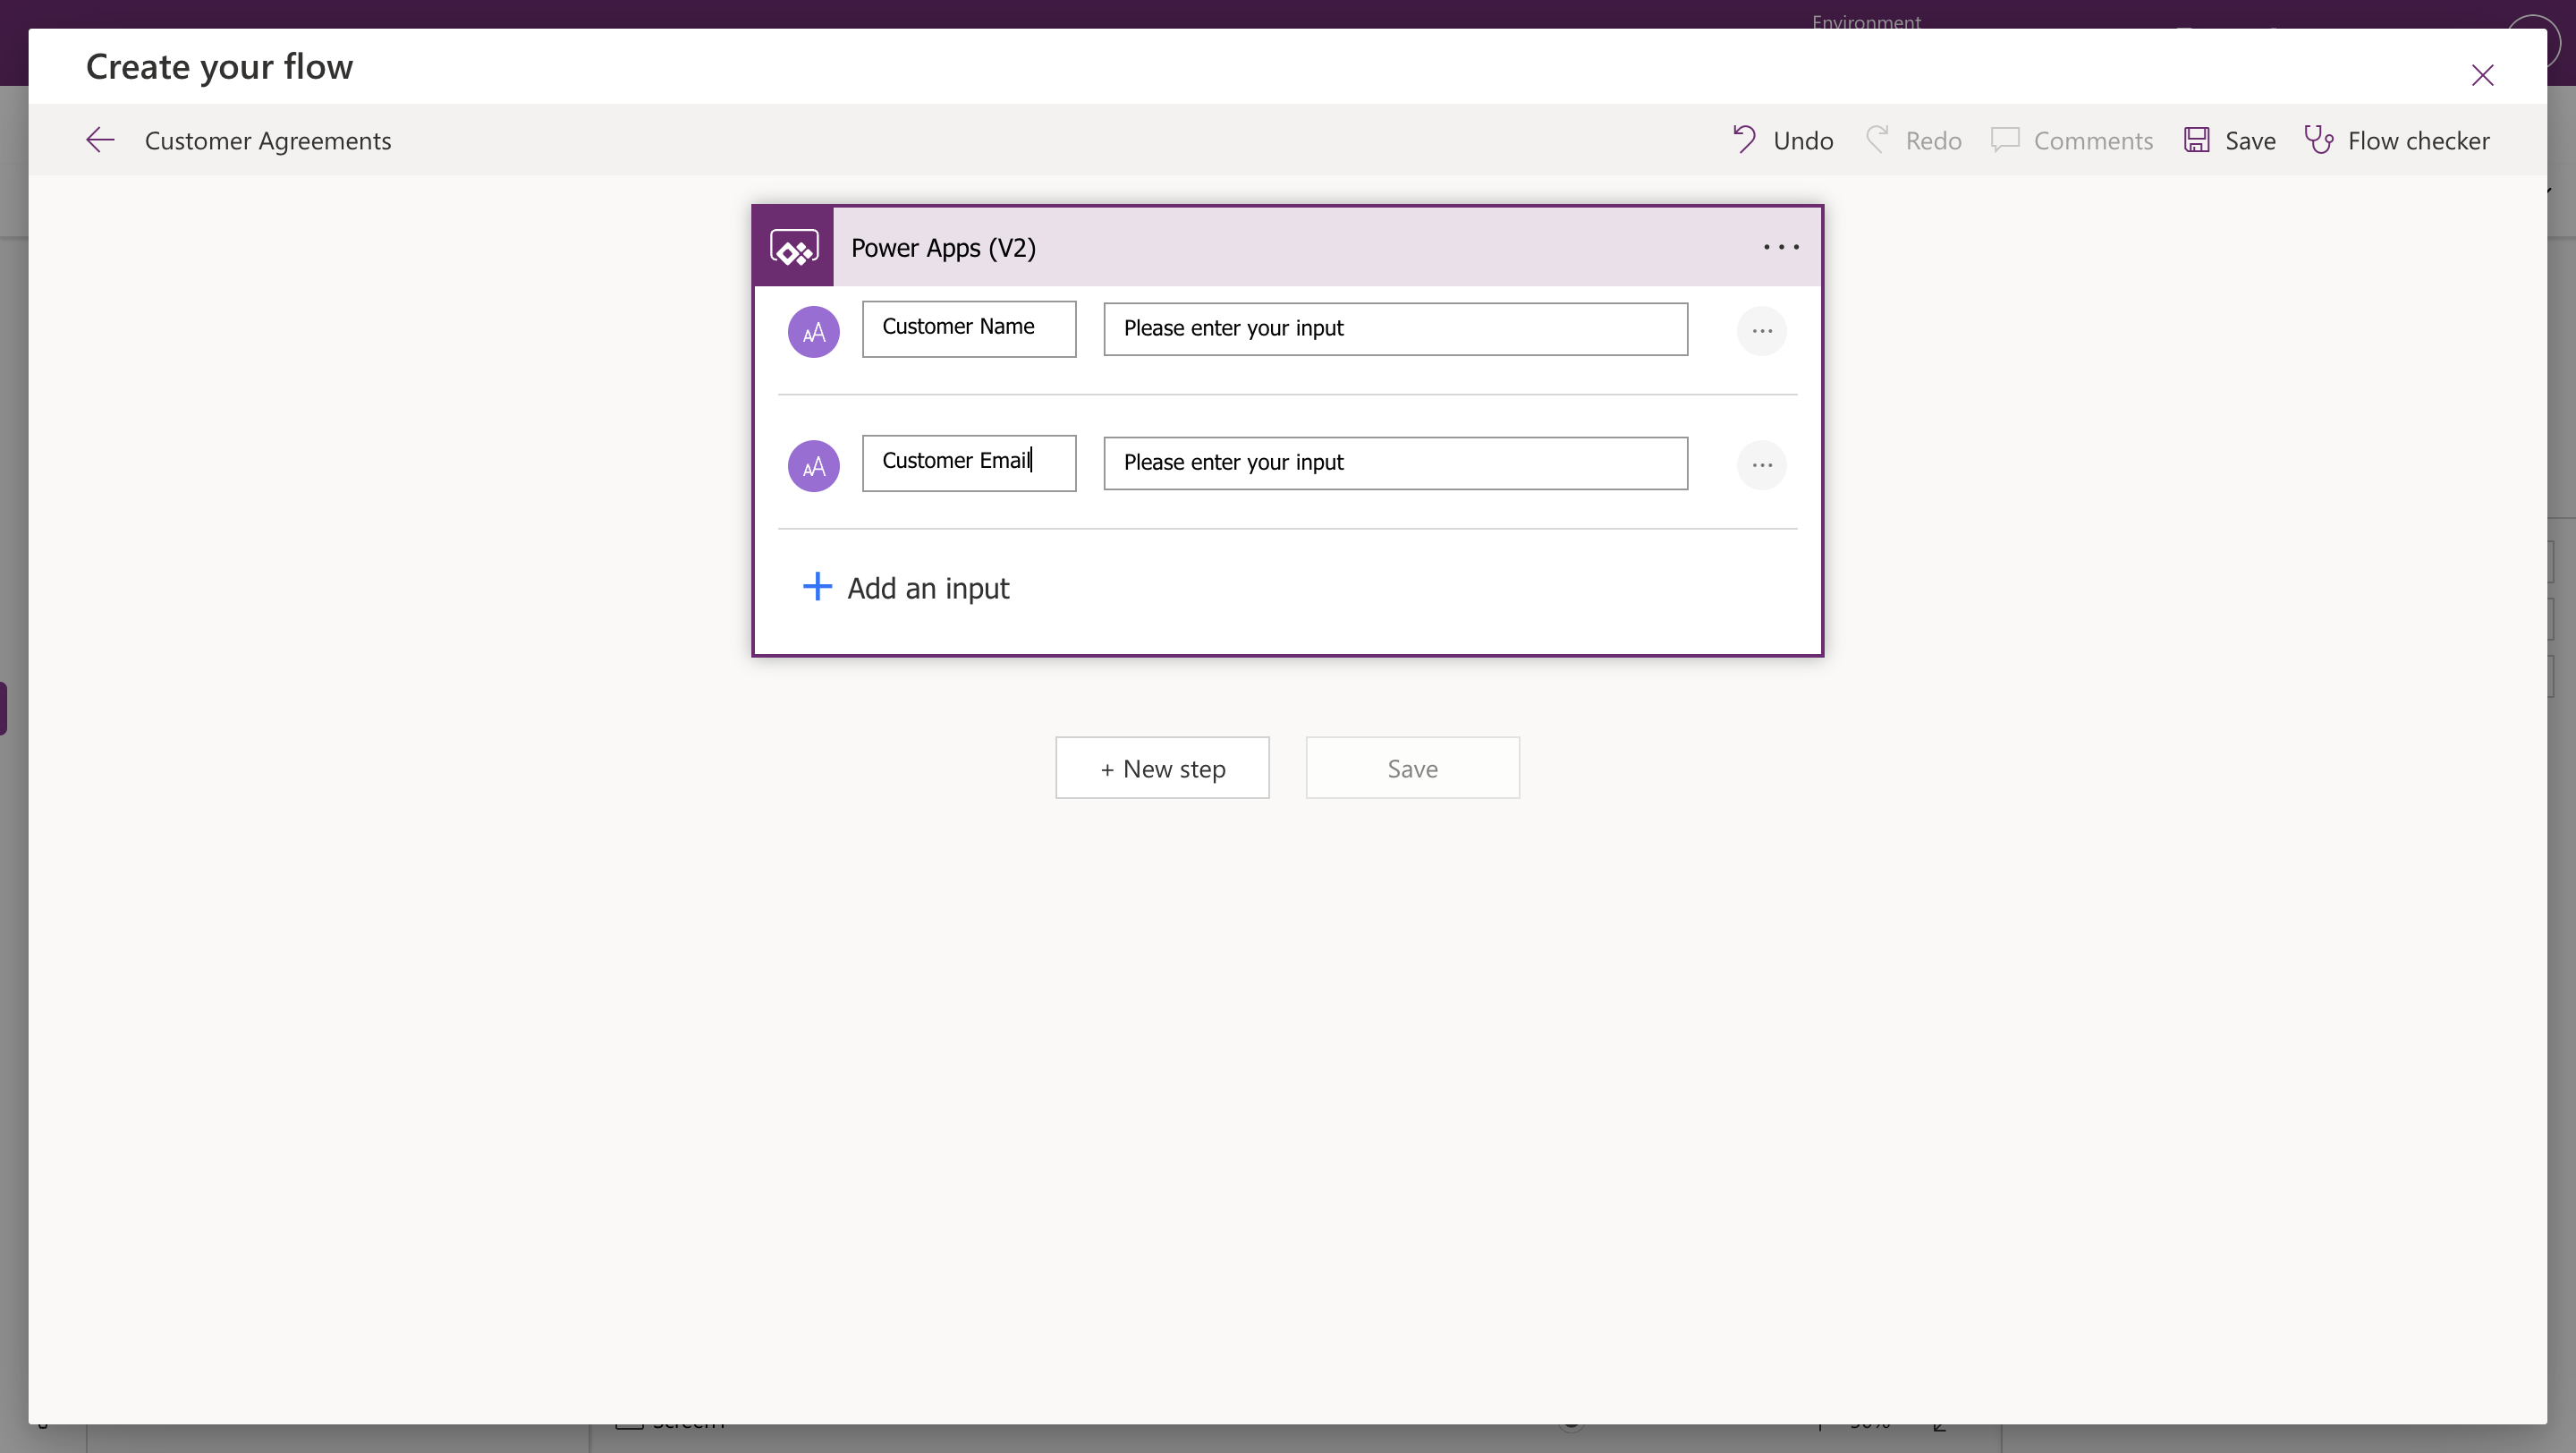
- Add a new step and select the Initialize Variable action.
-
Select the three dots and Rename this step according to the variable name (for example,
Customer Name) before filling out any of the required fields. This will properly name the variable’s Dynamic Content value later on. If the step is not renamed, the value will automatically be named “InitializeVariable_Value.” - Enter the variable Name.
- Use the Type drop-down menu and select String as the variable type.
-
Click in the Value field and select the
Customer Namevariable from the Dynamic Content list. This allows you to pass in a parameter associated with this variable in Power Apps. -
Repeat these steps to initialize the other variable (
Customer Email).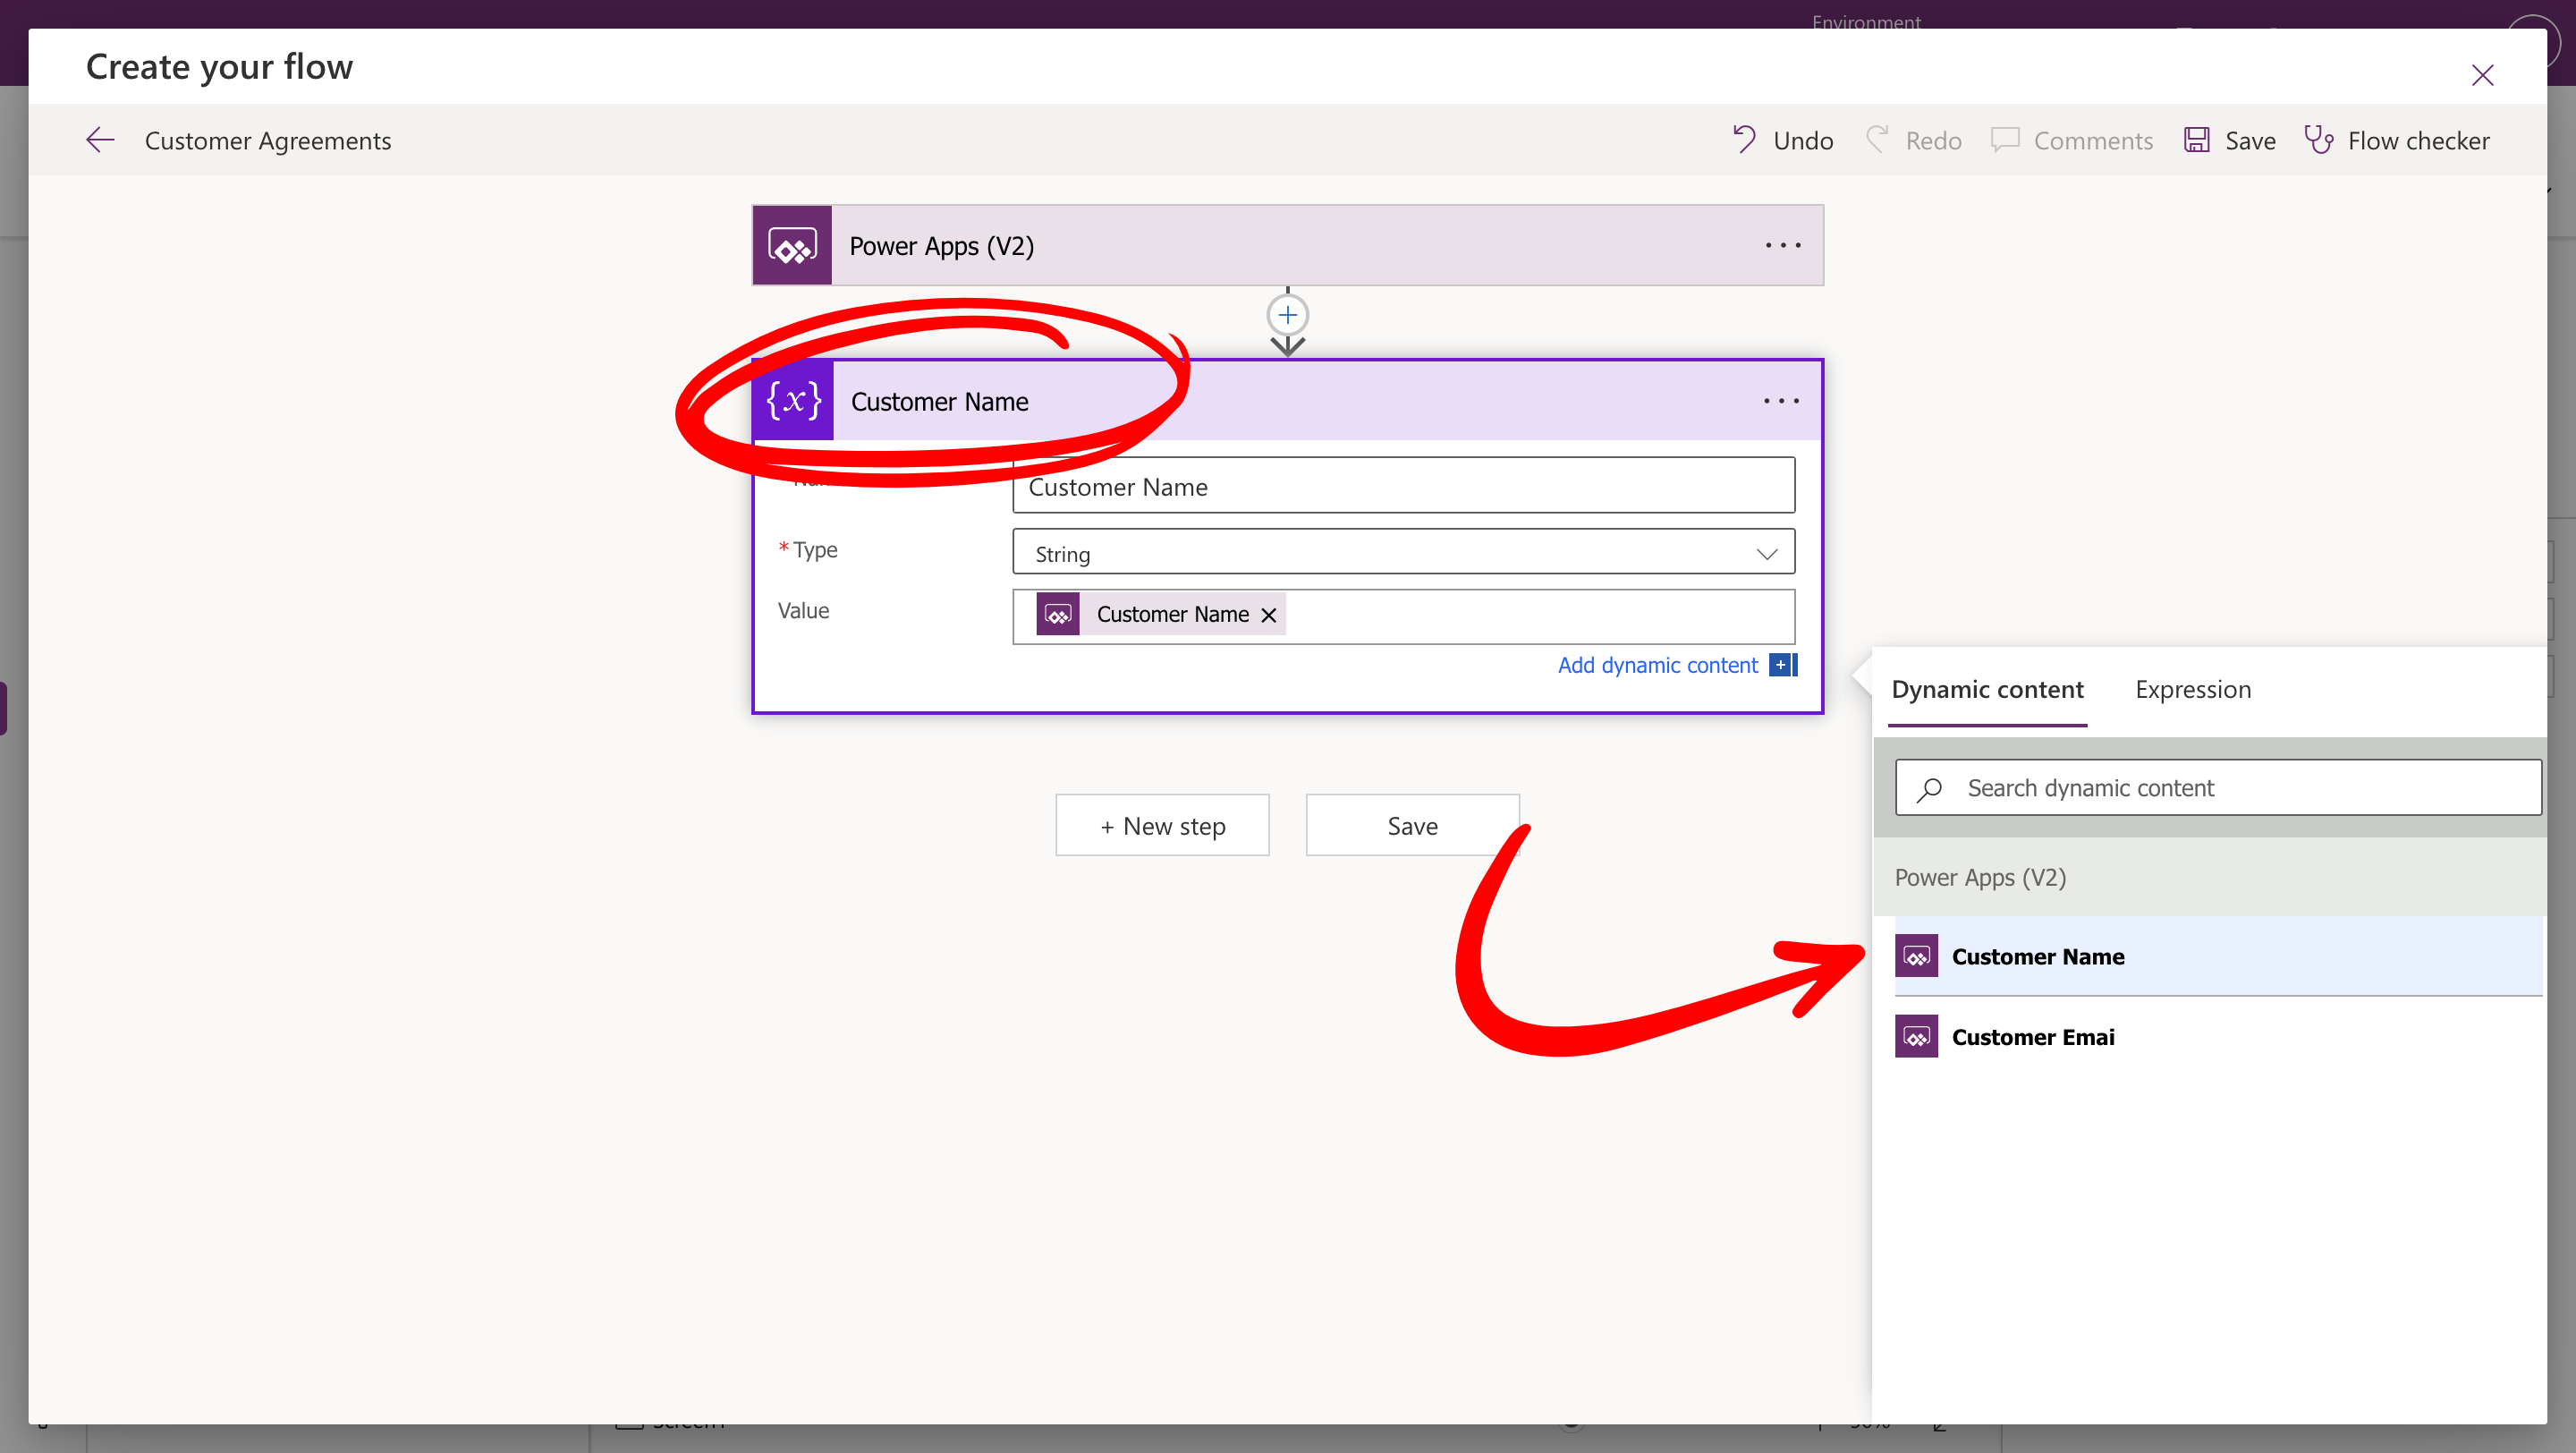
Step 3: Retrieve Contract Template from SharePoint
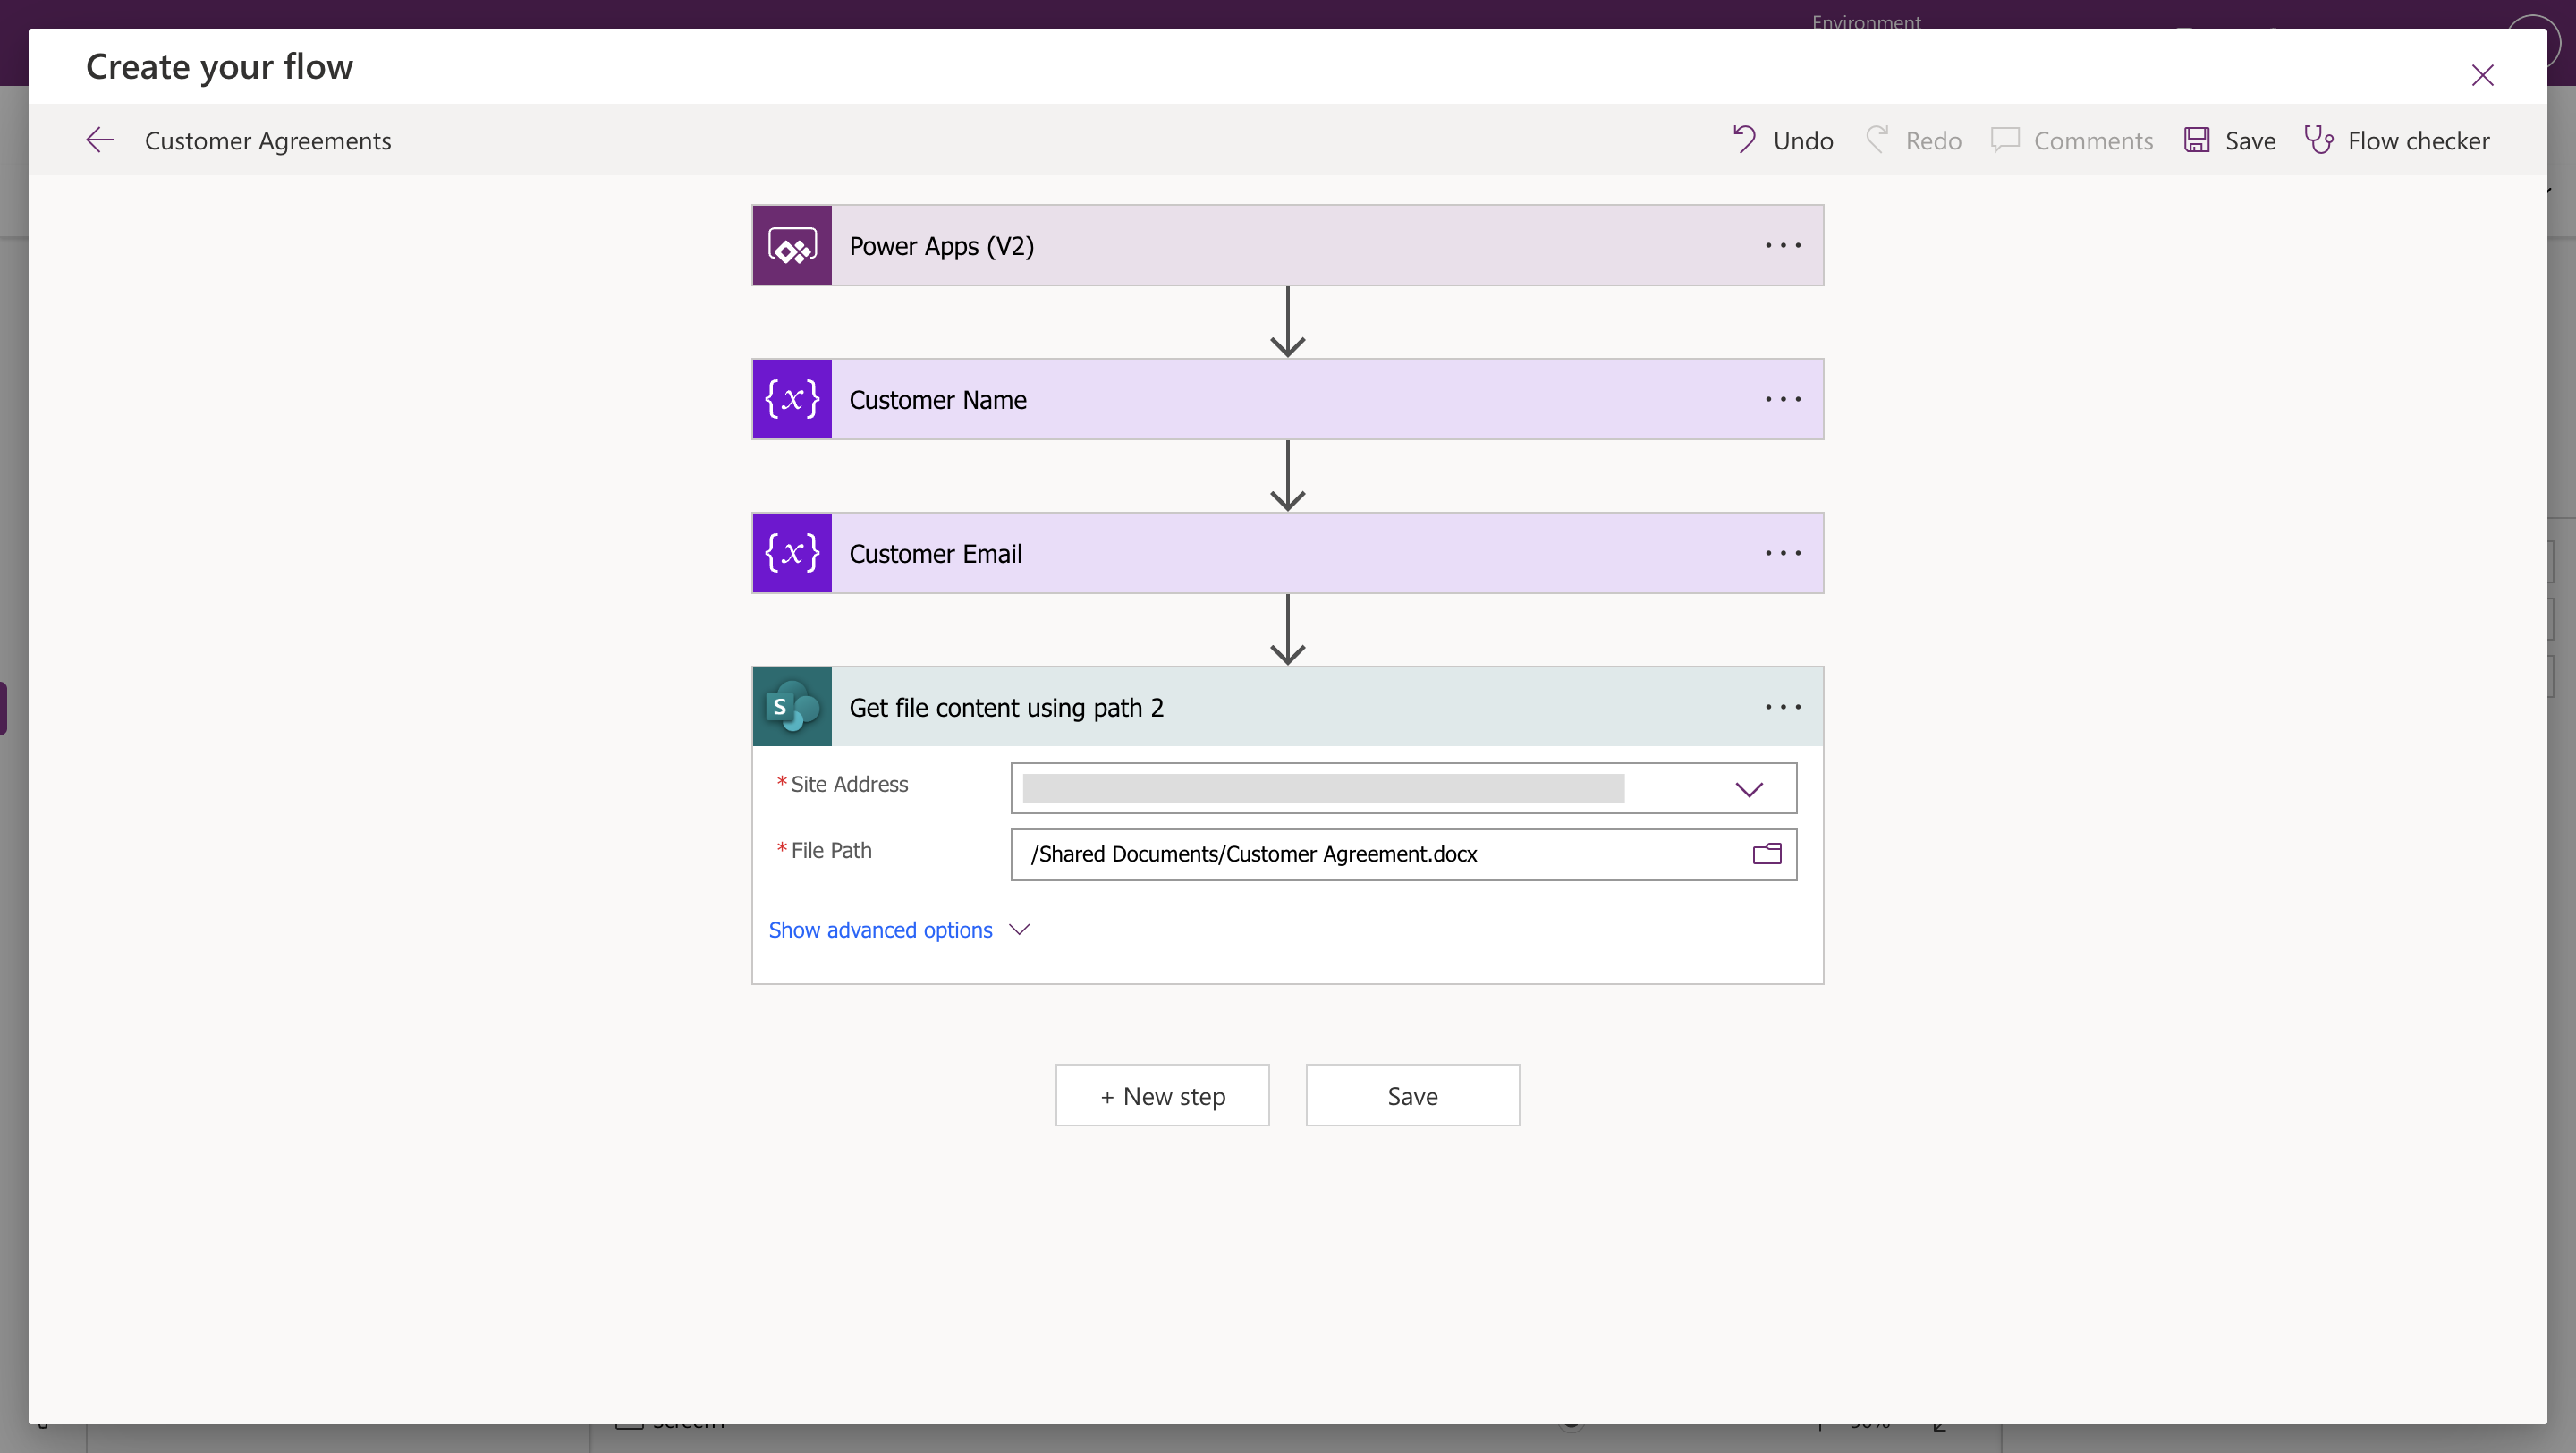
Now, fetch your customer agreement template stored in SharePoint.- Add “Get File Content using Path” from the SharePoint connector.
-
Select the DOCX template stored in your SharePoint.
Step 4: Create the Envelope with SignatureAPI
In this step, you will configure SignatureAPI to create, send, and track the signature process.4.1 Create a SignatureAPI Envelope
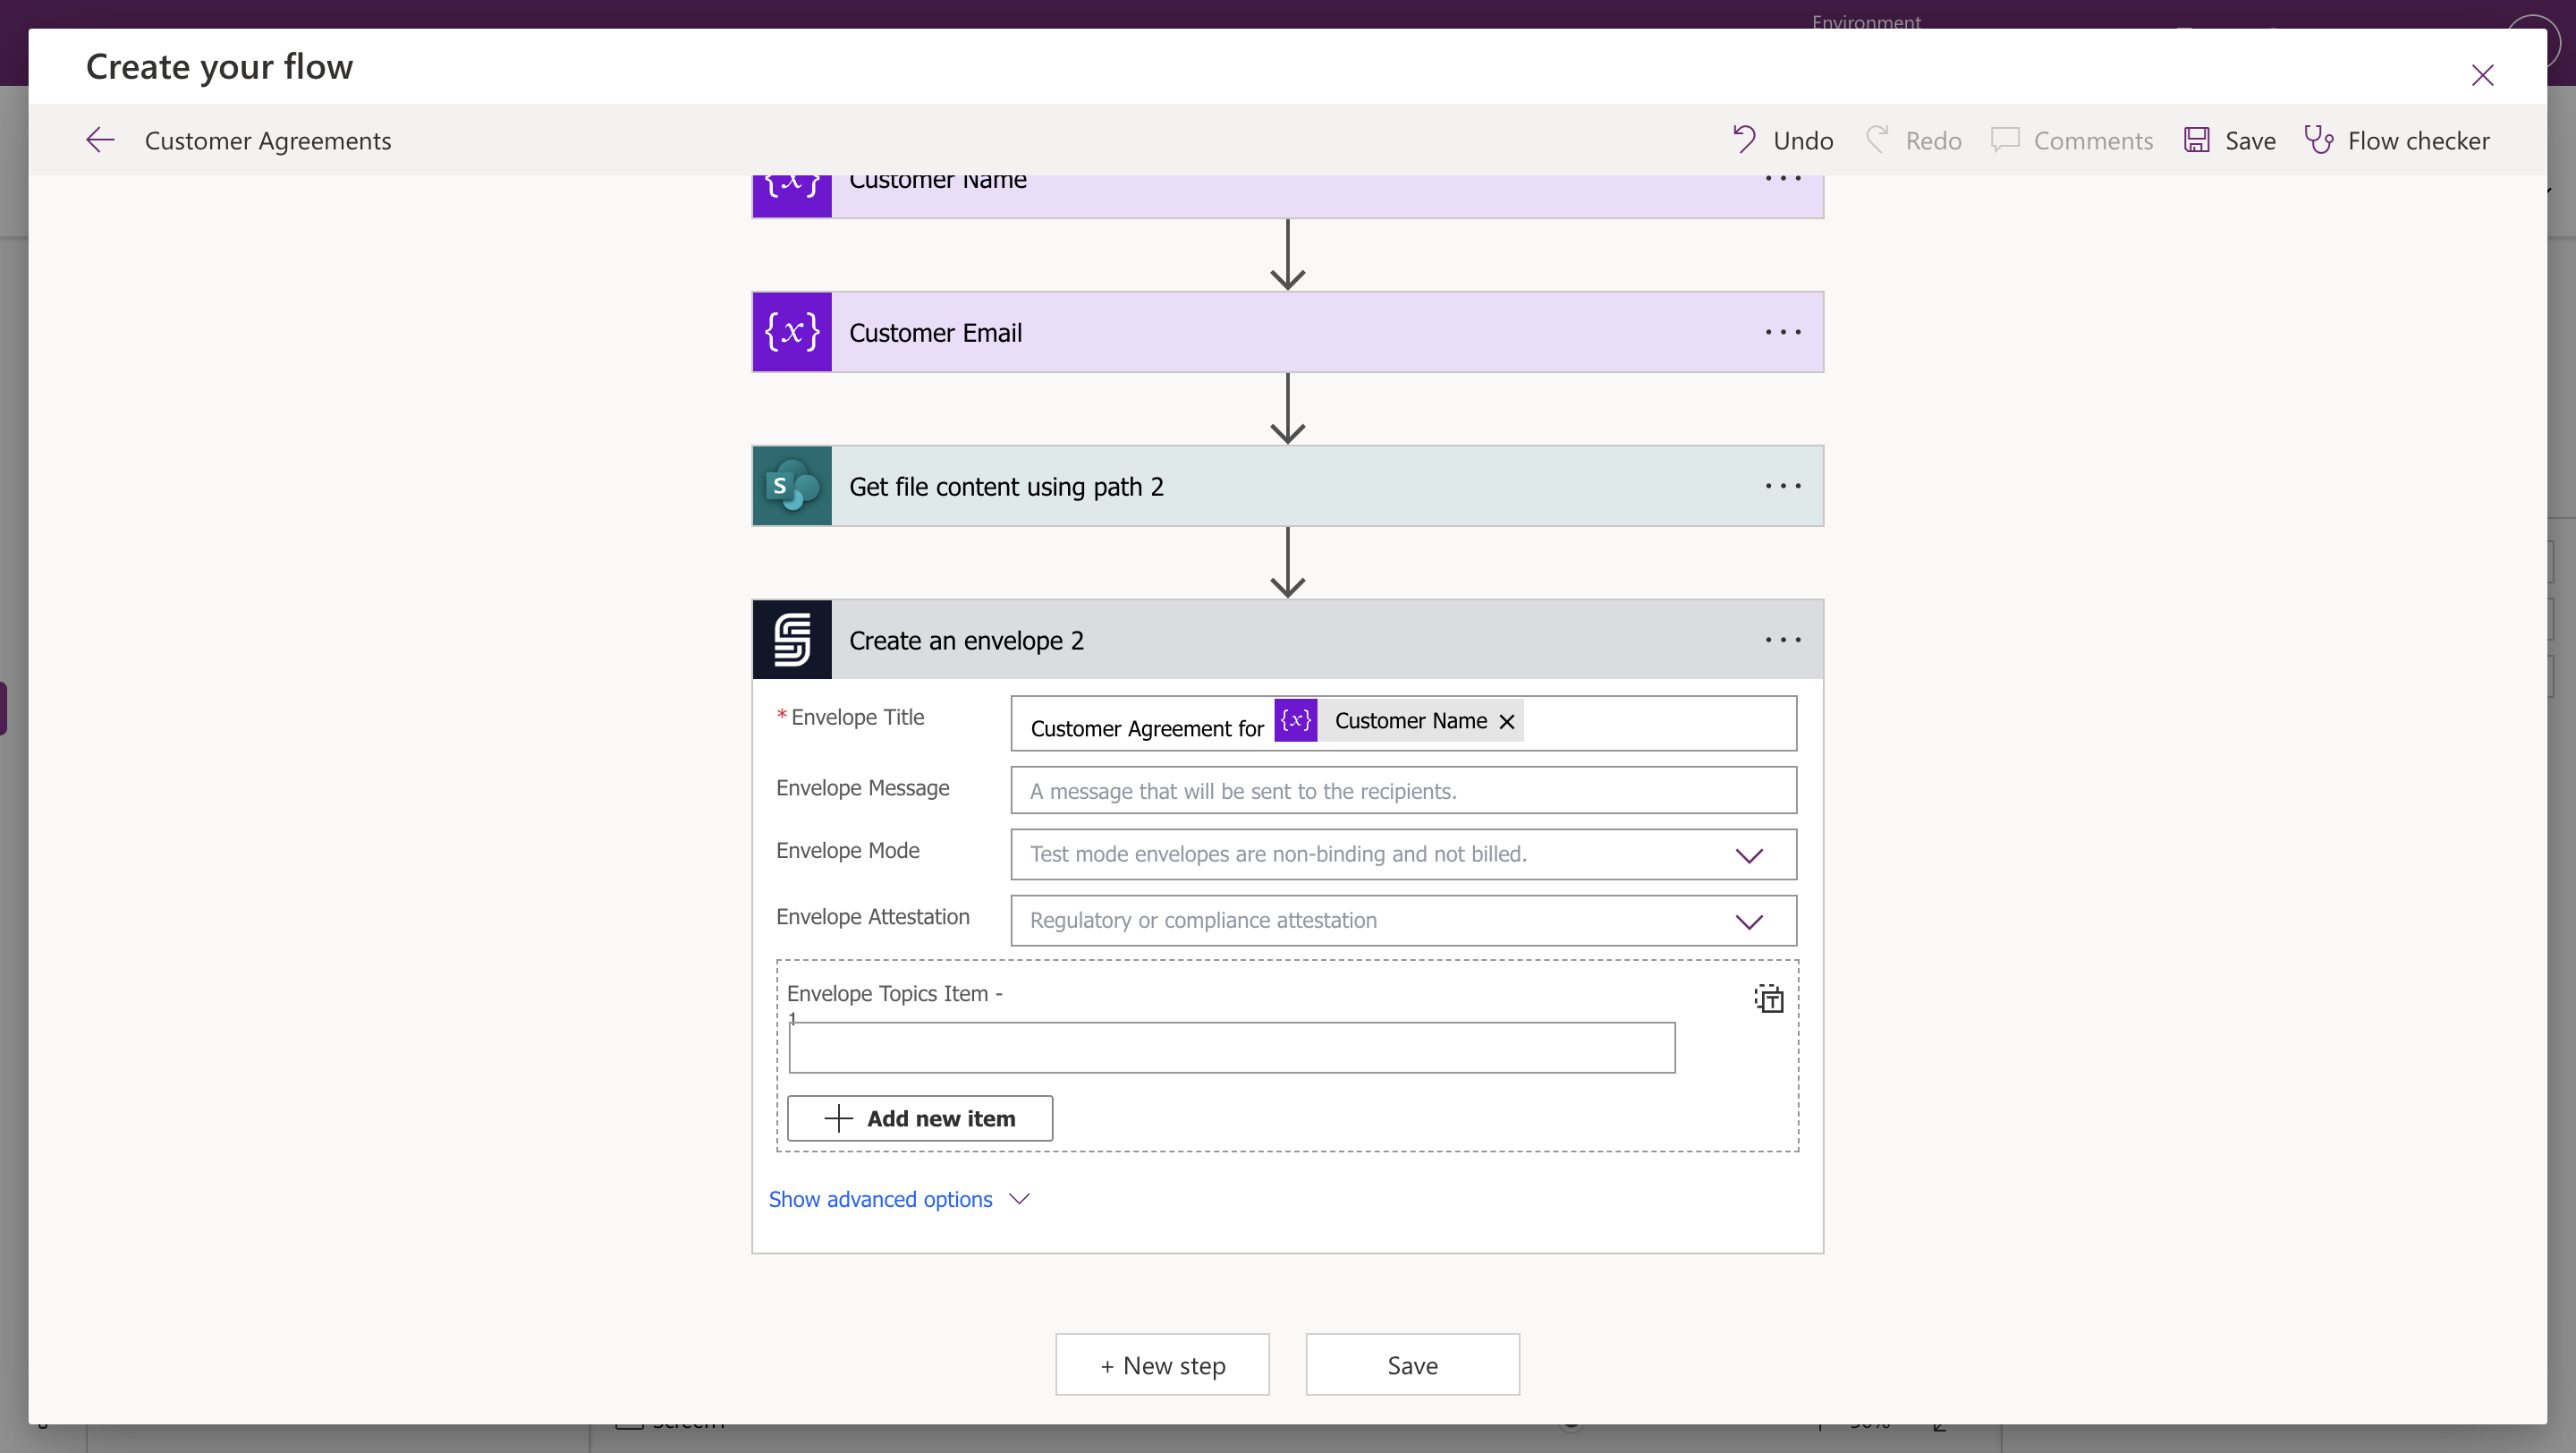
Begin by creating an envelope to hold your contract and signature process.- Add a new step with the “Create an Envelope” action (SignatureAPI connector).
- If prompted, authenticate your connection using your SignatureAPI key from the SignatureAPI Dashboard.
-
Set an Envelope Title (e.g., customer name) and email message using dynamic content.
4.2 Add the Recipient
Next, specify who will receive and sign the contract.- Add the “Add Recipient” action.
- Map Recipient Name and Recipient Email using form details (Dynamic Content).
-
Set the Recipient Key (e.g., “customer”), matching your DOCX placeholders.

4.3 Attach the DOCX Contract Template
Now, attach your contract template to the envelope and populate it with customer details.- Add the “Add a Template - DOCX” action.
- Select File Content from the SharePoint action.
- Set the Document Title (e.g., “Customer Agreement”).
-
Ensure your DOCX template uses placeholders (
{{customer.name}}, etc.) and map each field to the corresponding dynamic content from the Power Apps initialized variables.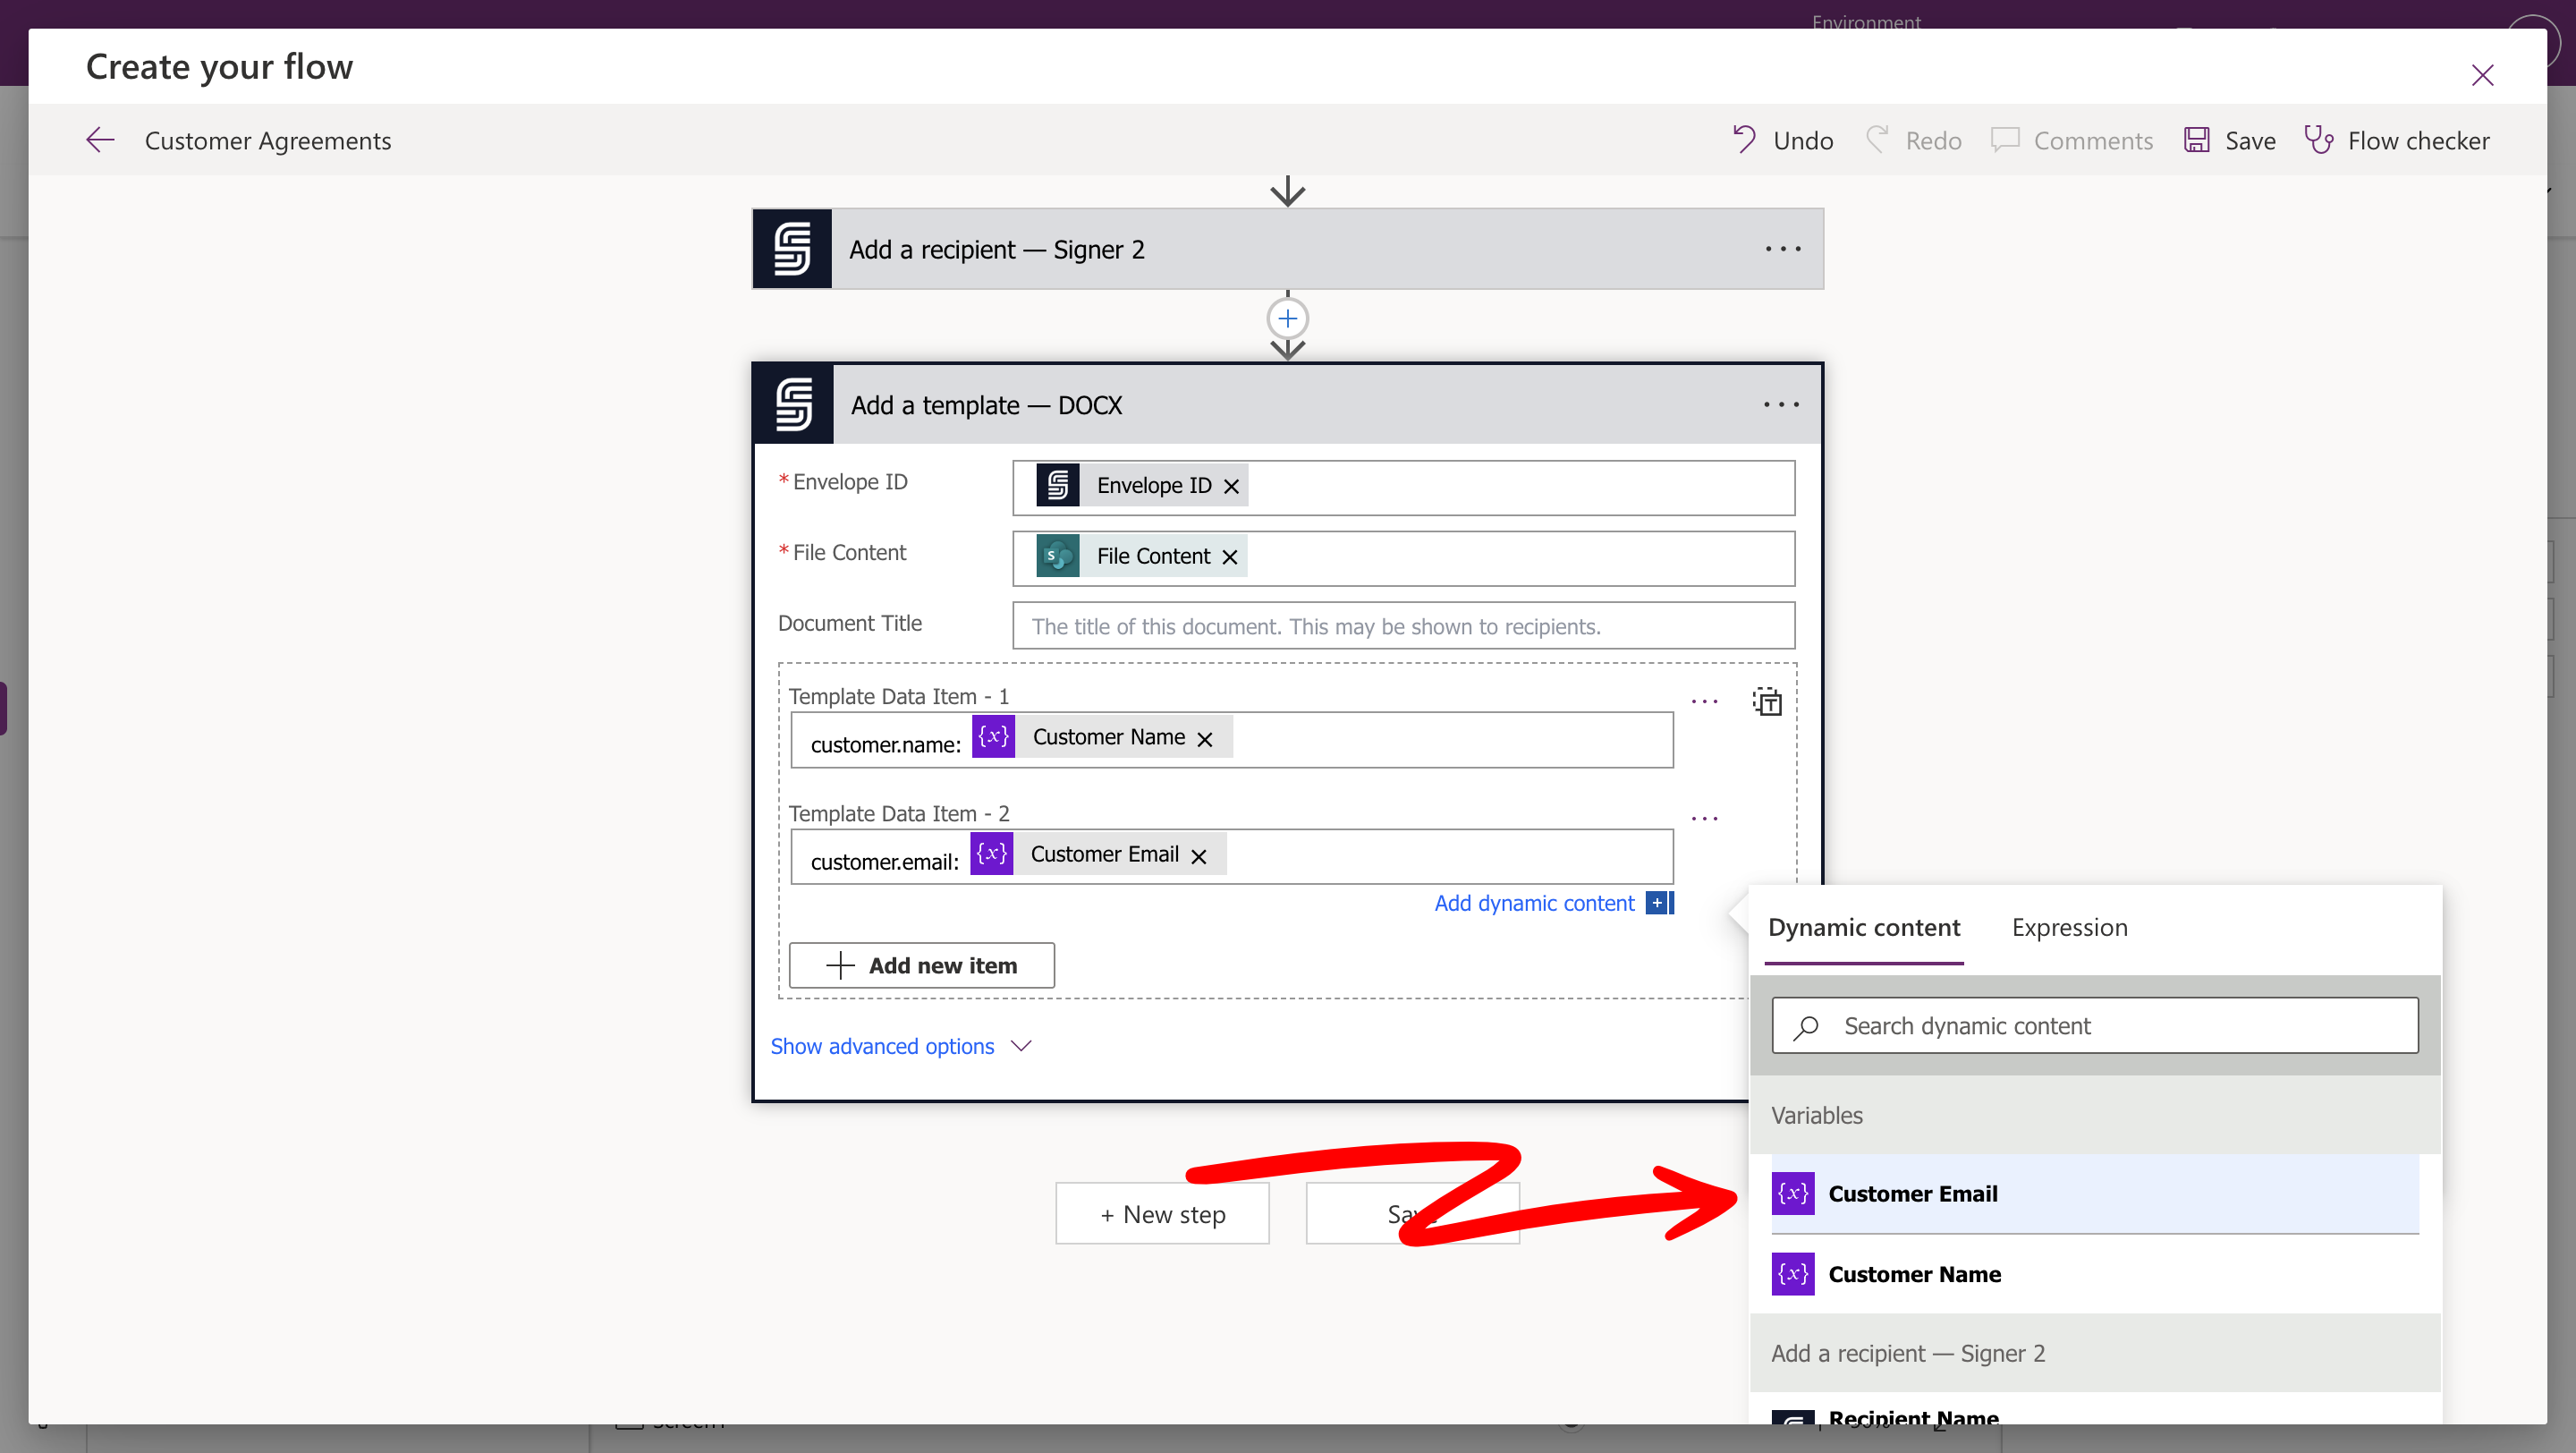
4.4 Define Signature Placement
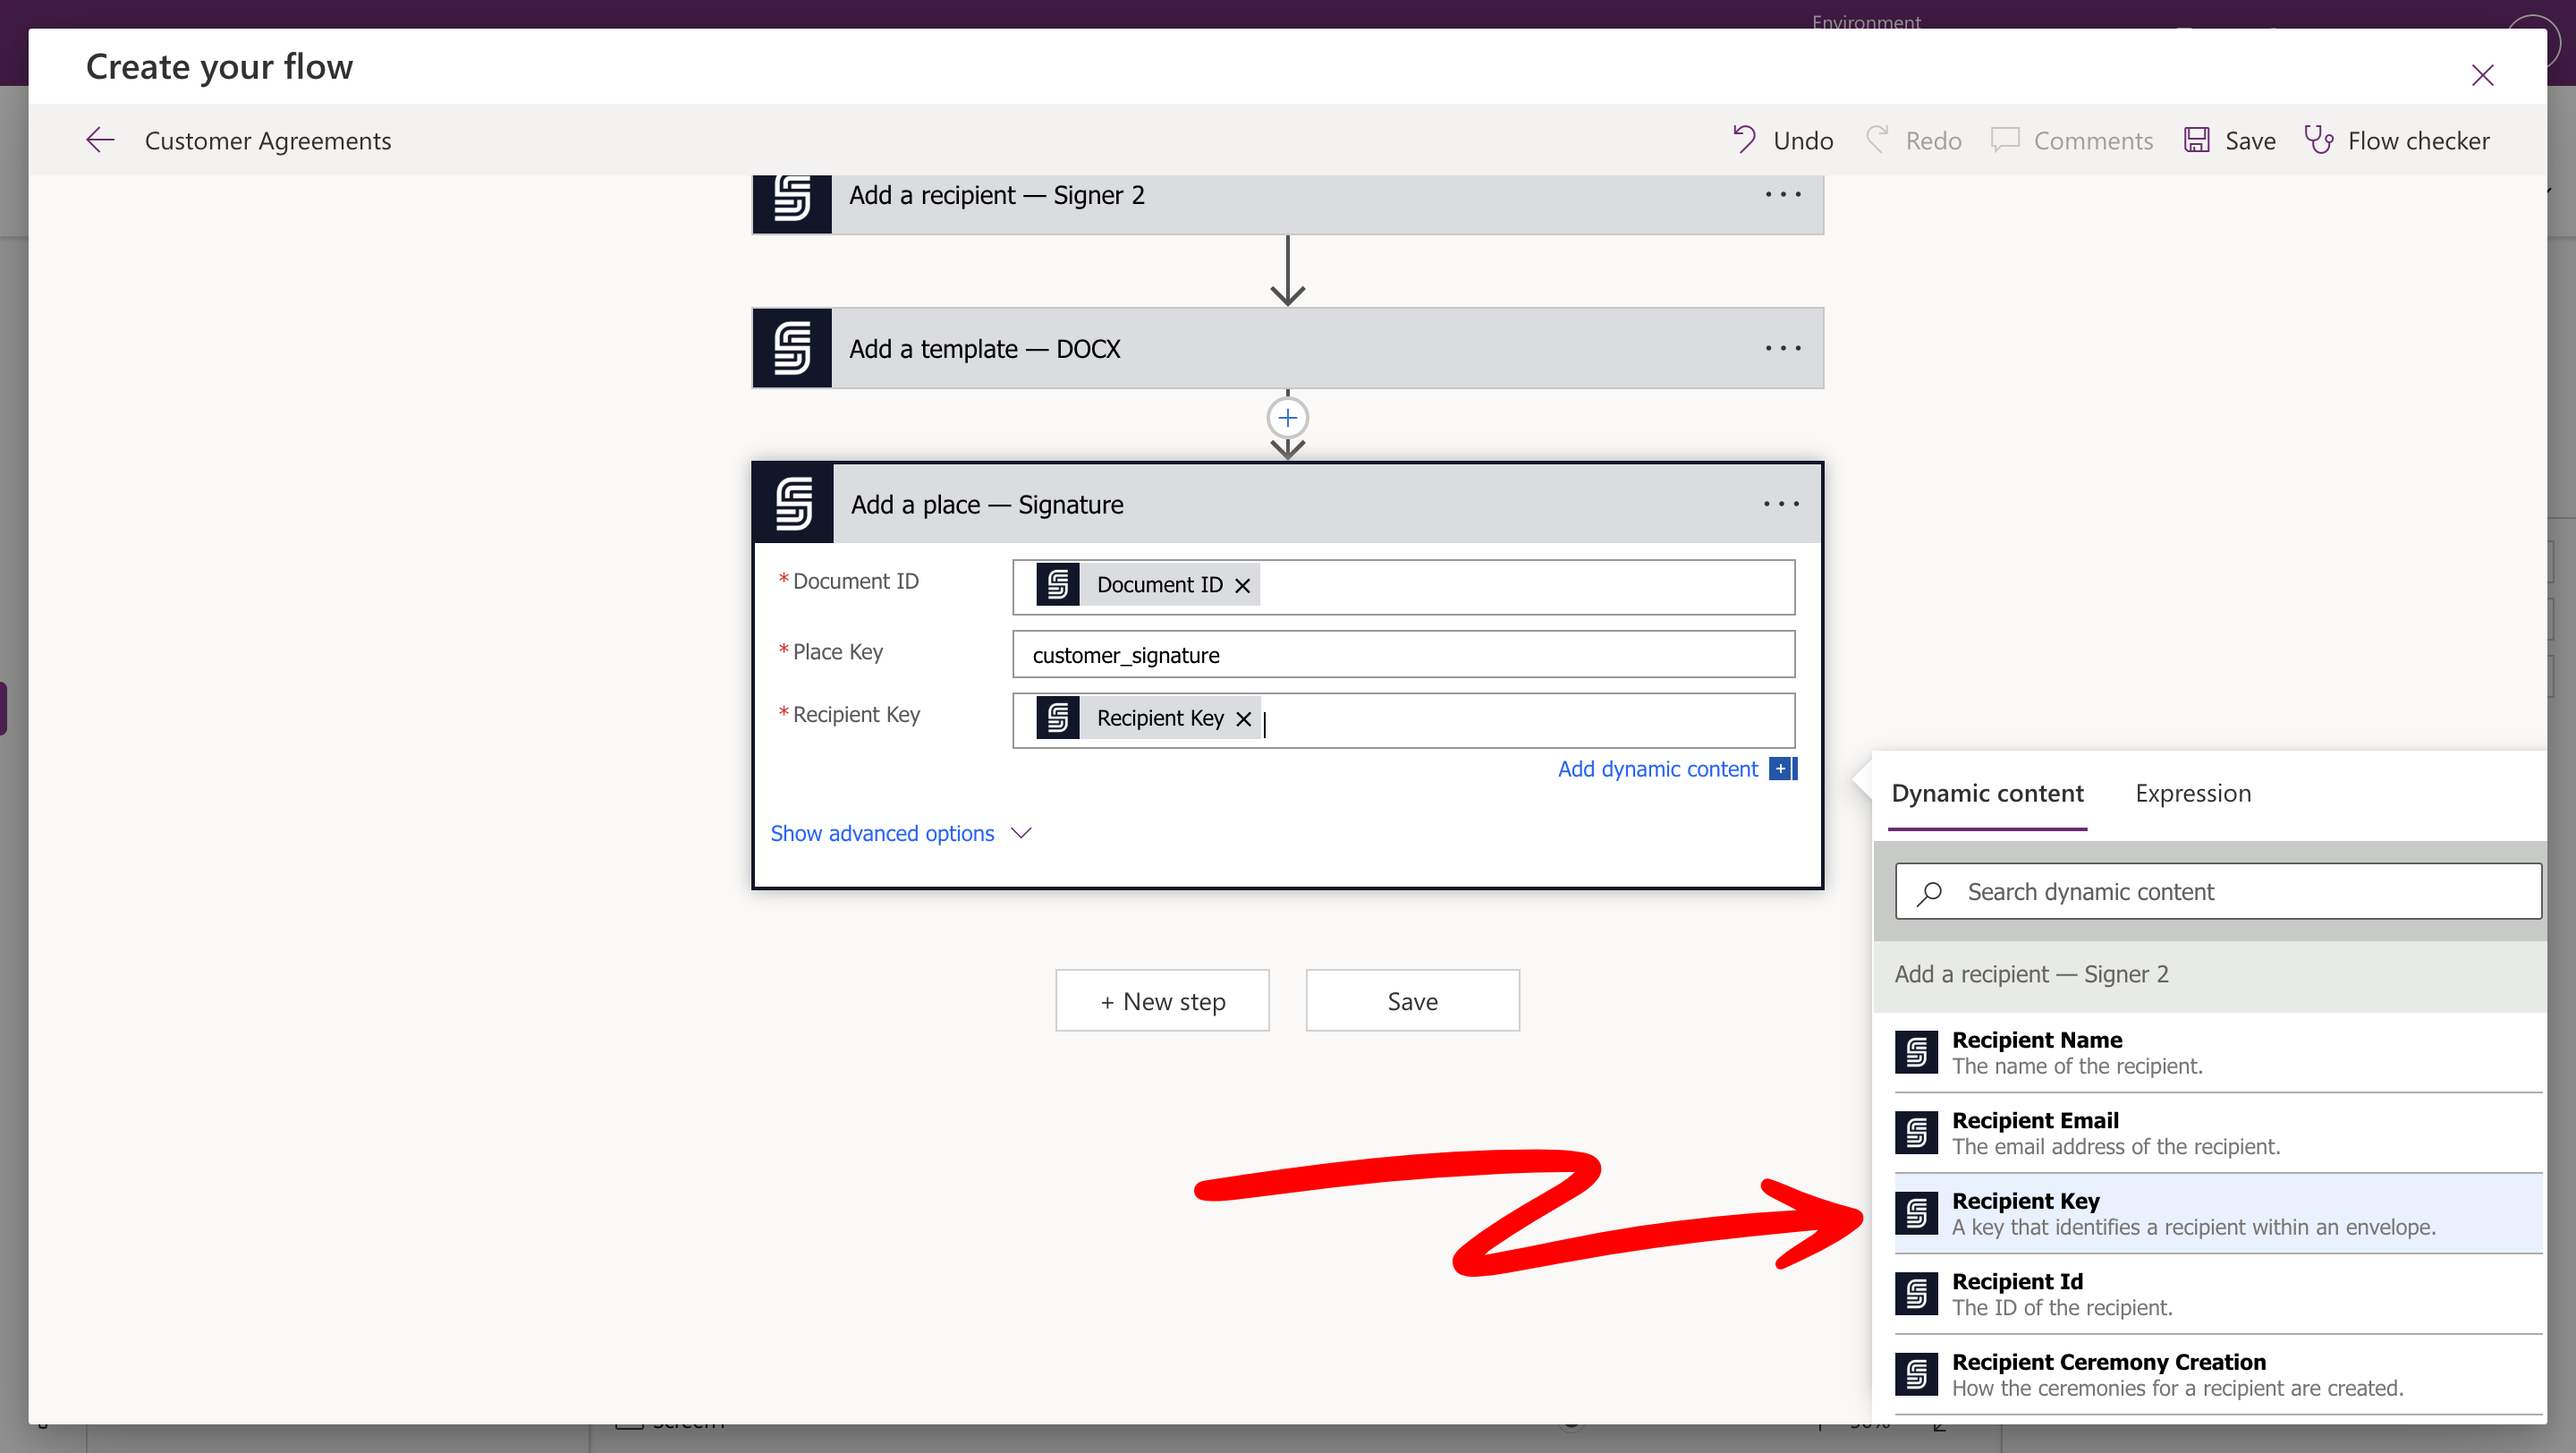
Specify where the customer should sign on the document.- Add the “Add a Place - Signature” action.
- Set the Document ID using dynamic content.
-
Use the placeholder (e.g.,
[[customer_signature]]) from your DOCX template. -
Set the Recipient Key using dynamic content.
4.5 Start the Signing Process
Trigger the sending of your envelope to the customer for signing.- Add the “Start Envelope” action.
-
Select the appropriate Envelope ID using dynamic content.

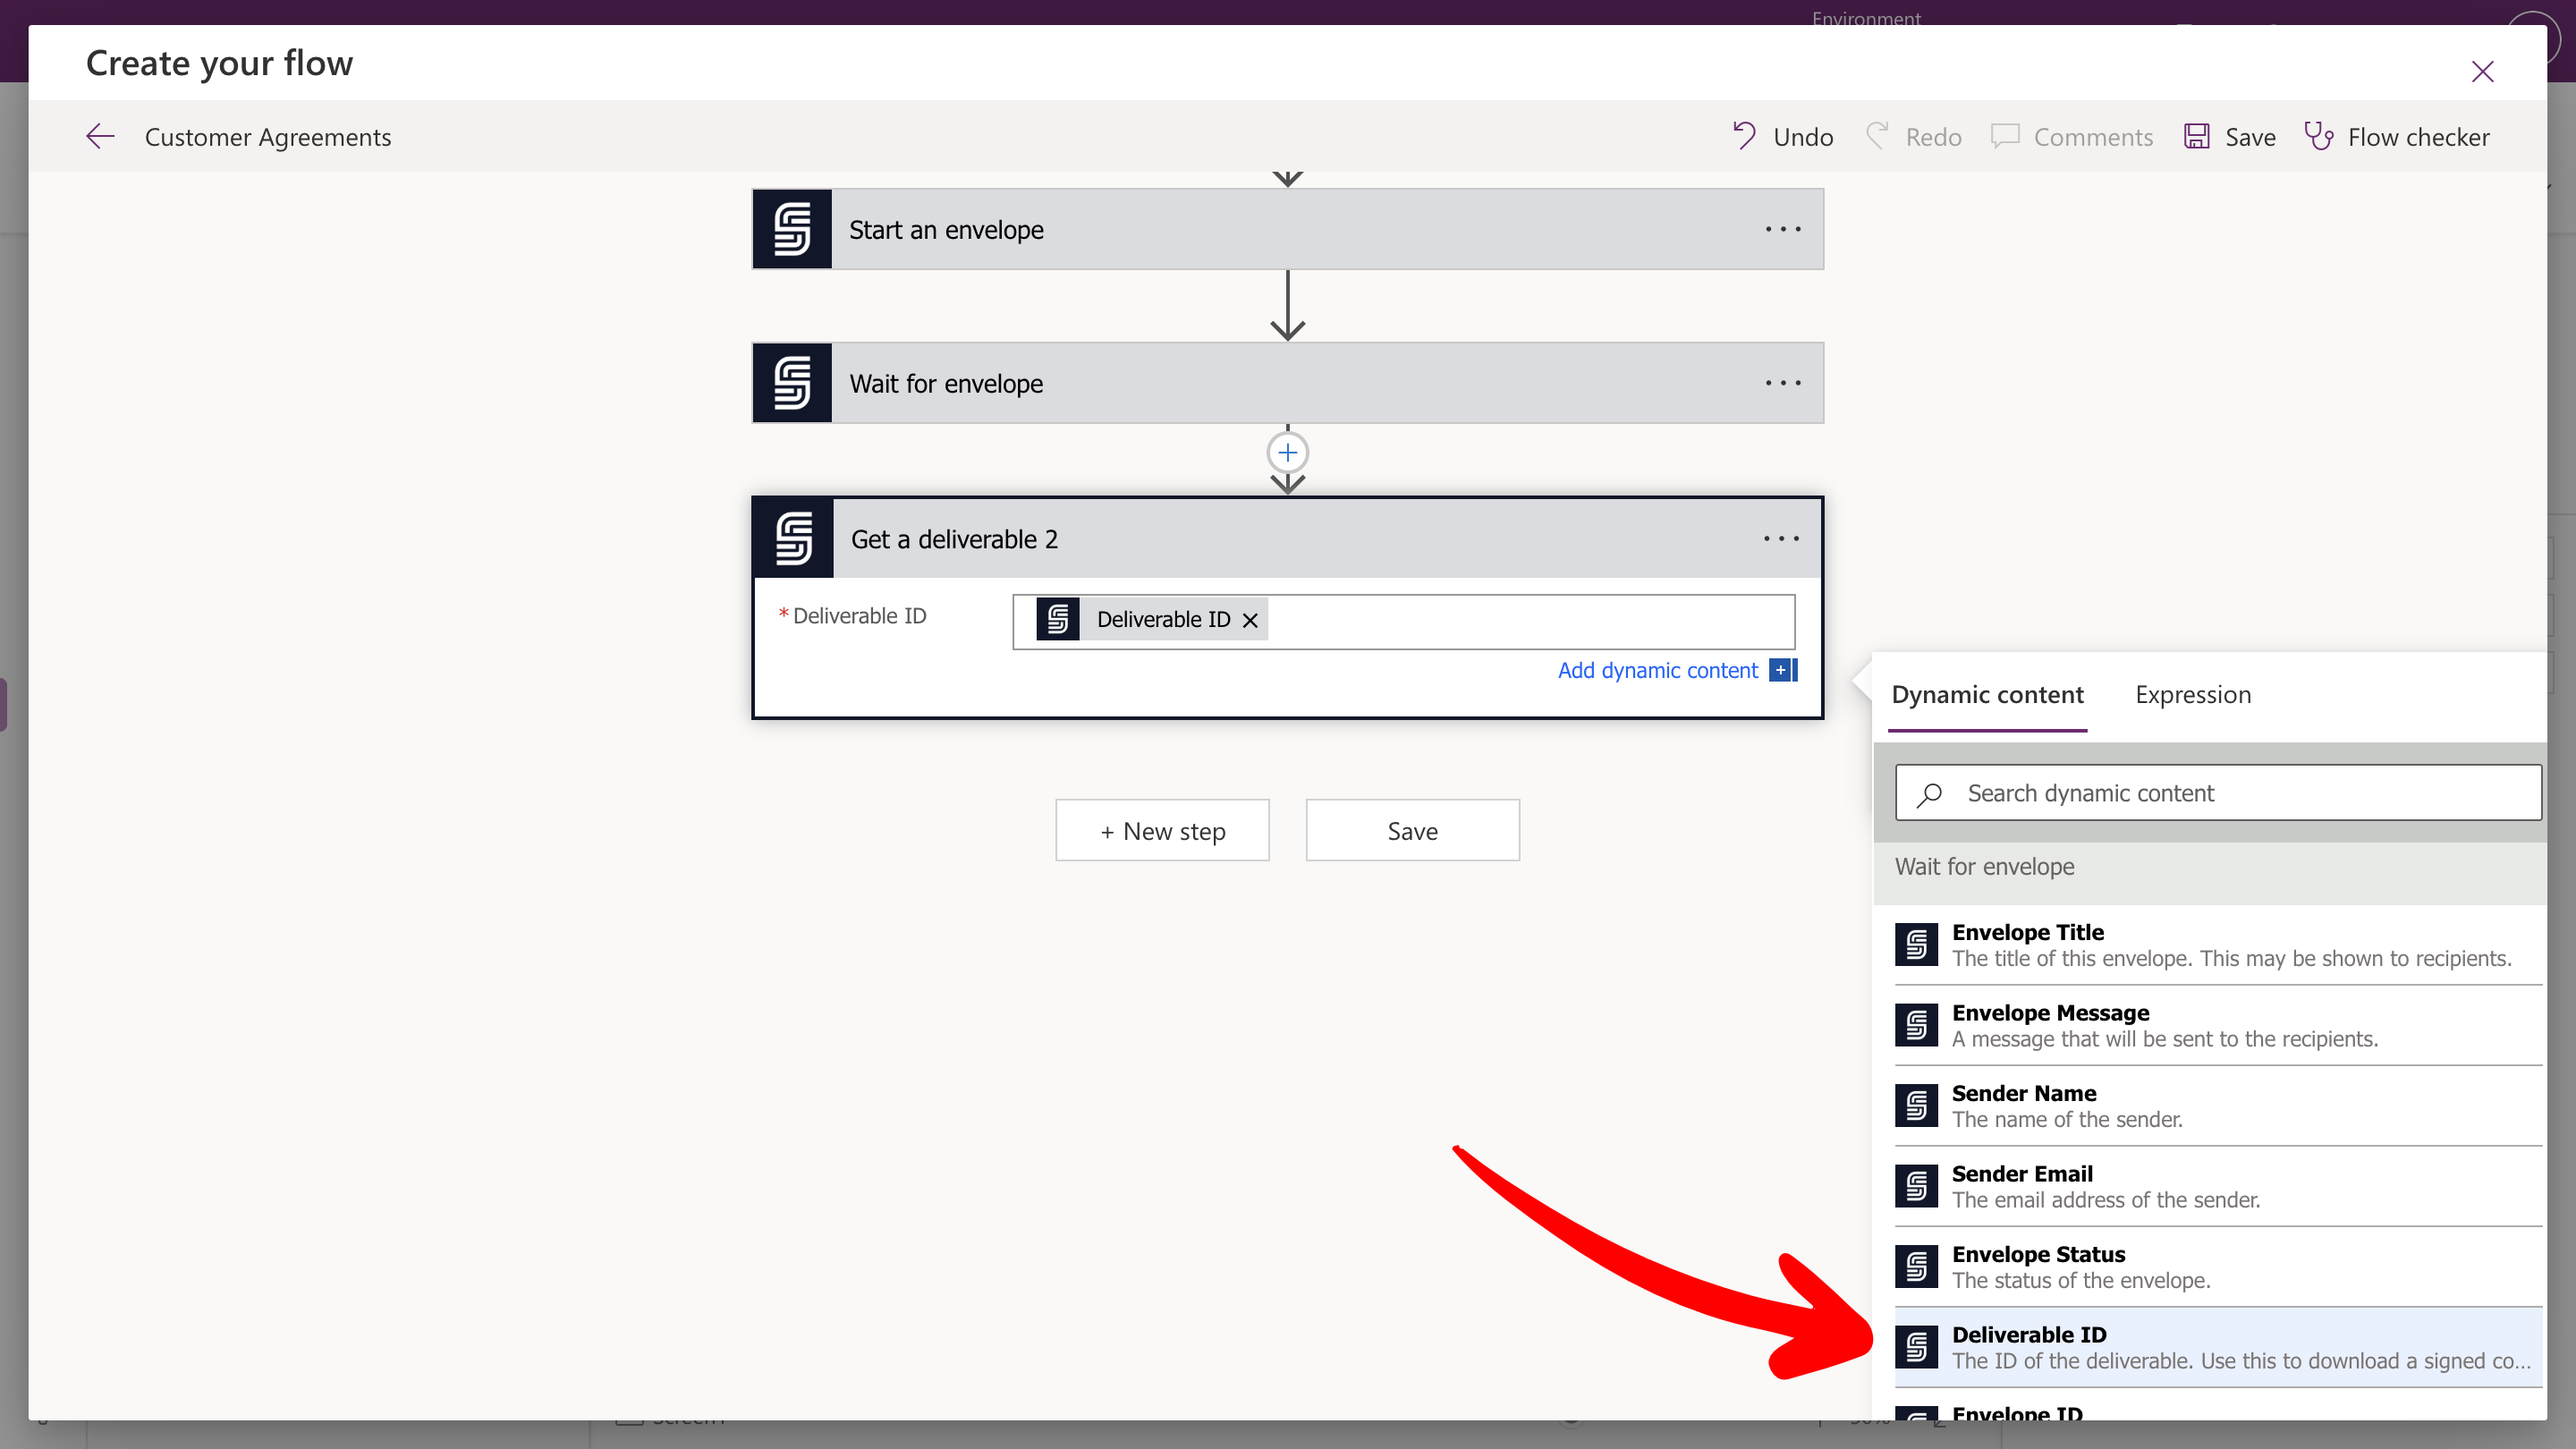
Step 5: Monitor and Finalize the Contract
Next, configure your flow to wait for the signing to complete, retrieve the signed contract, and notify the business.5.1 Wait for Signature Completion
Pause the flow until the customer signs the contract.- Add the “Wait for Envelope Completion” action.
-
Select the correct Envelope ID using dynamic content.

5.2 Retrieve the Signed Contract
Once signed, automatically retrieve the completed document.- Add the “Get Deliverables” action.
-
Select the correct Deliverable ID using dynamic content.
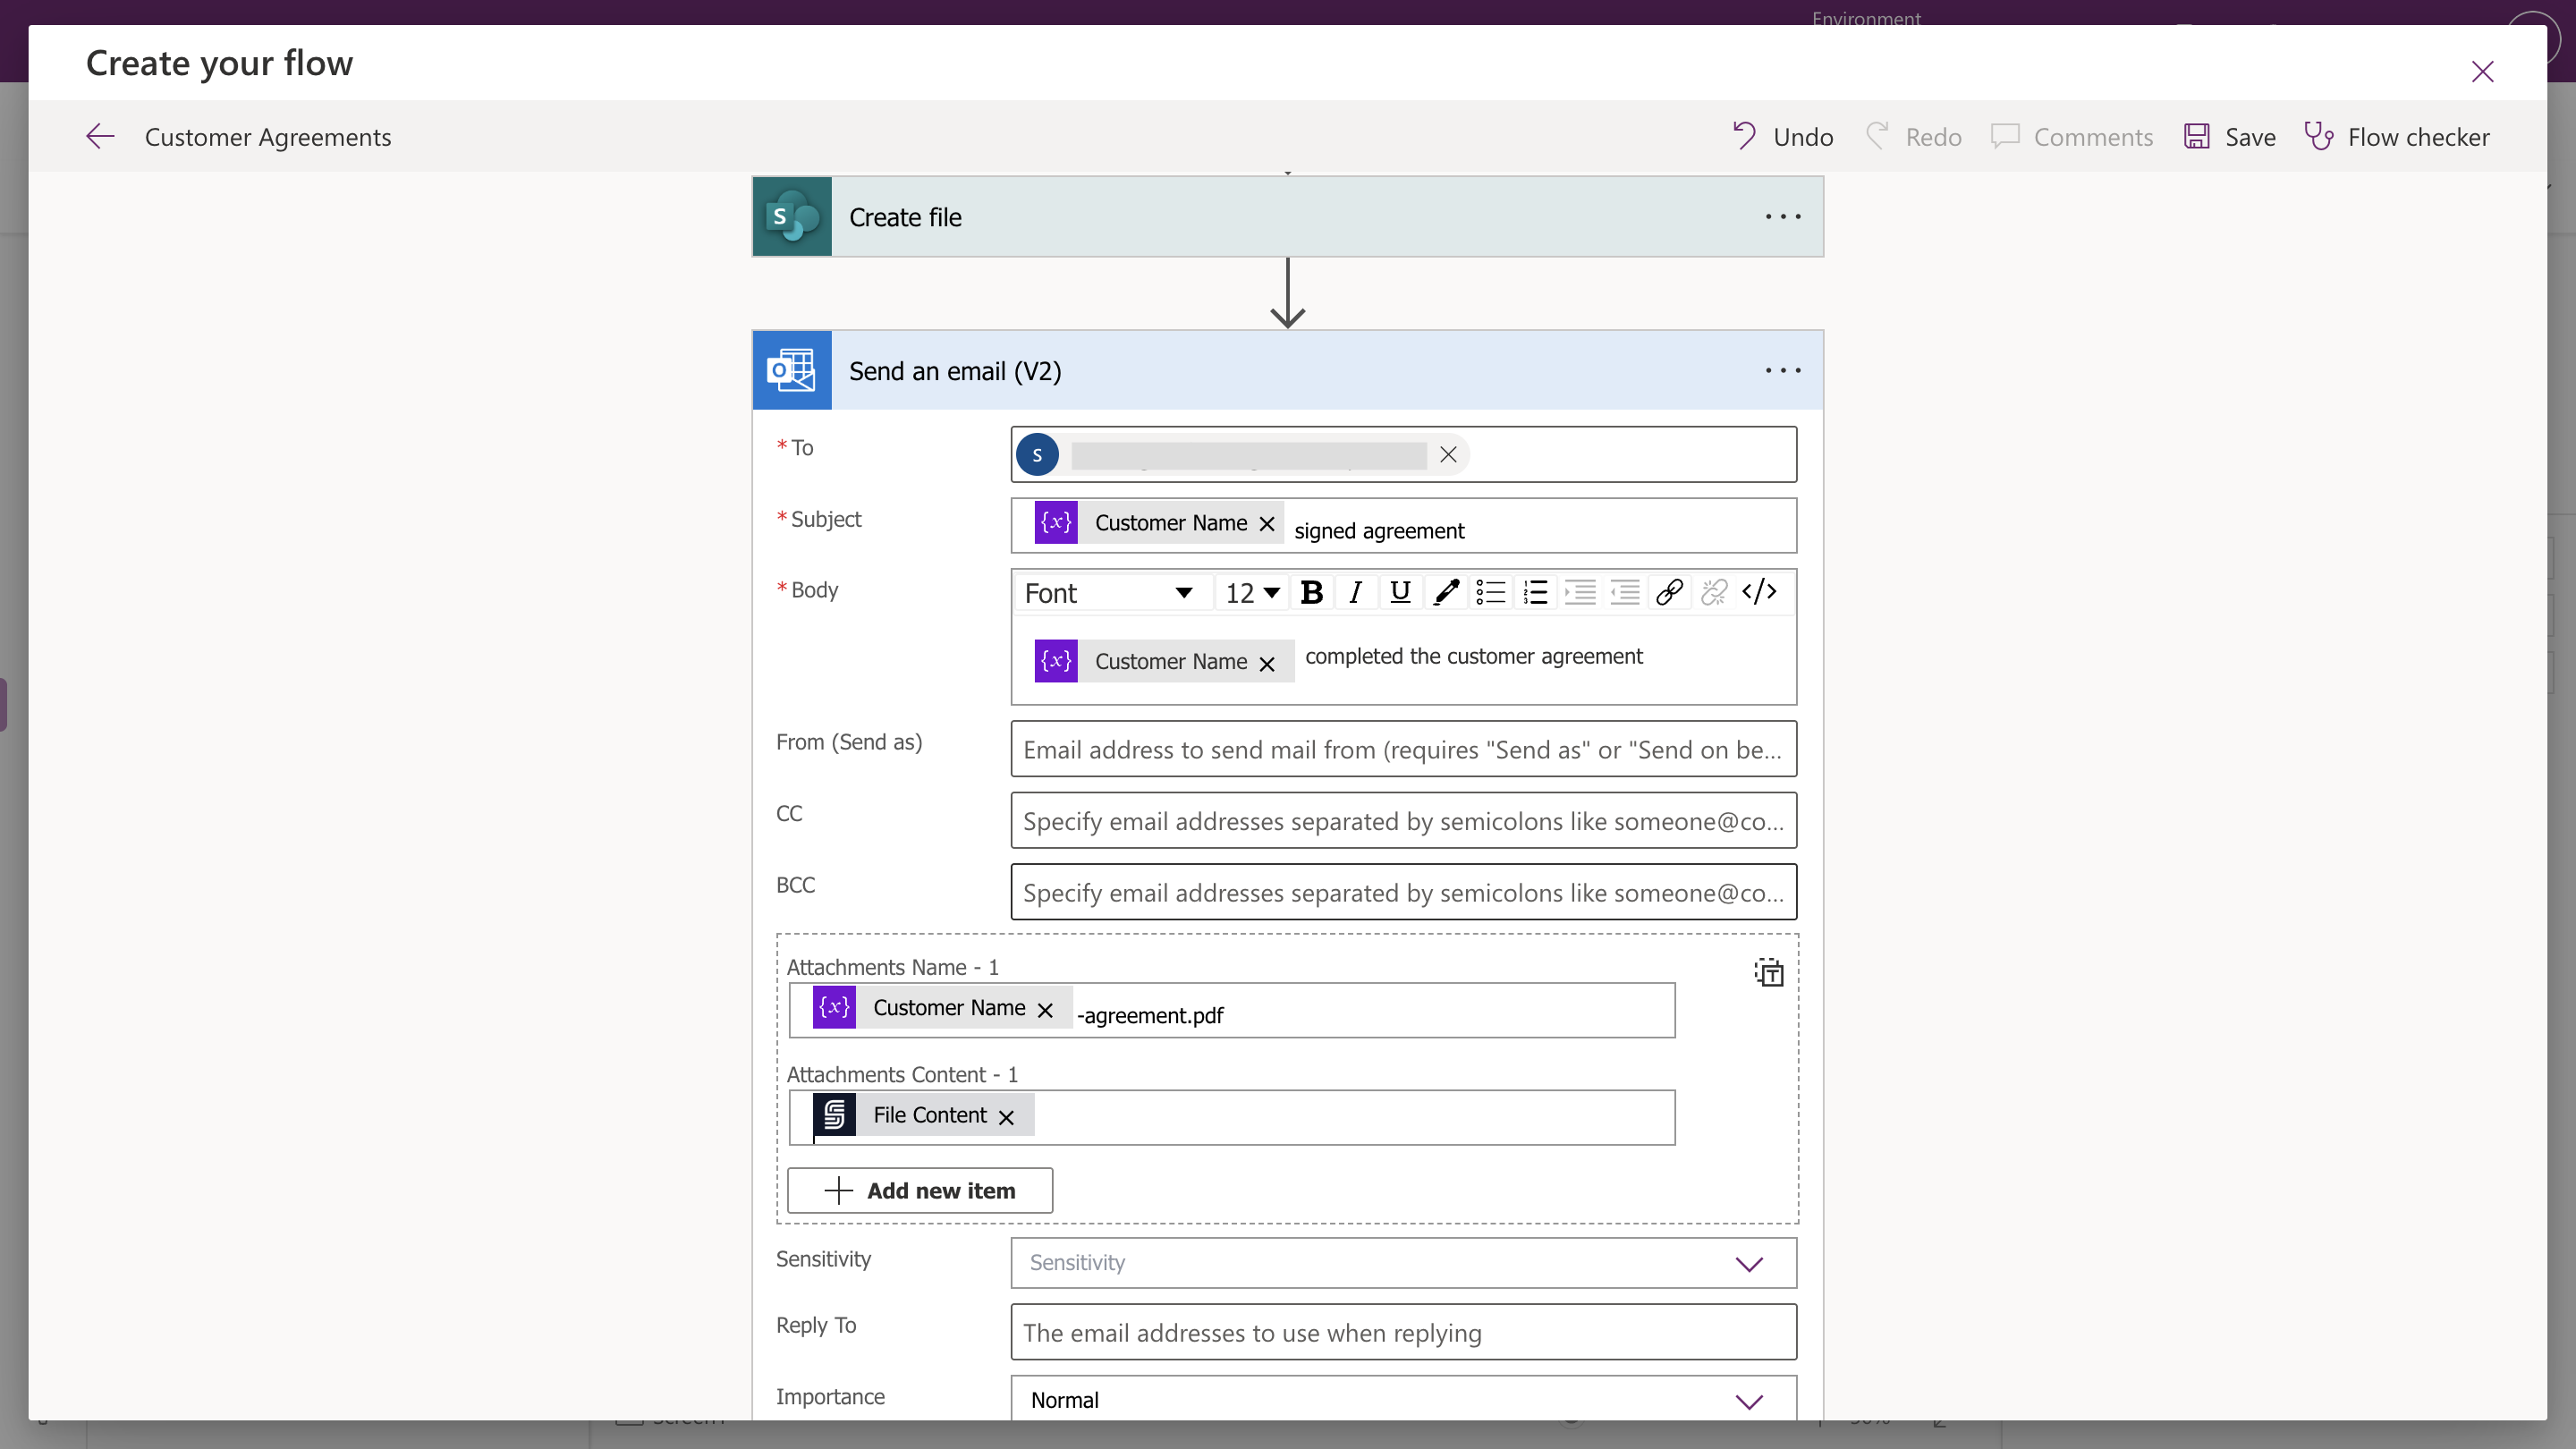
5.3 Save the Signed Contract to SharePoint
Save the signed document for record-keeping.- Add the “Create File” action (SharePoint connector).
- Select the Site Address and Folder Path.
-
Set the File Name (ending in
.pdf). -
Map File Content from the deliverable.

5.4 Notify the Business via Email
Automatically inform the business that the contract has been signed and saved.- Add the “Send an Email” action (Outlook connector).
- Configure the email recipient, subject, and message.
-
Attach the signed contract file from dynamic content.
5.5 Save the Flow
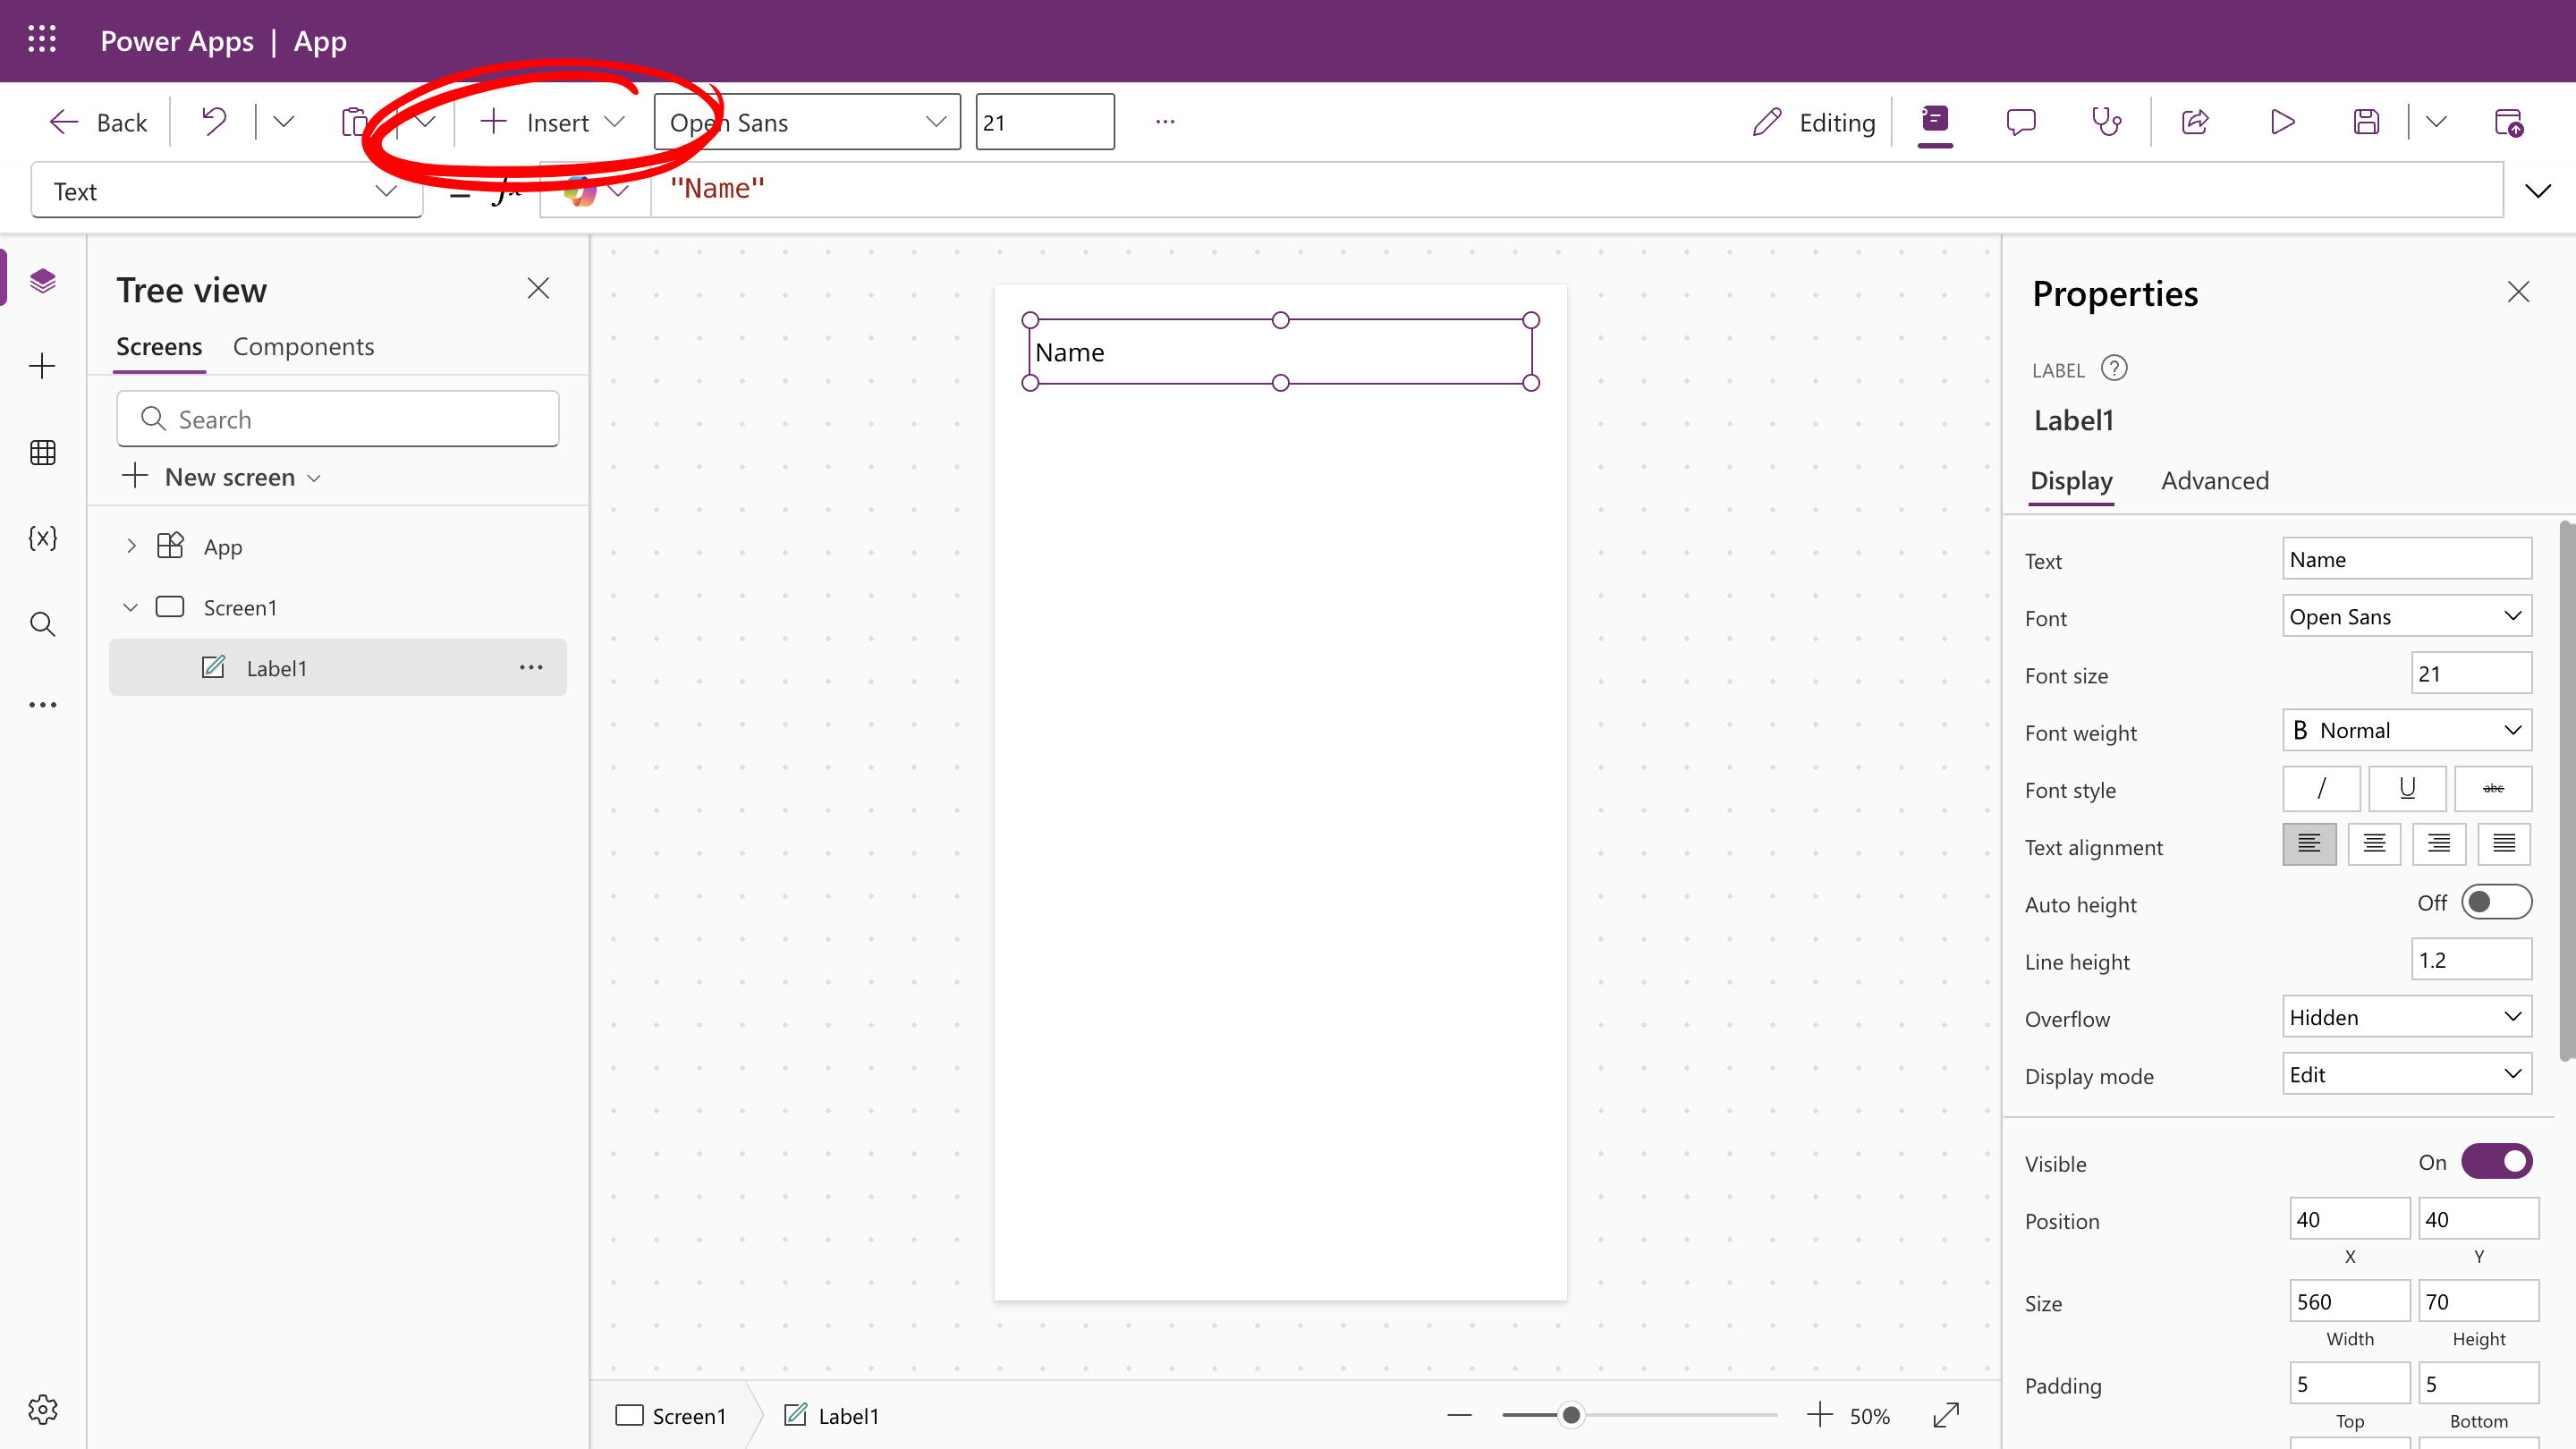
Save the flow by clicking the Save button in the top left corner. This will save the flow to Power Automate and add it to the Power App.Step 6: Create the Text Inputs in Power Apps
Create the text inputs in the Power App to collect the customer details.- Select Insert in the top menu bar and then select Label.
-
Change the Text value of this label to “Name:” You can do this in either the top function bar or through the Text property in the right-hand menu.
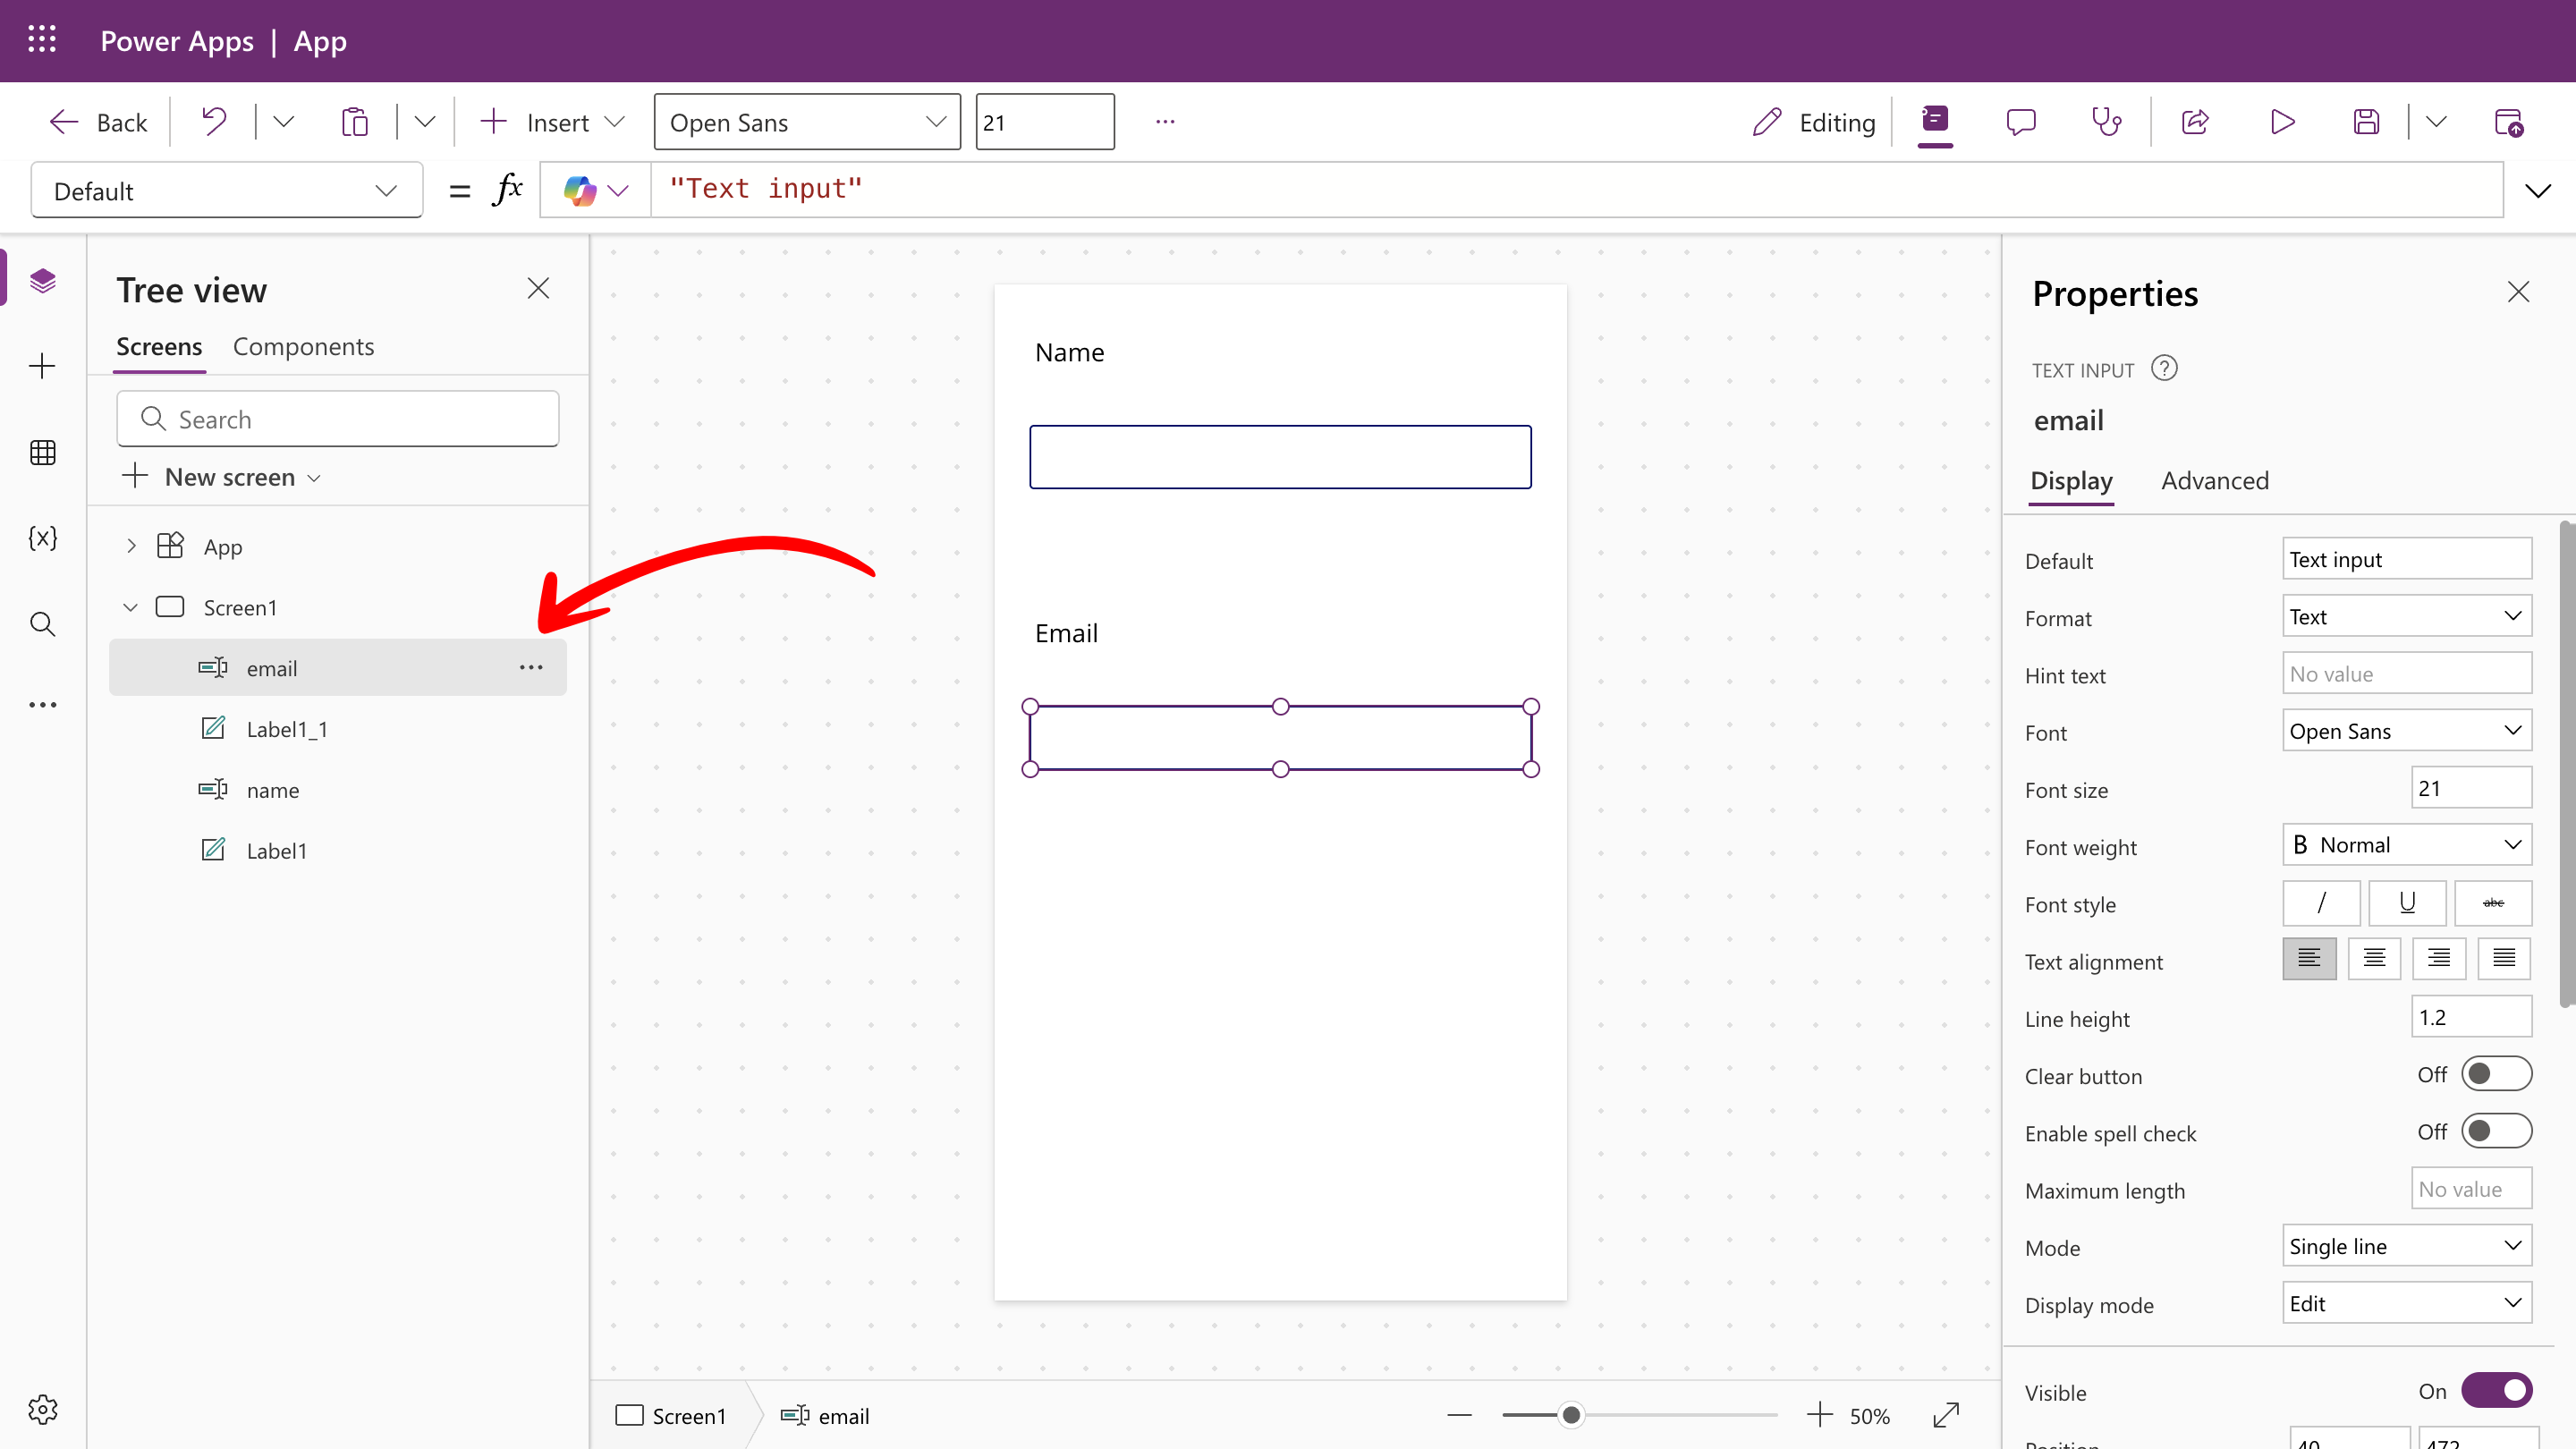
- Select Input from the top menu bar and select Text input from the drop-down menu.
-
Repeat these steps to create the other text input fields for the other variable (
Customer Email). Tip: Select the text input bar. Notice the element name has been highlighted in the left-hand Tree view. Click the three dots on this element and Rename it to match the text label (in this case, “Name”). This will make it easier to identify this element later when you reference its value to trigger the Flow.
-
Select Button from the top menu bar.
- Enter
Submitin the Text property on the right-hand menu. - Position this button below the text input fields.
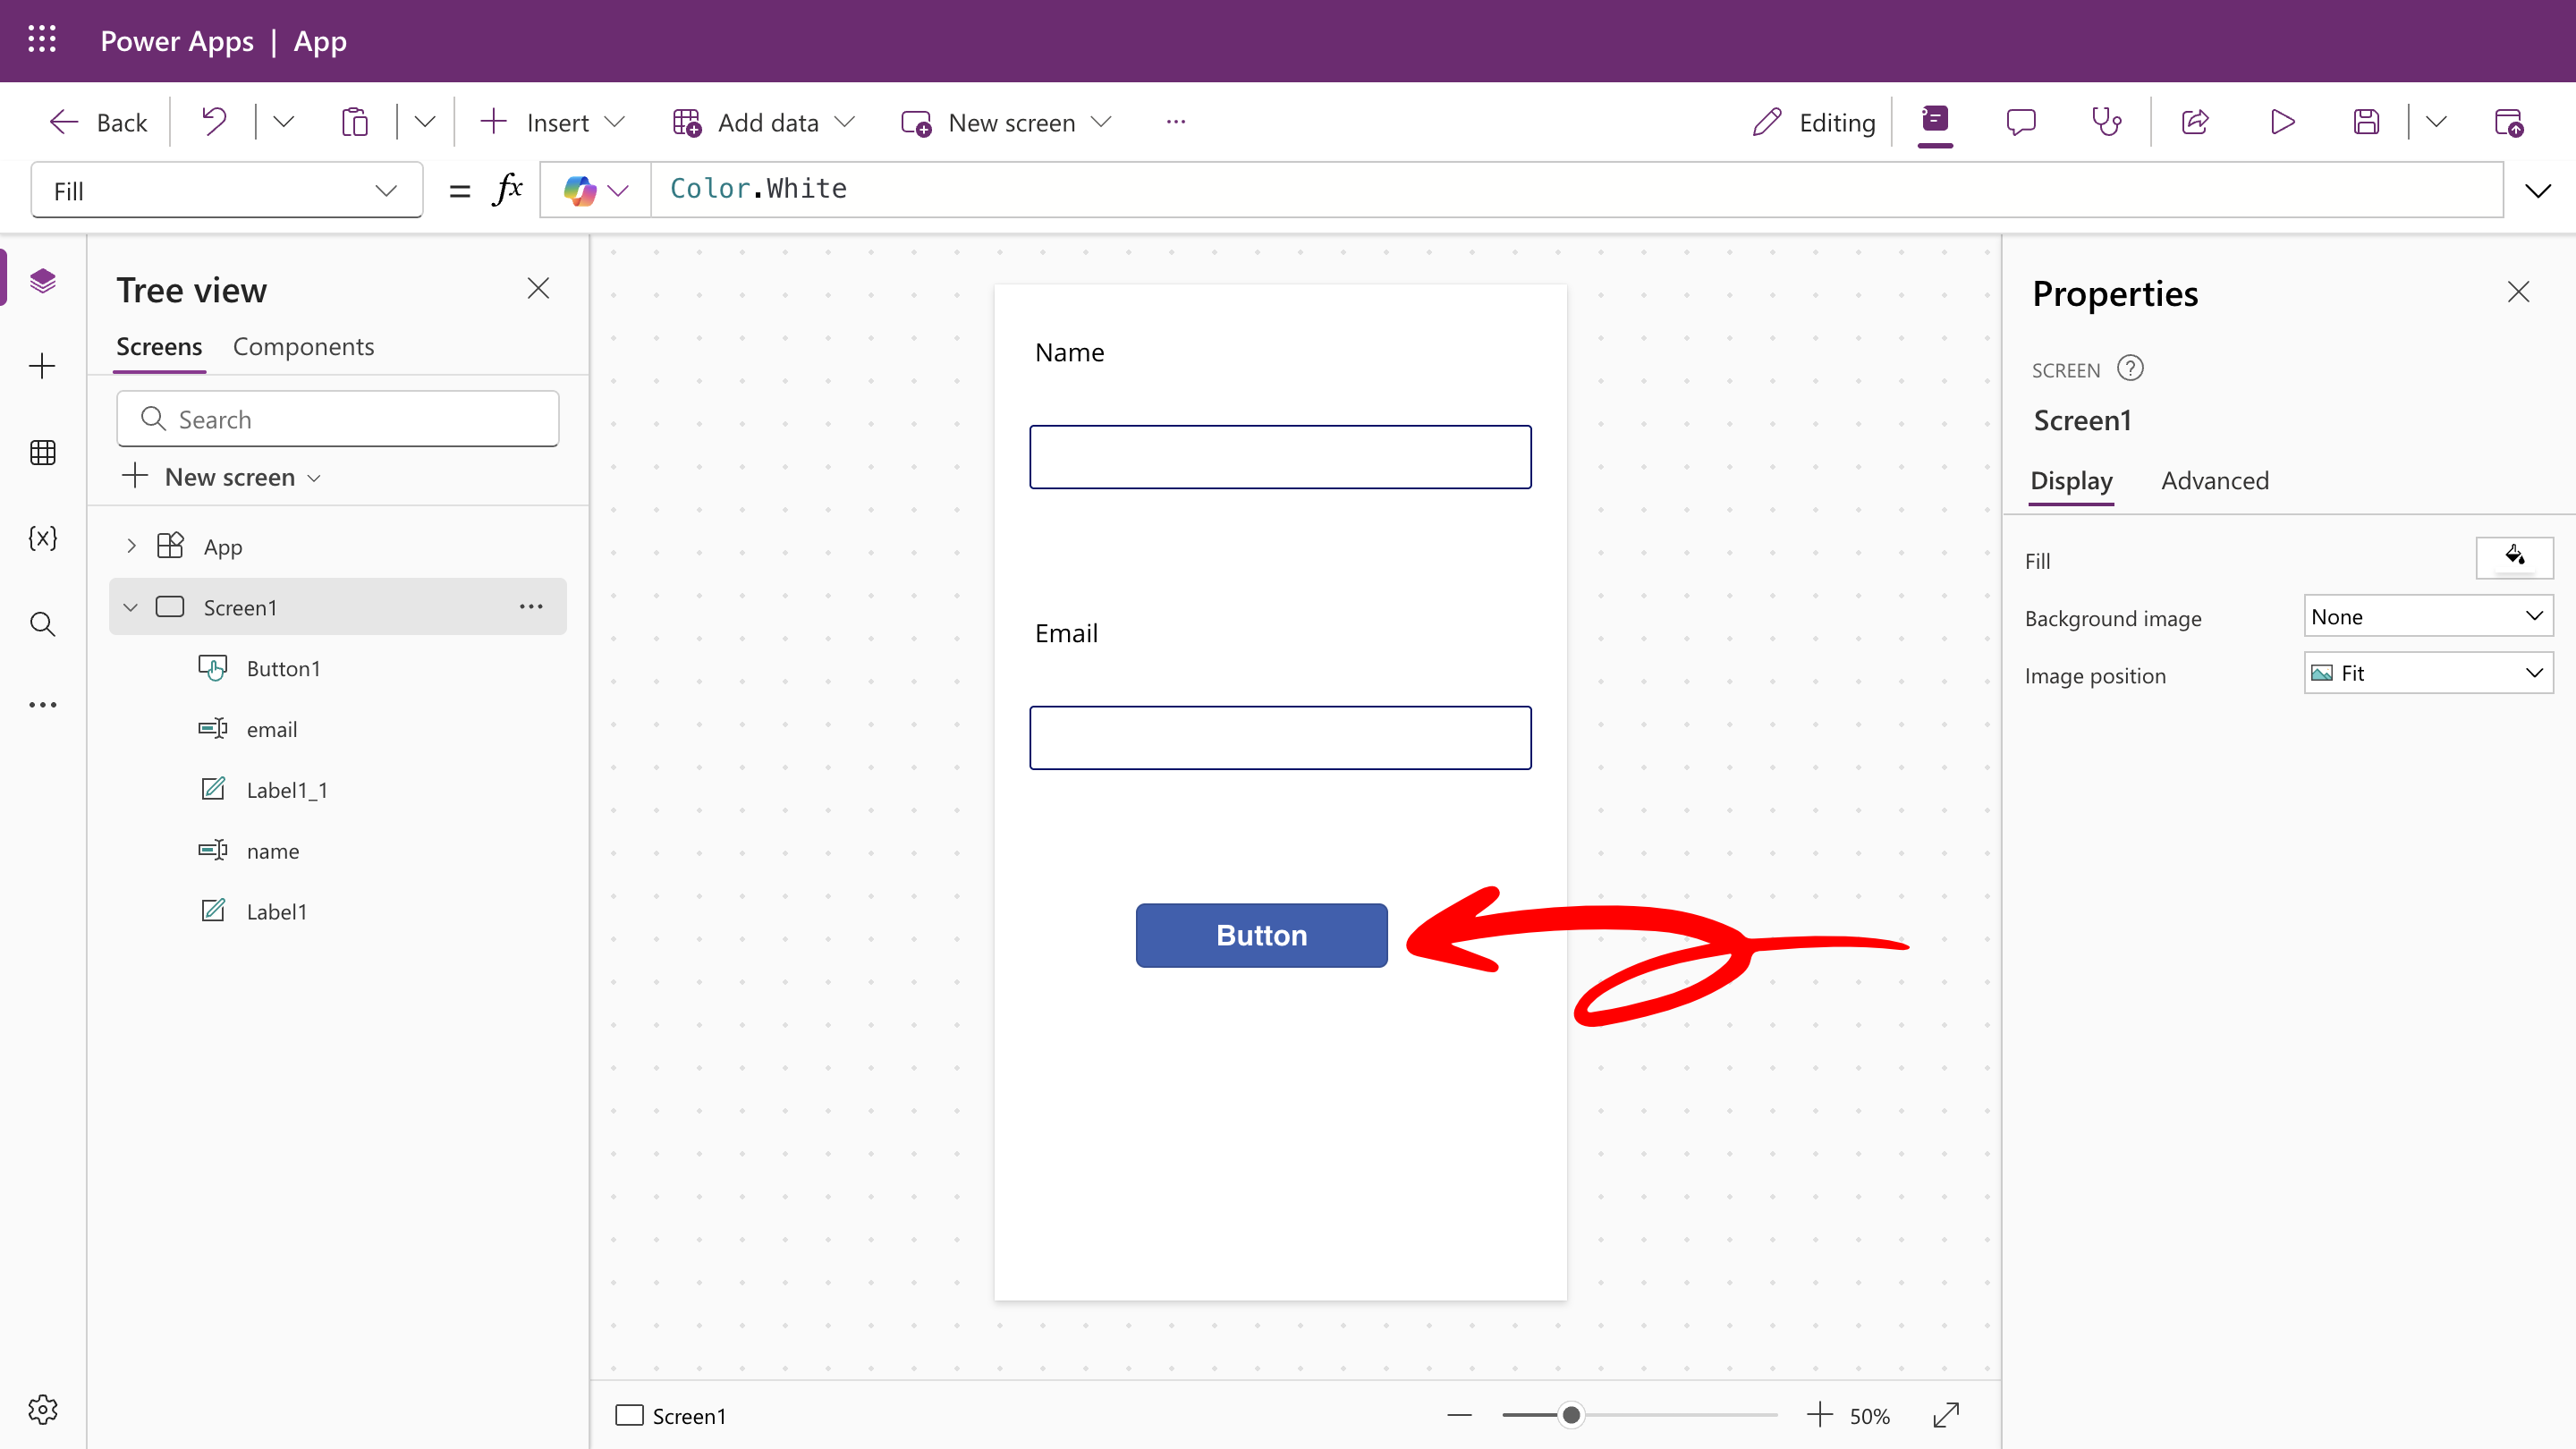
- Enter
- Select the newly created Submit button.
- Select OnSelect from the drop-down menu in the upper left-hand corner.
-
In the function bar, enter:
FlowName.Run(name.Text, email.Text). This triggers the Power Automate Flow and passes in the text input fields as parameters that reference the variables initialized in the Flow.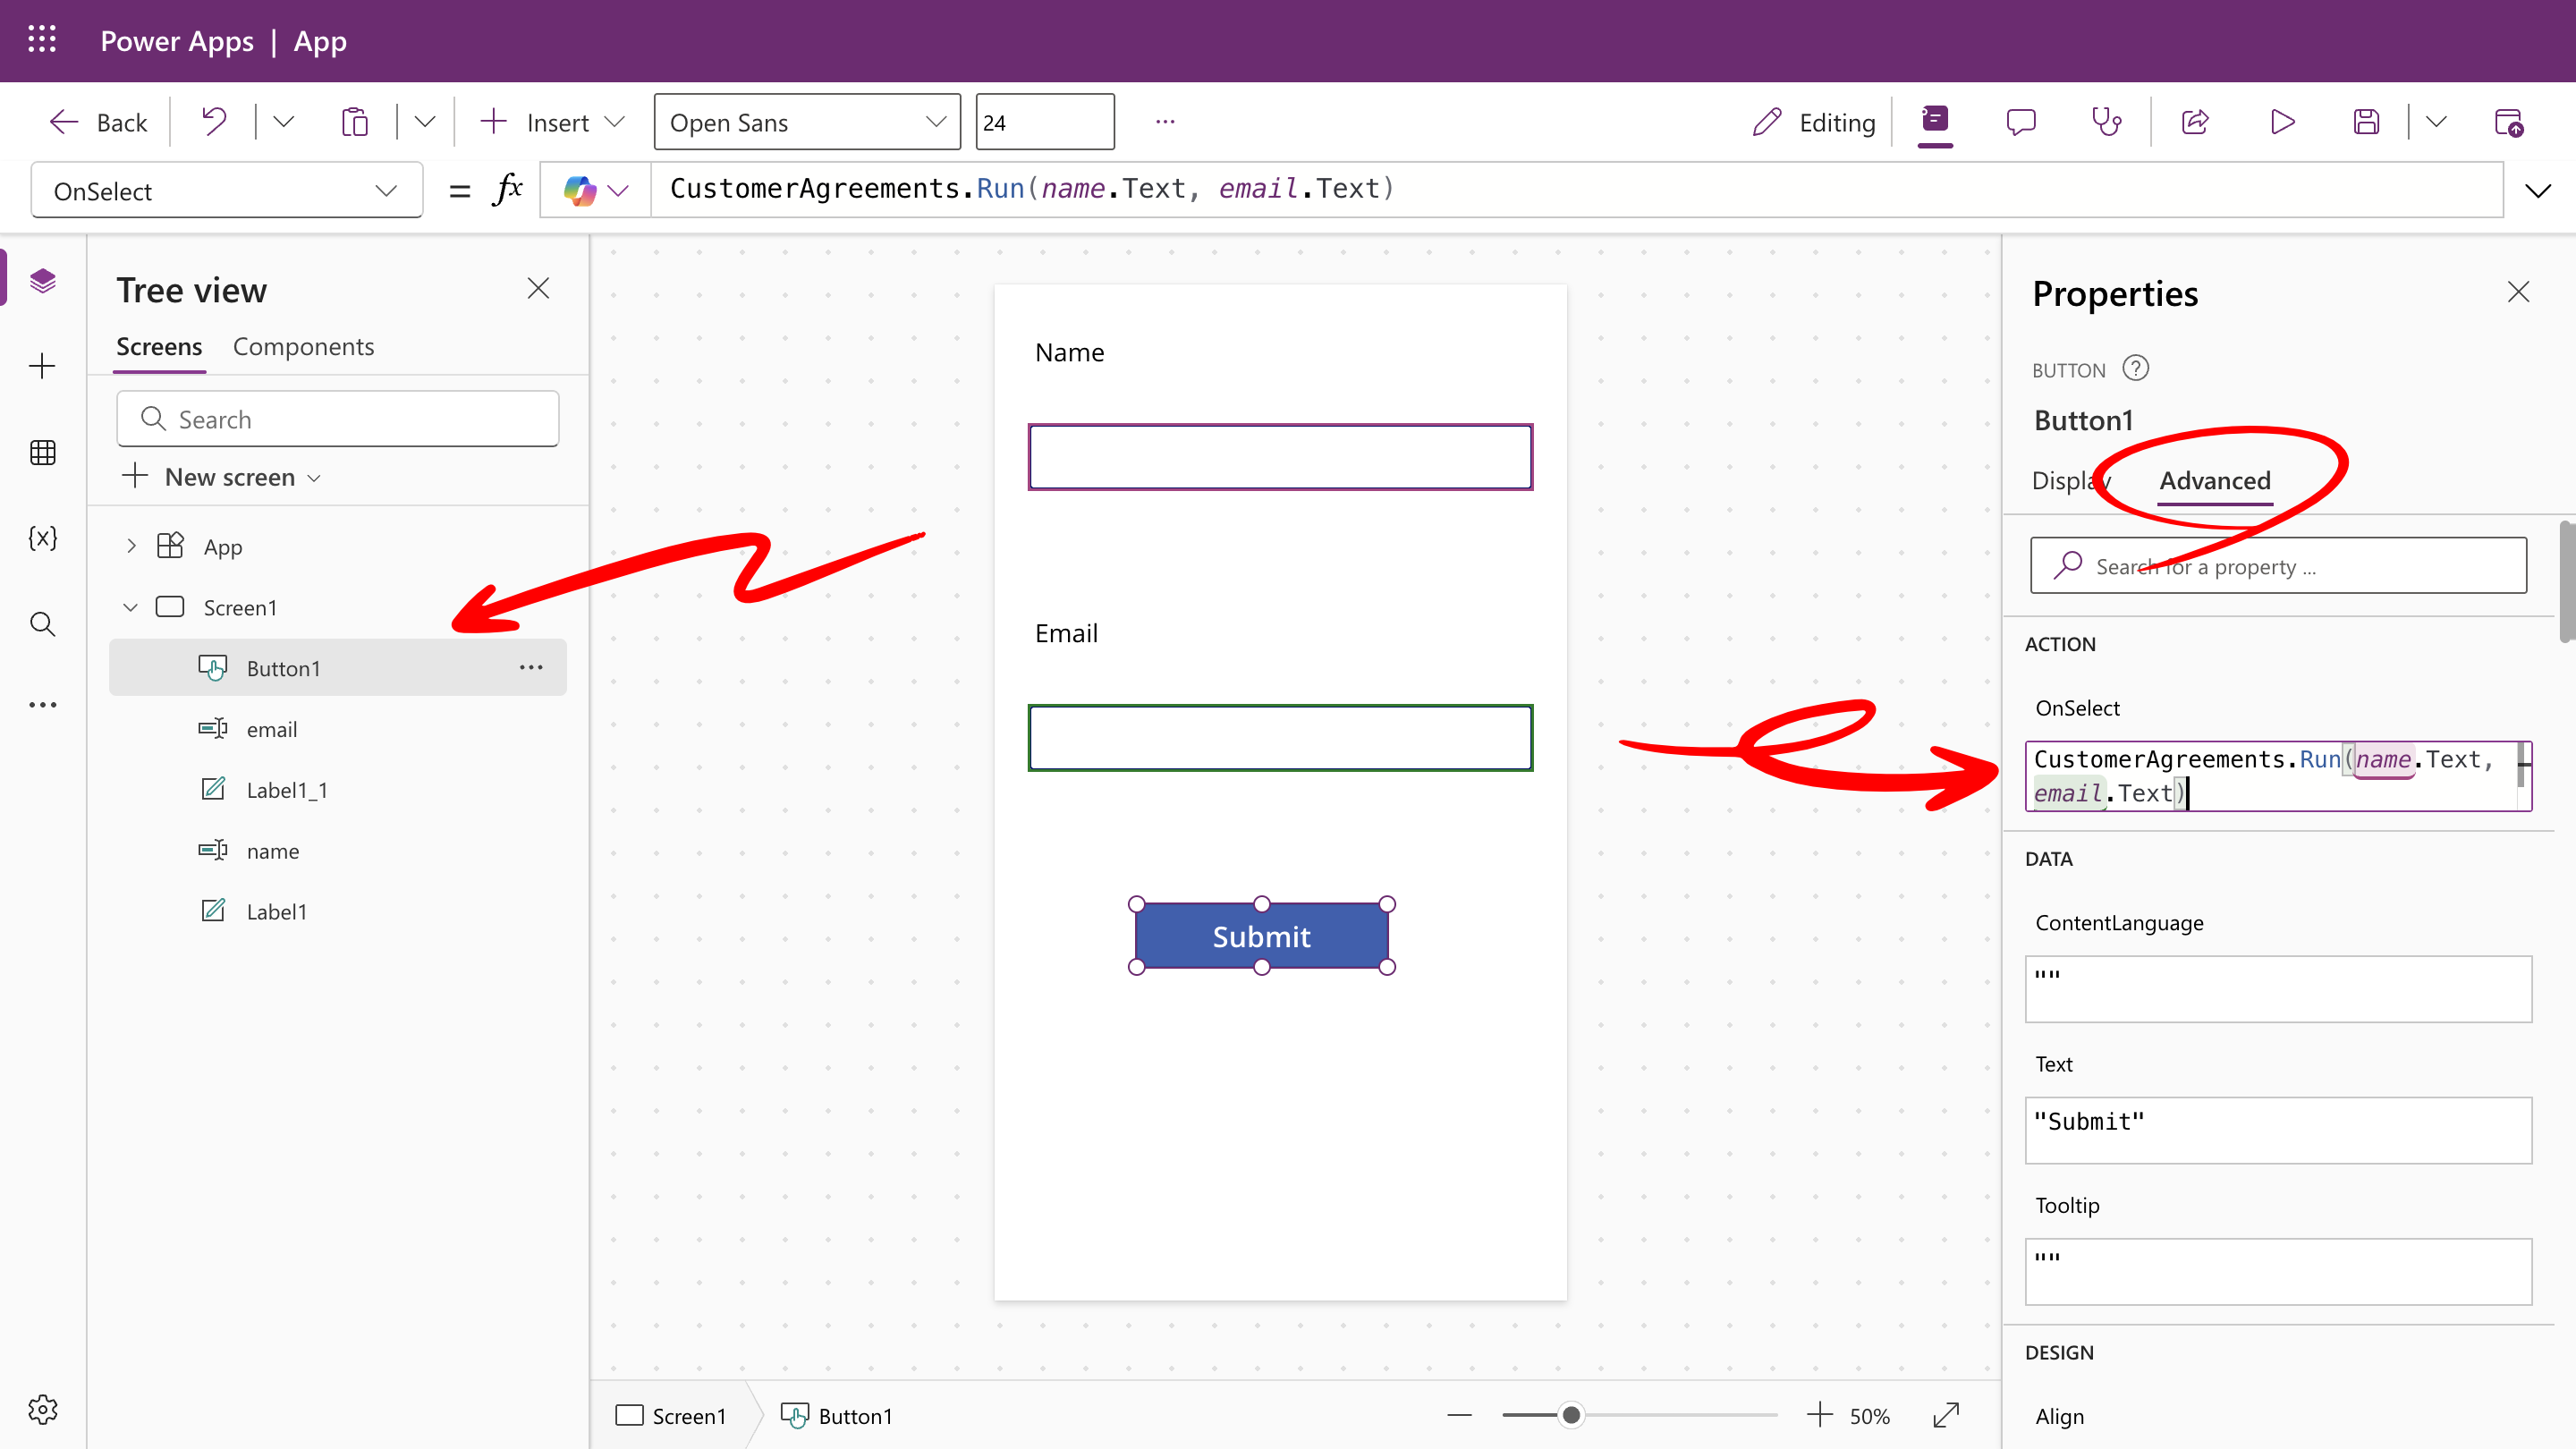
.Run()function call with the variable names as parameter placeholders. Make sure the order of the parameters matches the expected order to prevent invalid argument errors. Note: By renaming the text input field elements in Step 6, you can easily reference them when passing them into the.Run()function as parameters. Power Apps also color-codes each text input field to its corresponding parameter value.
Step 7: Test Your Automation
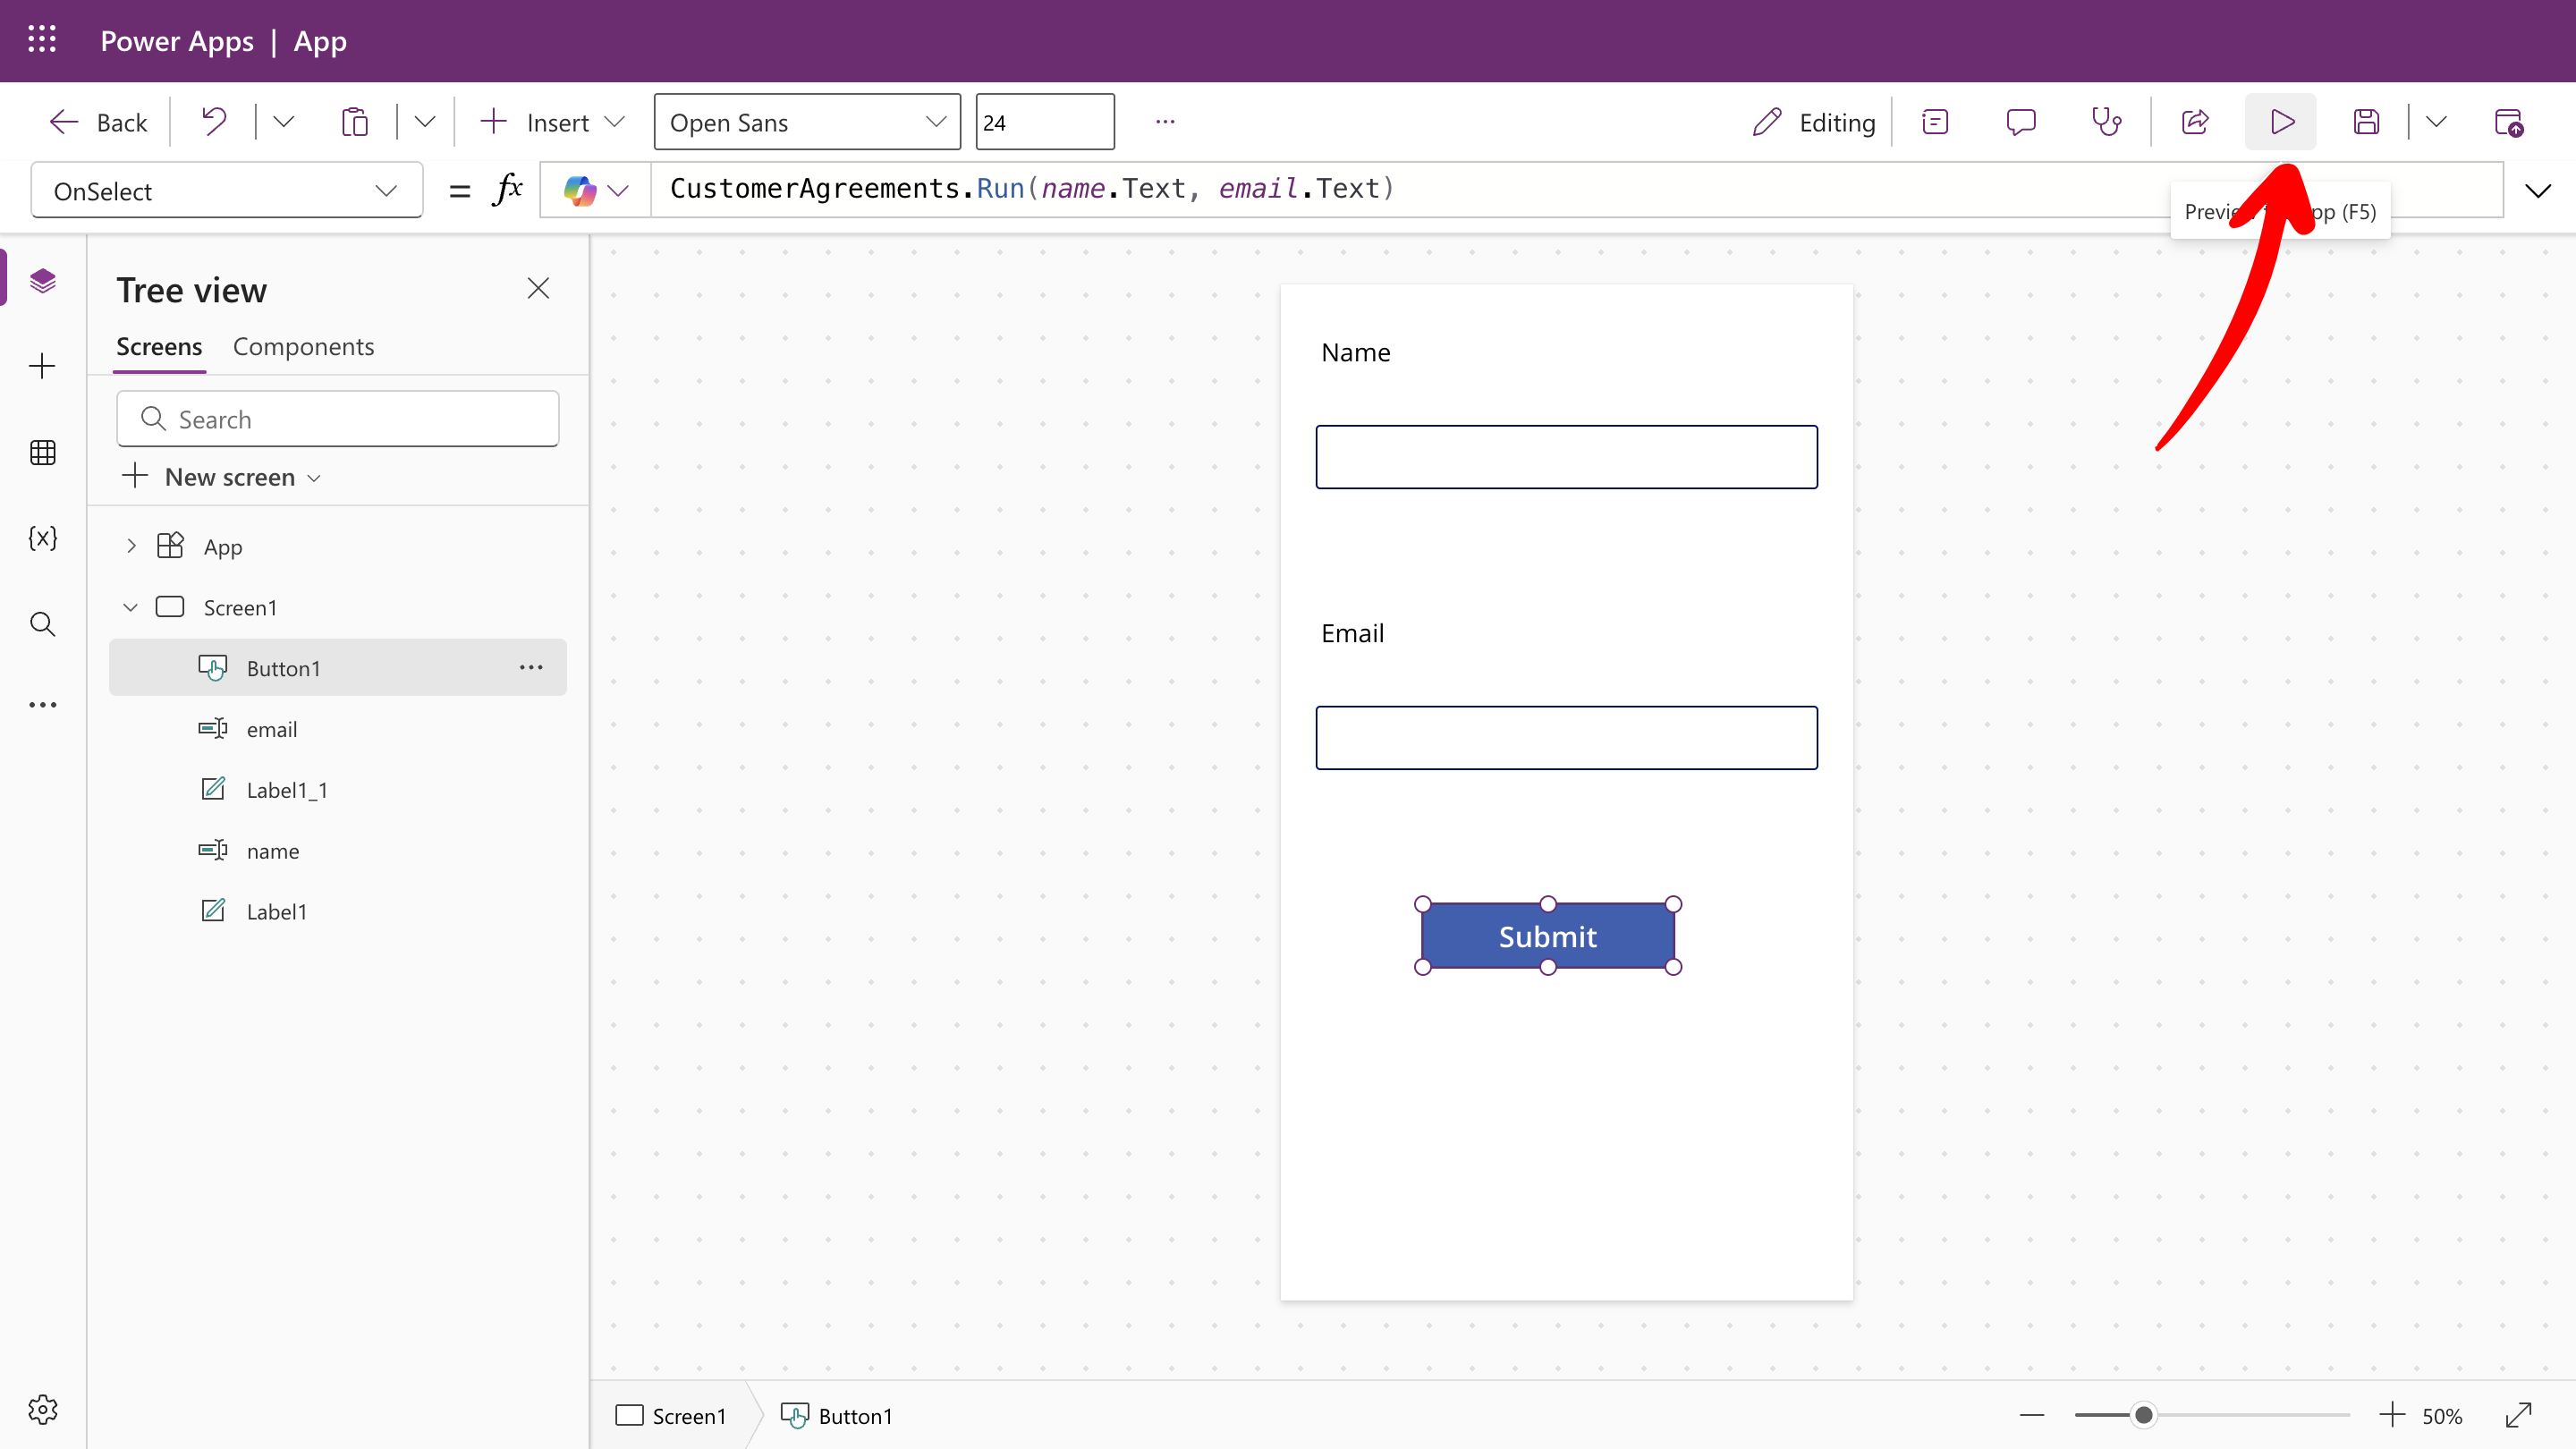
Finally, test the entire process end-to-end.-
Select the Preview button in the upper-right hand corner to fill out the text input fields with recipient information and trigger the Flow by clicking the Submit button.
-
Submit a test response by clicking on the Submit button.
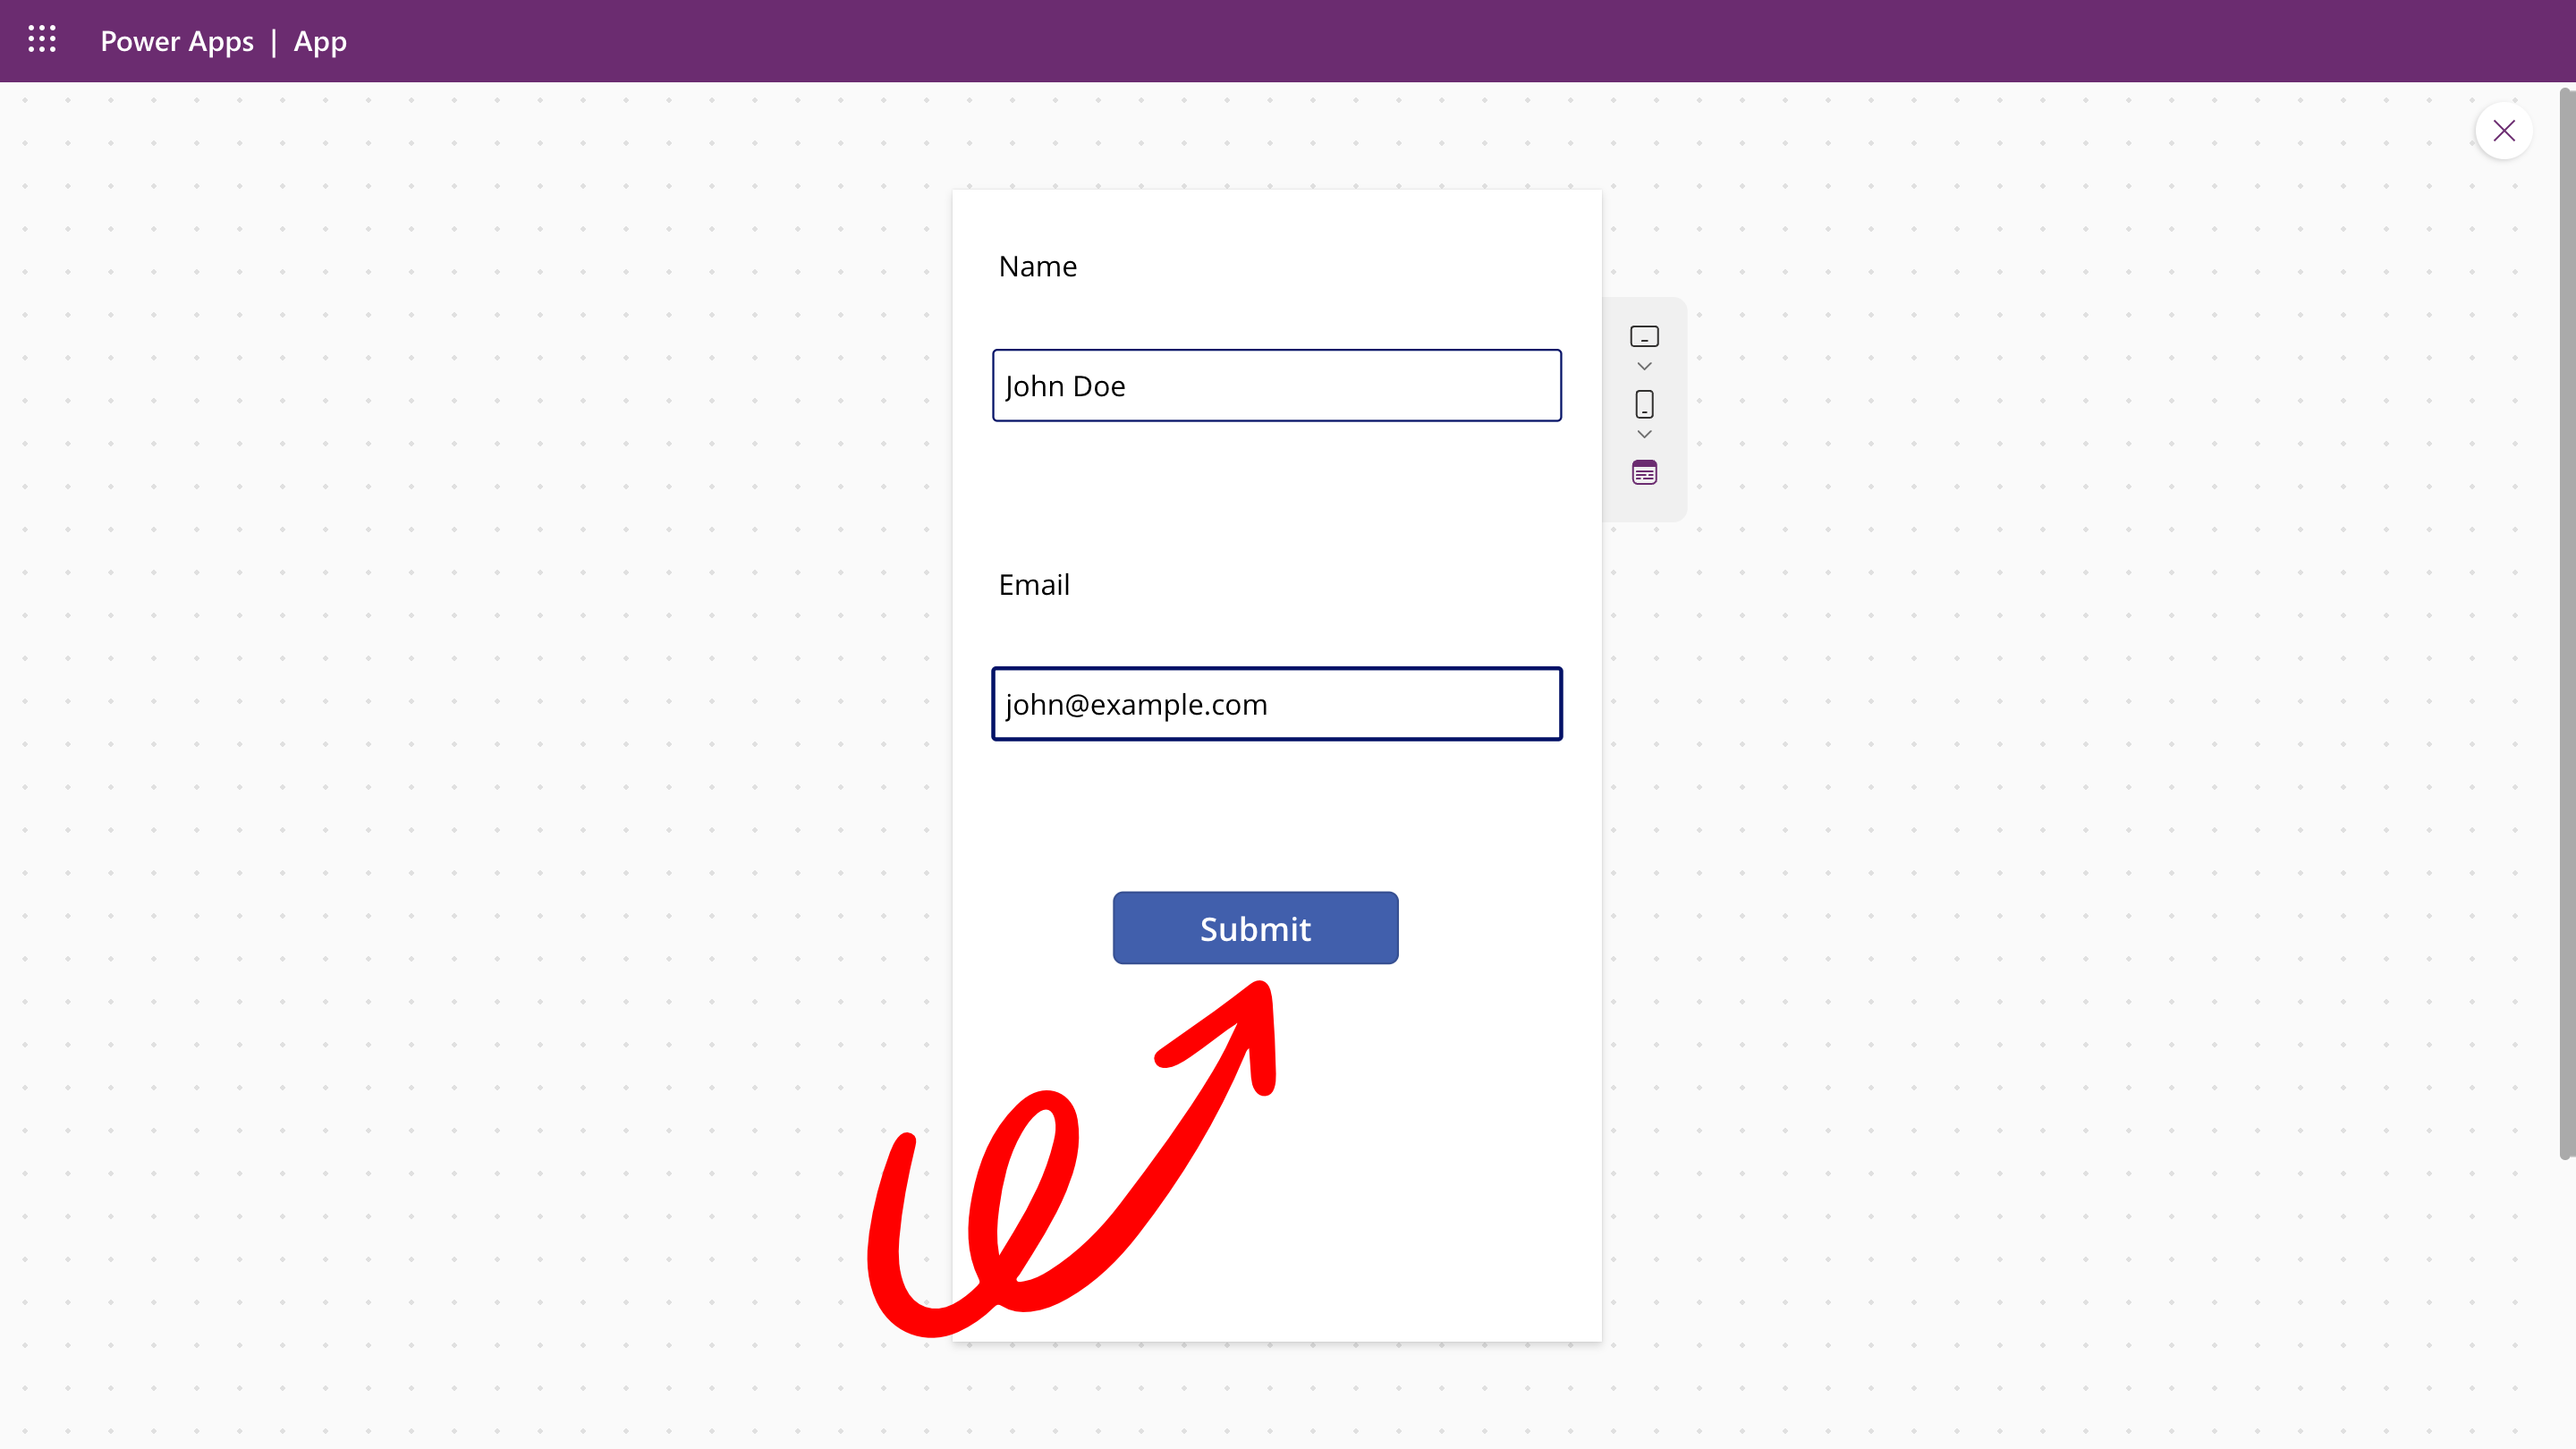
- Verify:
- The contract is sent to the customer via email.
- The signature process initiates correctly.
- The signed contract saves successfully in SharePoint.
- The business receives an email notification with the signed contract attached.
- Contract sent successfully.
- Customer receives and signs contract.
- Signed document stored correctly in SharePoint.
- Business receives email notification with attachment.
Troubleshooting & FAQ
Common Issues
- API Key Errors: Ensure your SignatureAPI key is correct and authenticated.
- Dynamic Content Mapping: Double-check that placeholder names in your DOCX file match exactly with the dynamic content mappings in your flow.
- File Access Issues: Verify permissions and file paths in SharePoint.
Frequently Asked Questions
- What if the agreement is not sent? Check your SignatureAPI dashboard for errors and verify the recipient details. Also confirm that the Power Apps trigger is passing parameters correctly to the flow.
-
Can I add more fields to the Power Apps form?
Yes. Add additional text inputs in Power Apps, initialize corresponding variables in the flow, and map them to DOCX template placeholders. Update the
.Run()function call to include the new parameters in the correct order. - How do I handle multiple signers? Add additional Add Recipient and Add a Place - Signature actions in your flow for each signer. Each signer needs a unique recipient key that matches the corresponding placeholders in your DOCX template.
-
Can I use a gallery or dropdown instead of text inputs?
Yes. Power Apps supports various input controls. As long as you pass the correct
.Textor.Selectedvalues into the.Run()function, the flow will receive the data it needs.
Best Practices and Security
- Always securely manage API keys.
- Regularly check flow runs in Power Automate for any errors.
- Document any flow or template changes for future reference.
Additional Resources
- SignatureAPI Documentation
- Microsoft Power Apps Documentation
- Power Automate Community
- SharePoint Documentation