Documentation Index
Fetch the complete documentation index at: https://signatureapi-daf4ee54.mintlify.app/llms.txt
Use this file to discover all available pages before exploring further.
Overview
This tutorial walks you through embedding a SignatureAPI signature ceremony directly into a Microsoft Power Pages site. By combining Power Pages (for the customer-facing form), OneDrive (for template storage), and the SignatureAPI connector (for electronic signatures), you can let customers fill out a form and sign a document without ever leaving your website.What You’ll Learn
- How to trigger a Power Automate flow from a Power Pages form submission.
- How to retrieve and pre-fill a DOCX contract template stored in OneDrive.
- How to create and send a signature envelope using SignatureAPI.
- How to configure a ceremony with custom authentication for embedding.
- How to edit the Power Pages source code to invoke the flow on form submission.
- How to embed the signature ceremony iframe in your Power Pages site.
The Problem
Many companies need to collect information from customers and have them sign documents as part of the same workflow. Without automation, this process introduces several pain points:- Manual signature handling — customers must sign documents outside of the web experience, adding friction and delays.
- Disconnected user experience — the signature step happens on a separate page or platform, breaking the flow for the customer.
- No dynamic document generation — staff must manually insert customer details into contracts before sending them for signature.
How Automation Helps
- Automatically generates a personalized contract from a template using customer-submitted form data.
- Creates a signature envelope and recipient in SignatureAPI without manual intervention.
- Returns an embeddable ceremony URL so the customer can sign directly on your Power Pages site.
- Eliminates context-switching for the customer by keeping the entire process on a single page.
Requirements
Before starting, make sure you have:- Power Automate — to build the automated workflow.
- SignatureAPI account — for electronic signatures. You can obtain an API key from the SignatureAPI Dashboard.
- Power Pages — for hosting the customer-facing form and embedded ceremony.
- OneDrive / SharePoint — for storing your DOCX contract template.
Flow Overview
The automation process follows these steps:- Trigger: A Power Pages form submission starts the flow.
- Data Retrieval: Collect customer details from the form inputs and fetch the DOCX template from OneDrive.
- Signature Process: Create an envelope via SignatureAPI, add the recipient, attach the DOCX template, define the signature placement, and start the envelope.
- Ceremony Creation: Create a ceremony with custom authentication and return the embeddable URL to Power Pages.
Step-by-Step Tutorial
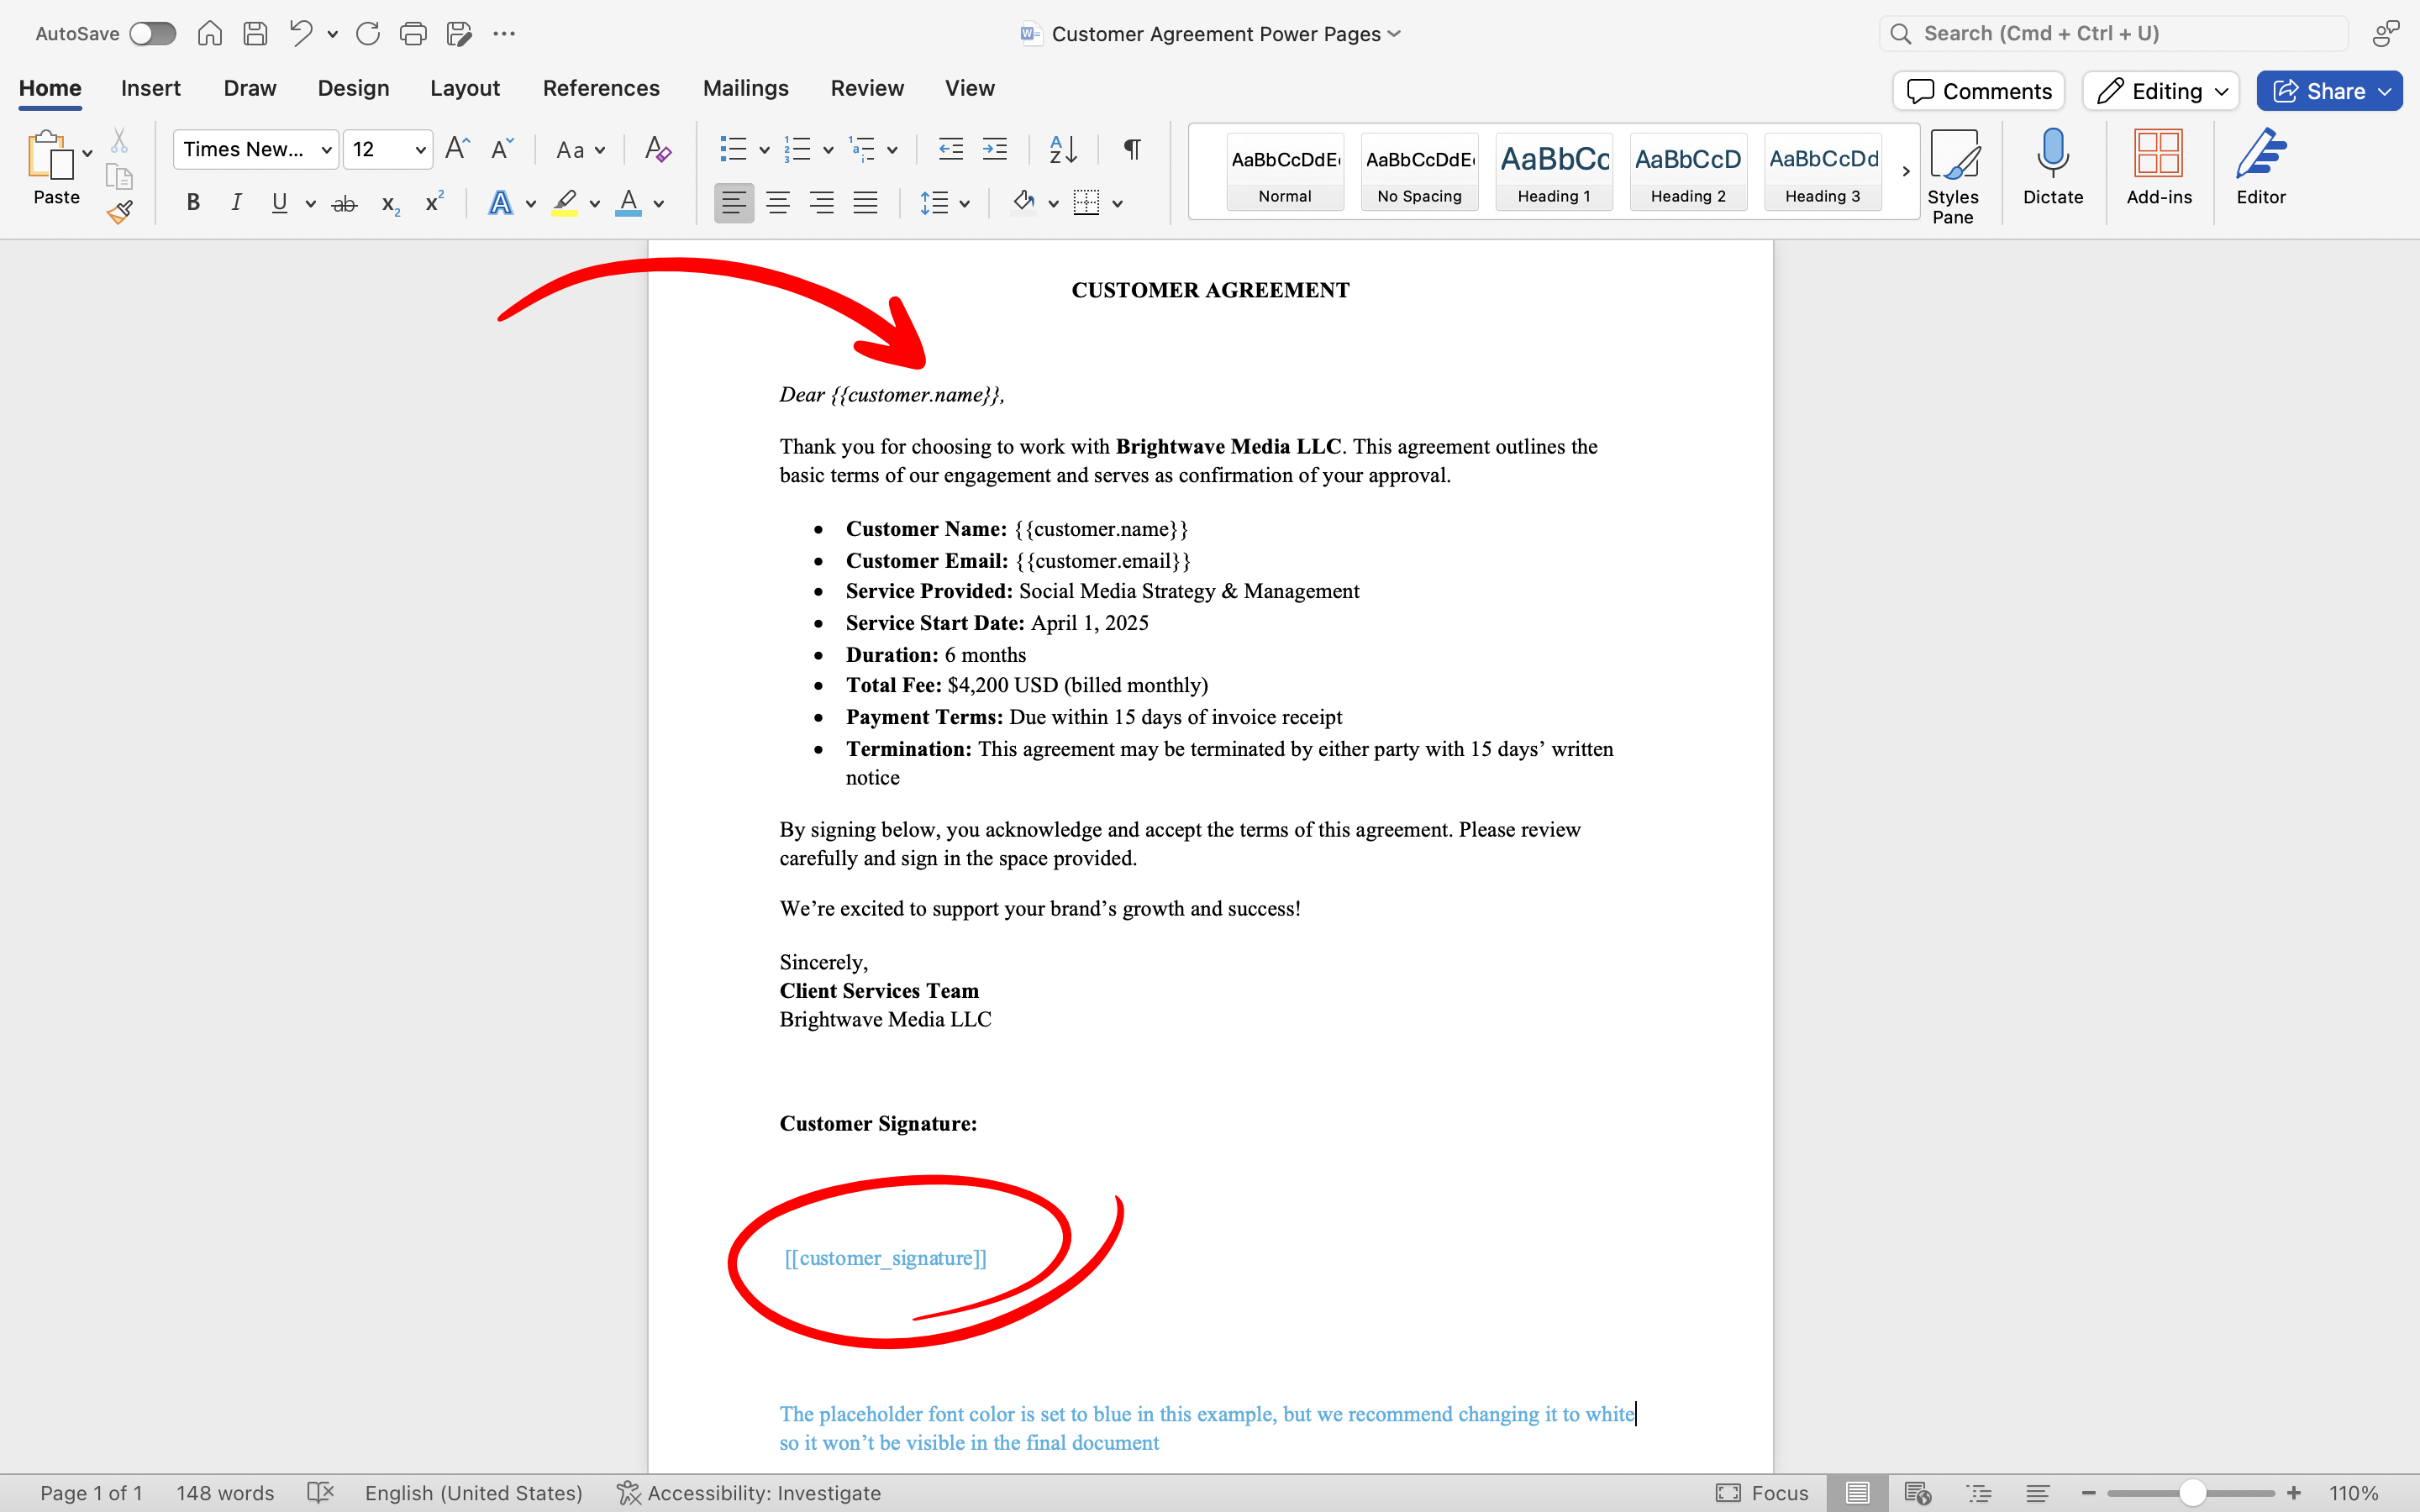
Follow these steps to automate your signature process using Power Pages, SignatureAPI, and Power Automate.Step 1: Prepare the Agreement Template
Create or update your agreement template by adding placeholders for dynamic fields and defining where the customer will sign. To prepare your template:- Open your existing customer agreement document (DOCX format) in Microsoft Word.
- Identify each place where customer details should be dynamically inserted (for example, name and email).
- Insert placeholders using double curly brackets around descriptive keys. Examples:
- Customer name:
{{customer.name}} - Customer email:
{{customer.email}}
- Customer name:
- Define the signature location by inserting a signature placeholder using double square brackets:
[[customer_signature]]
Dear{{customer.name}}, Please review and sign your agreement below:[[customer_signature]]
- Save your template and upload it to Documents in your SharePoint Site.
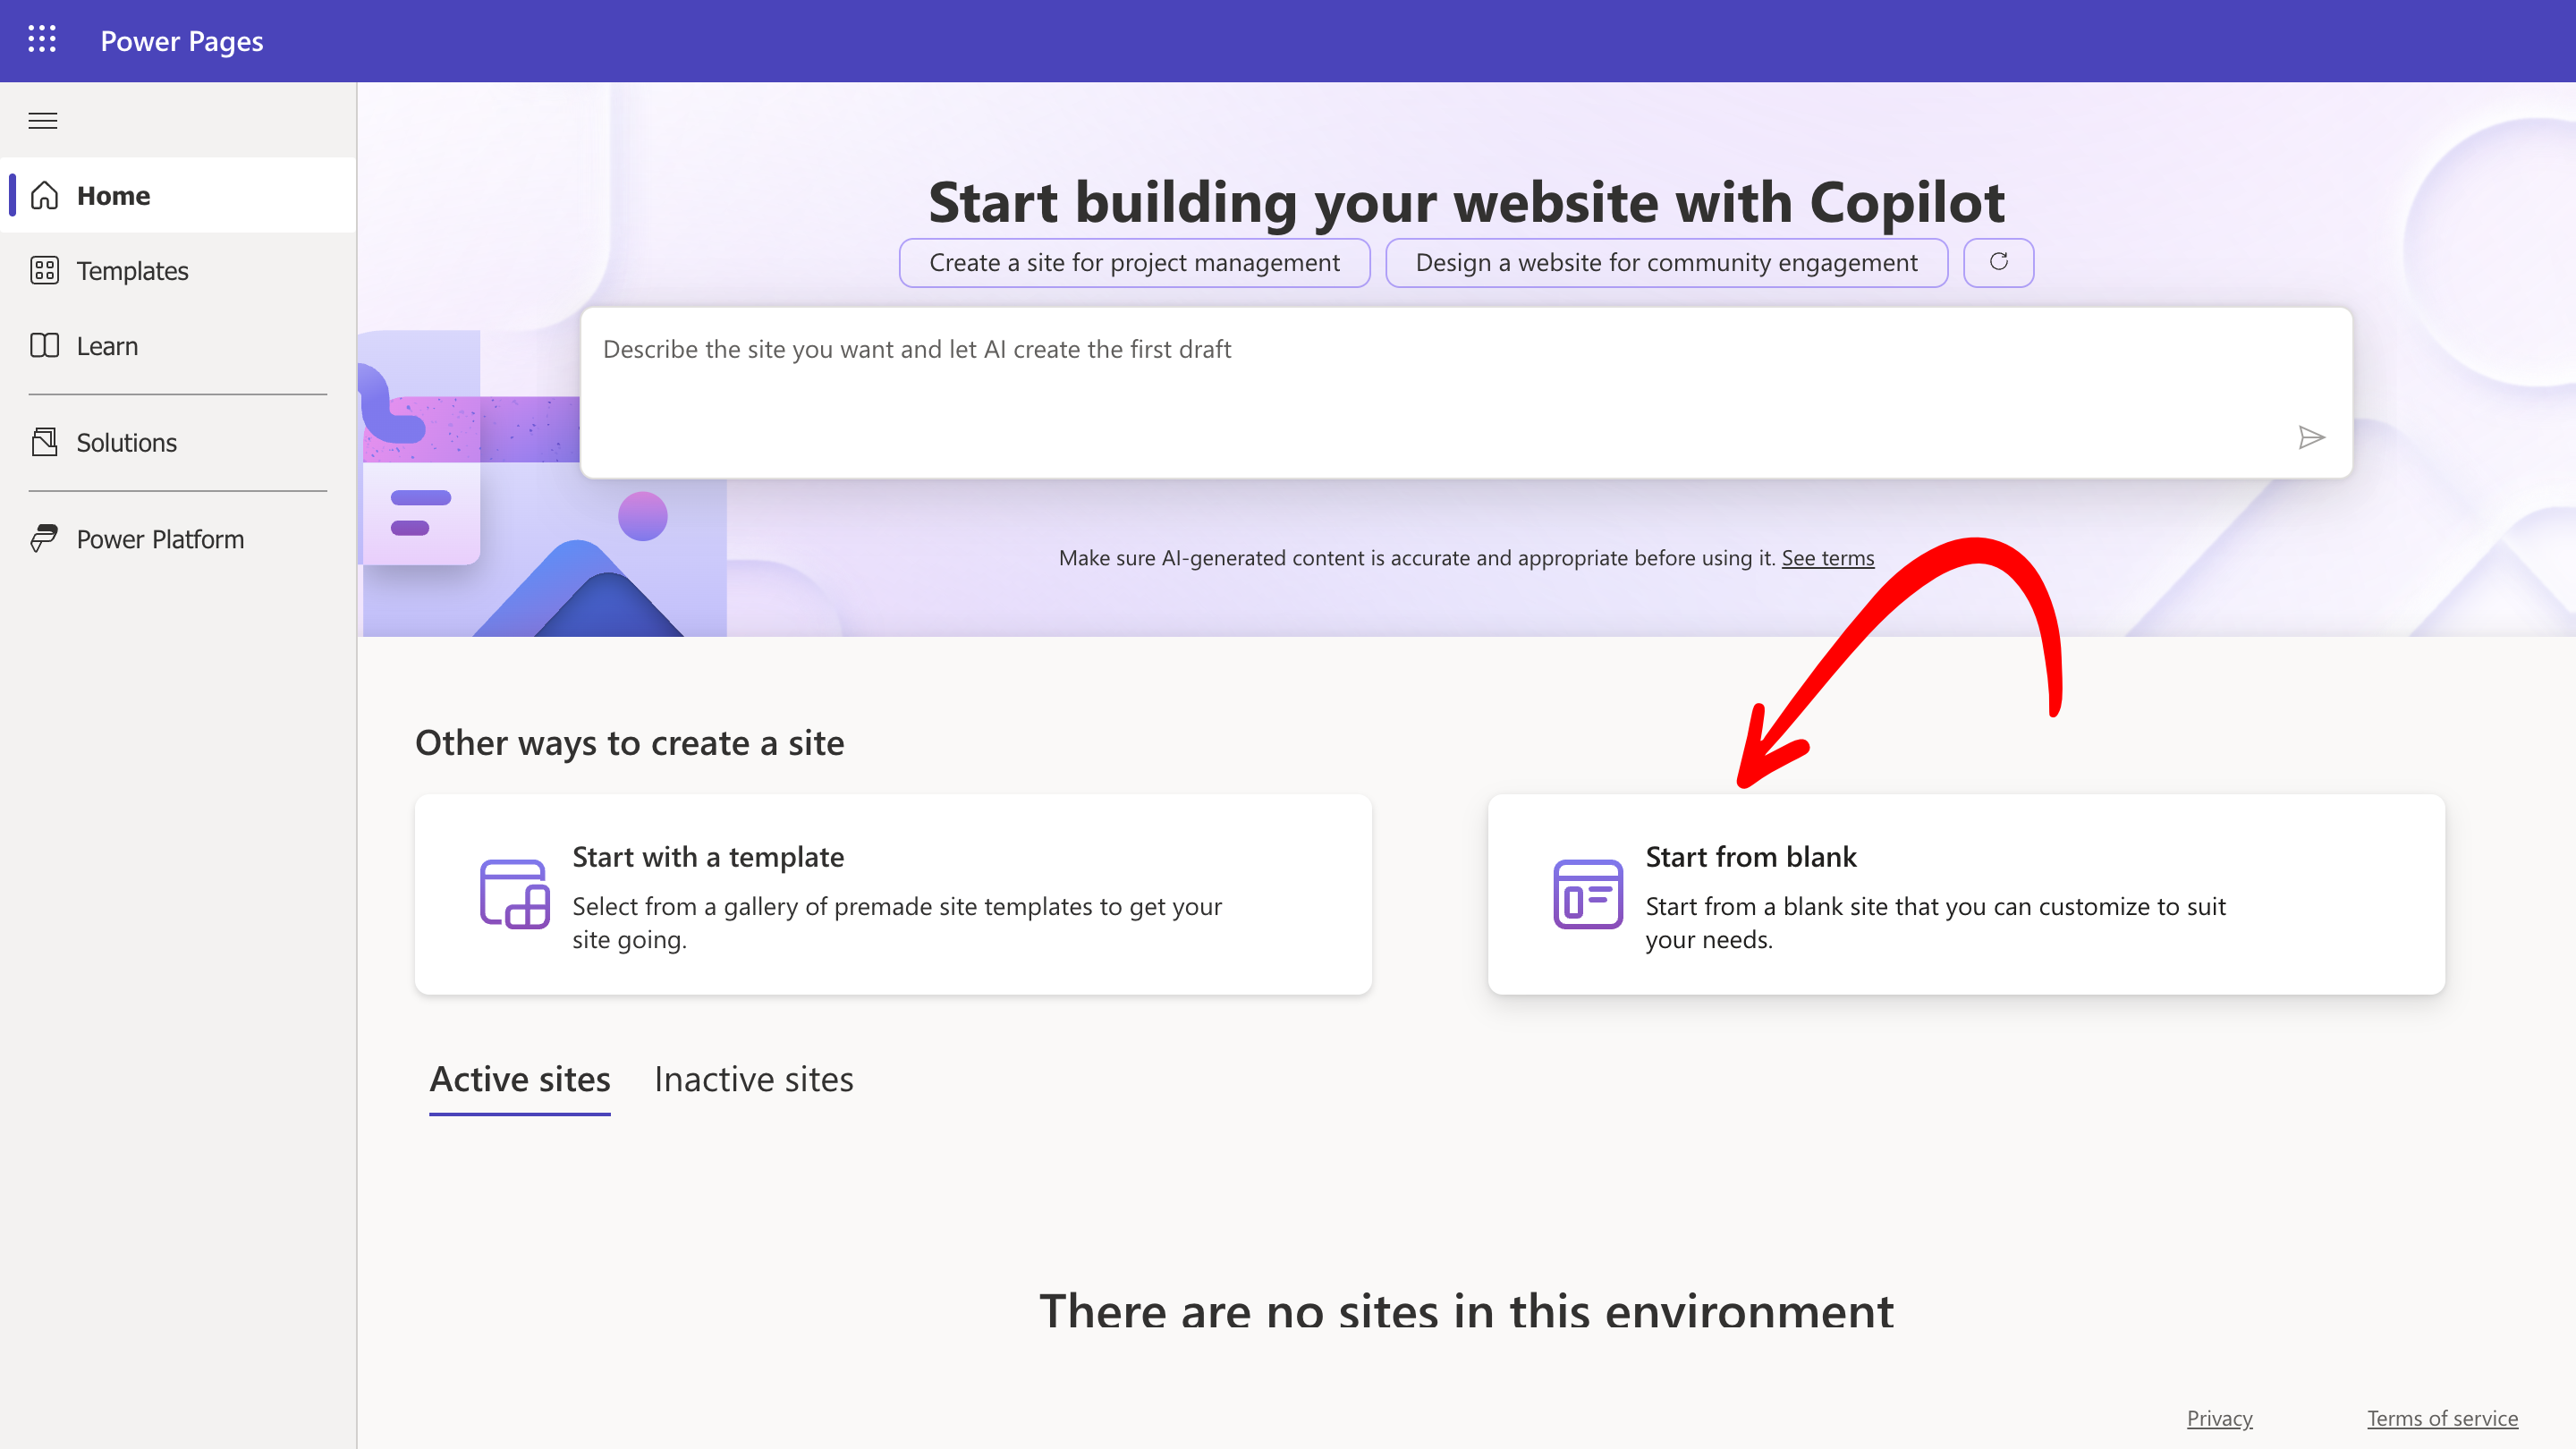
Step 2: Create the Power Pages Site
- Visit Power Pages and sign in.
-
From the left-hand menu bar, in the Home section, click Start from blank.
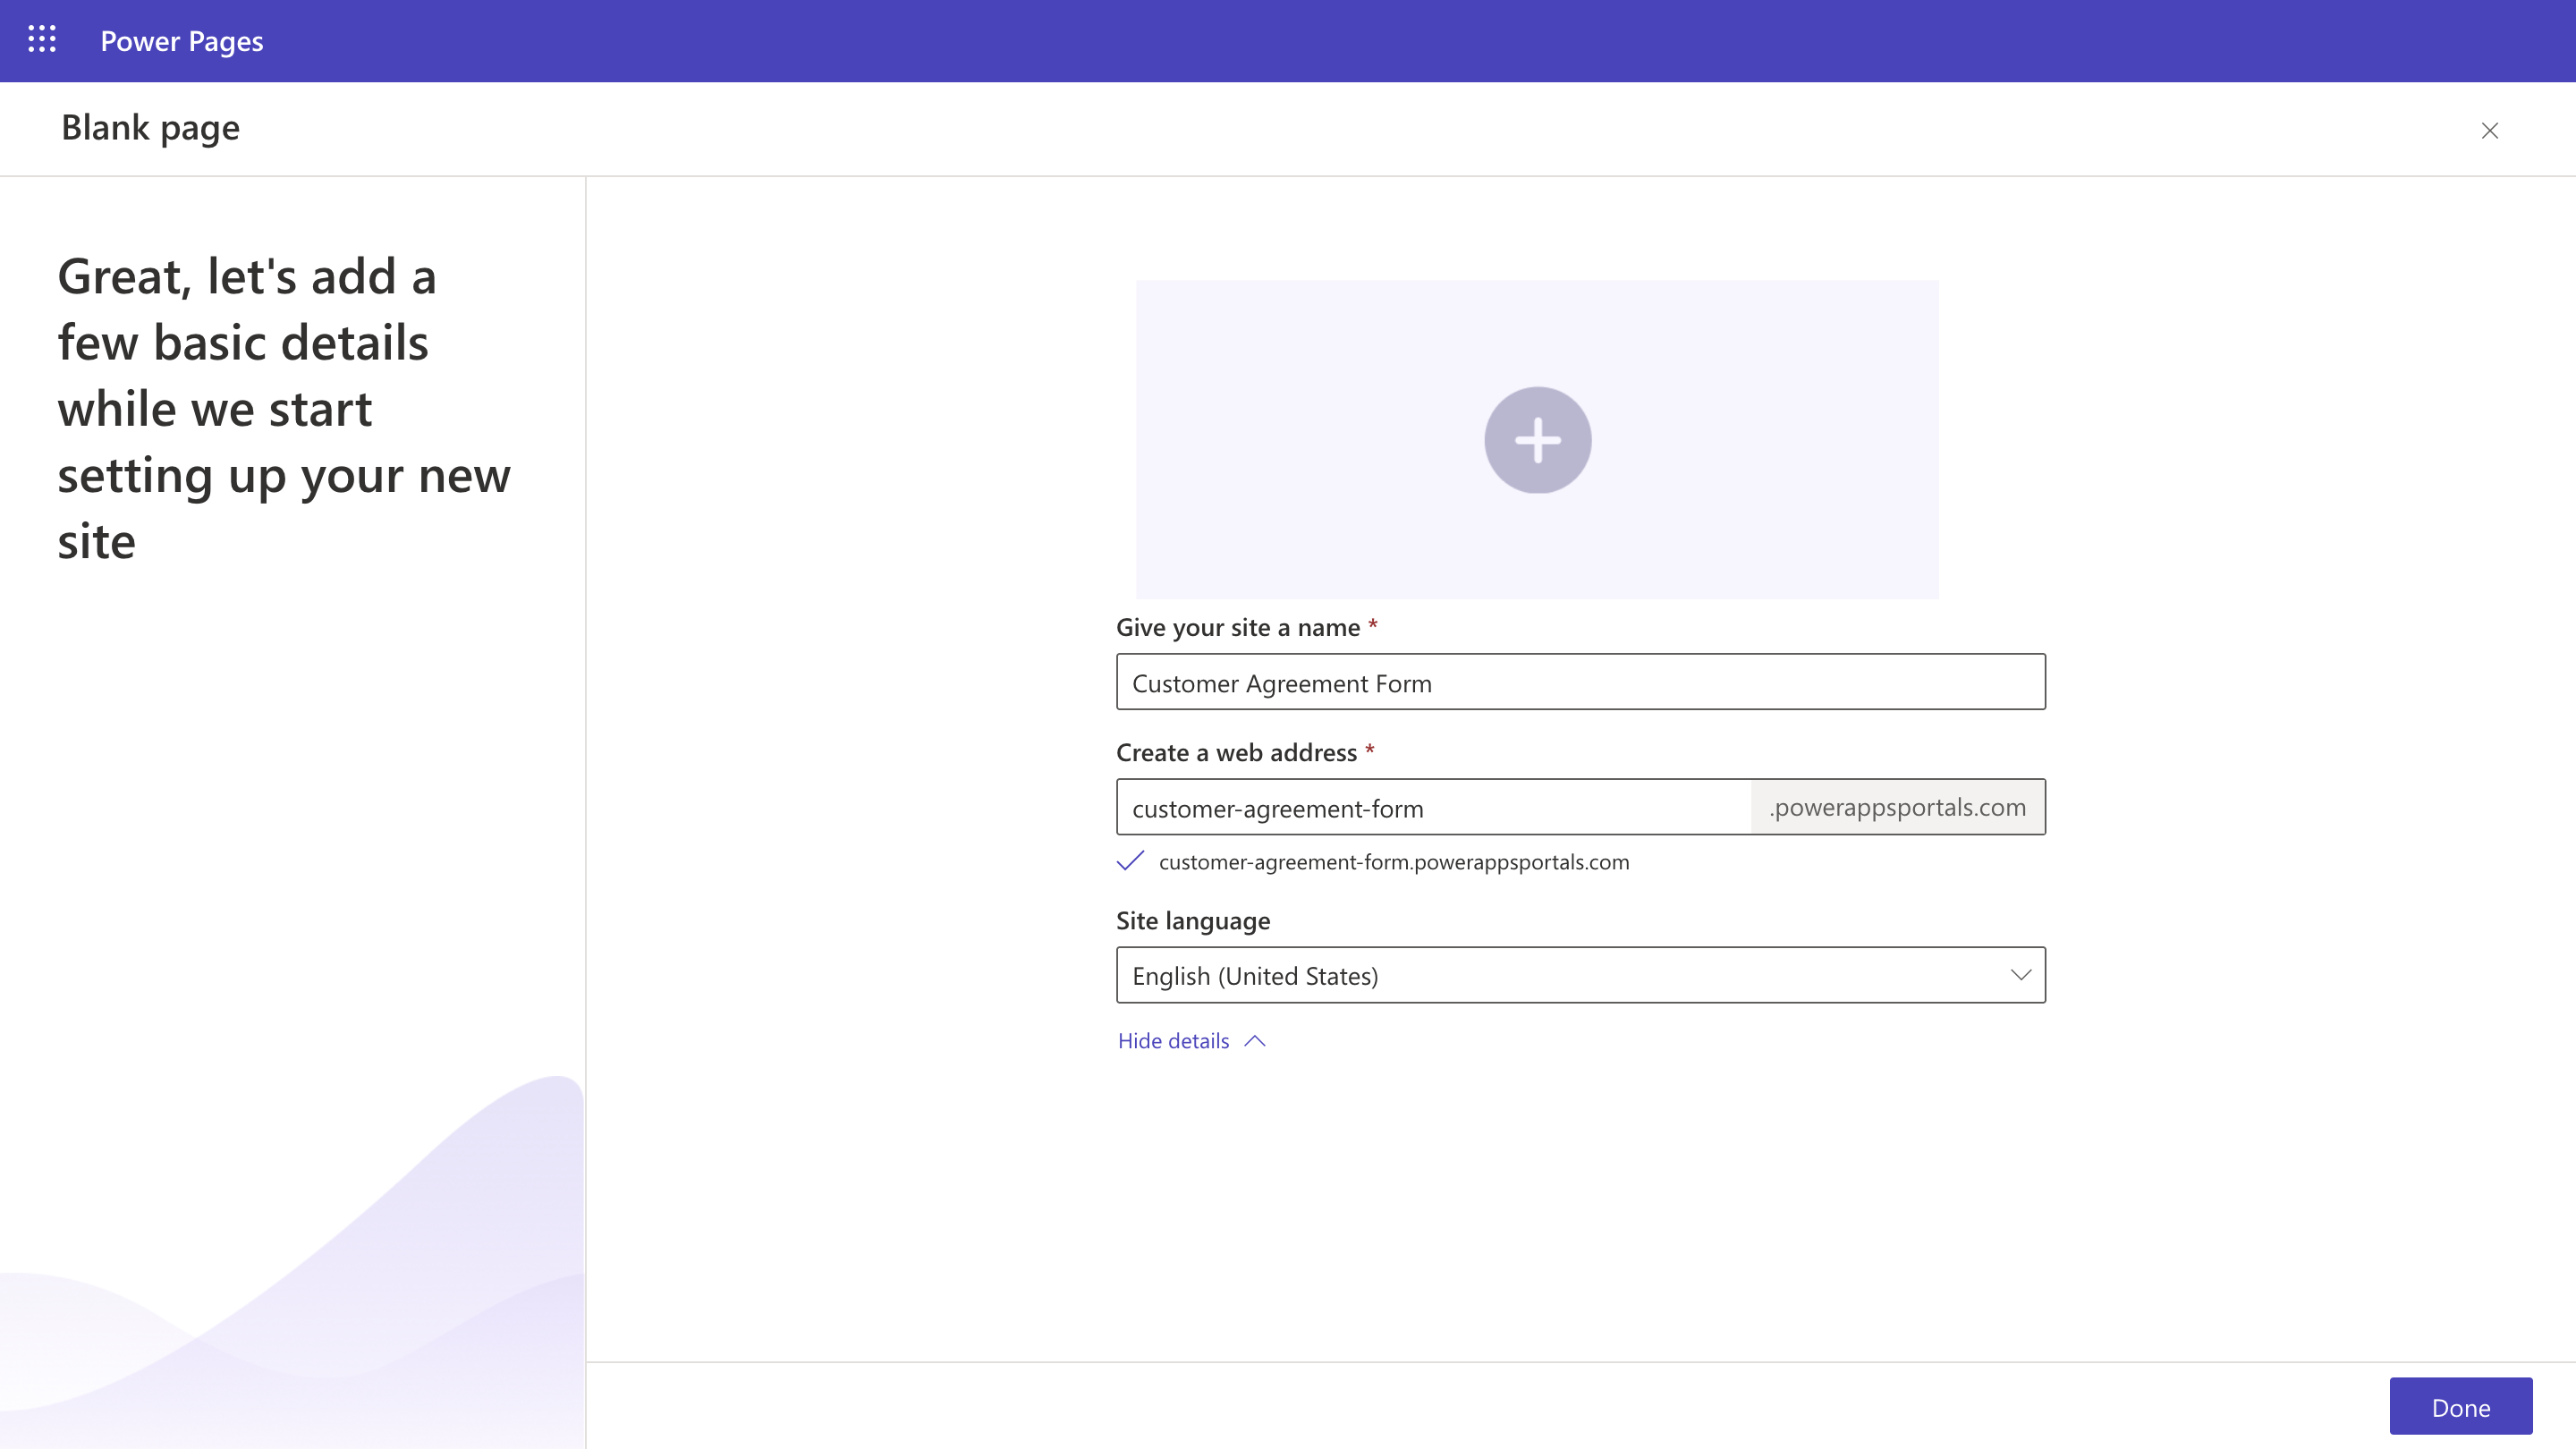
-
Name the site (for example, “Customer Agreement Form”), set the web address (for example, “customer-agreement-form”), and click Done.
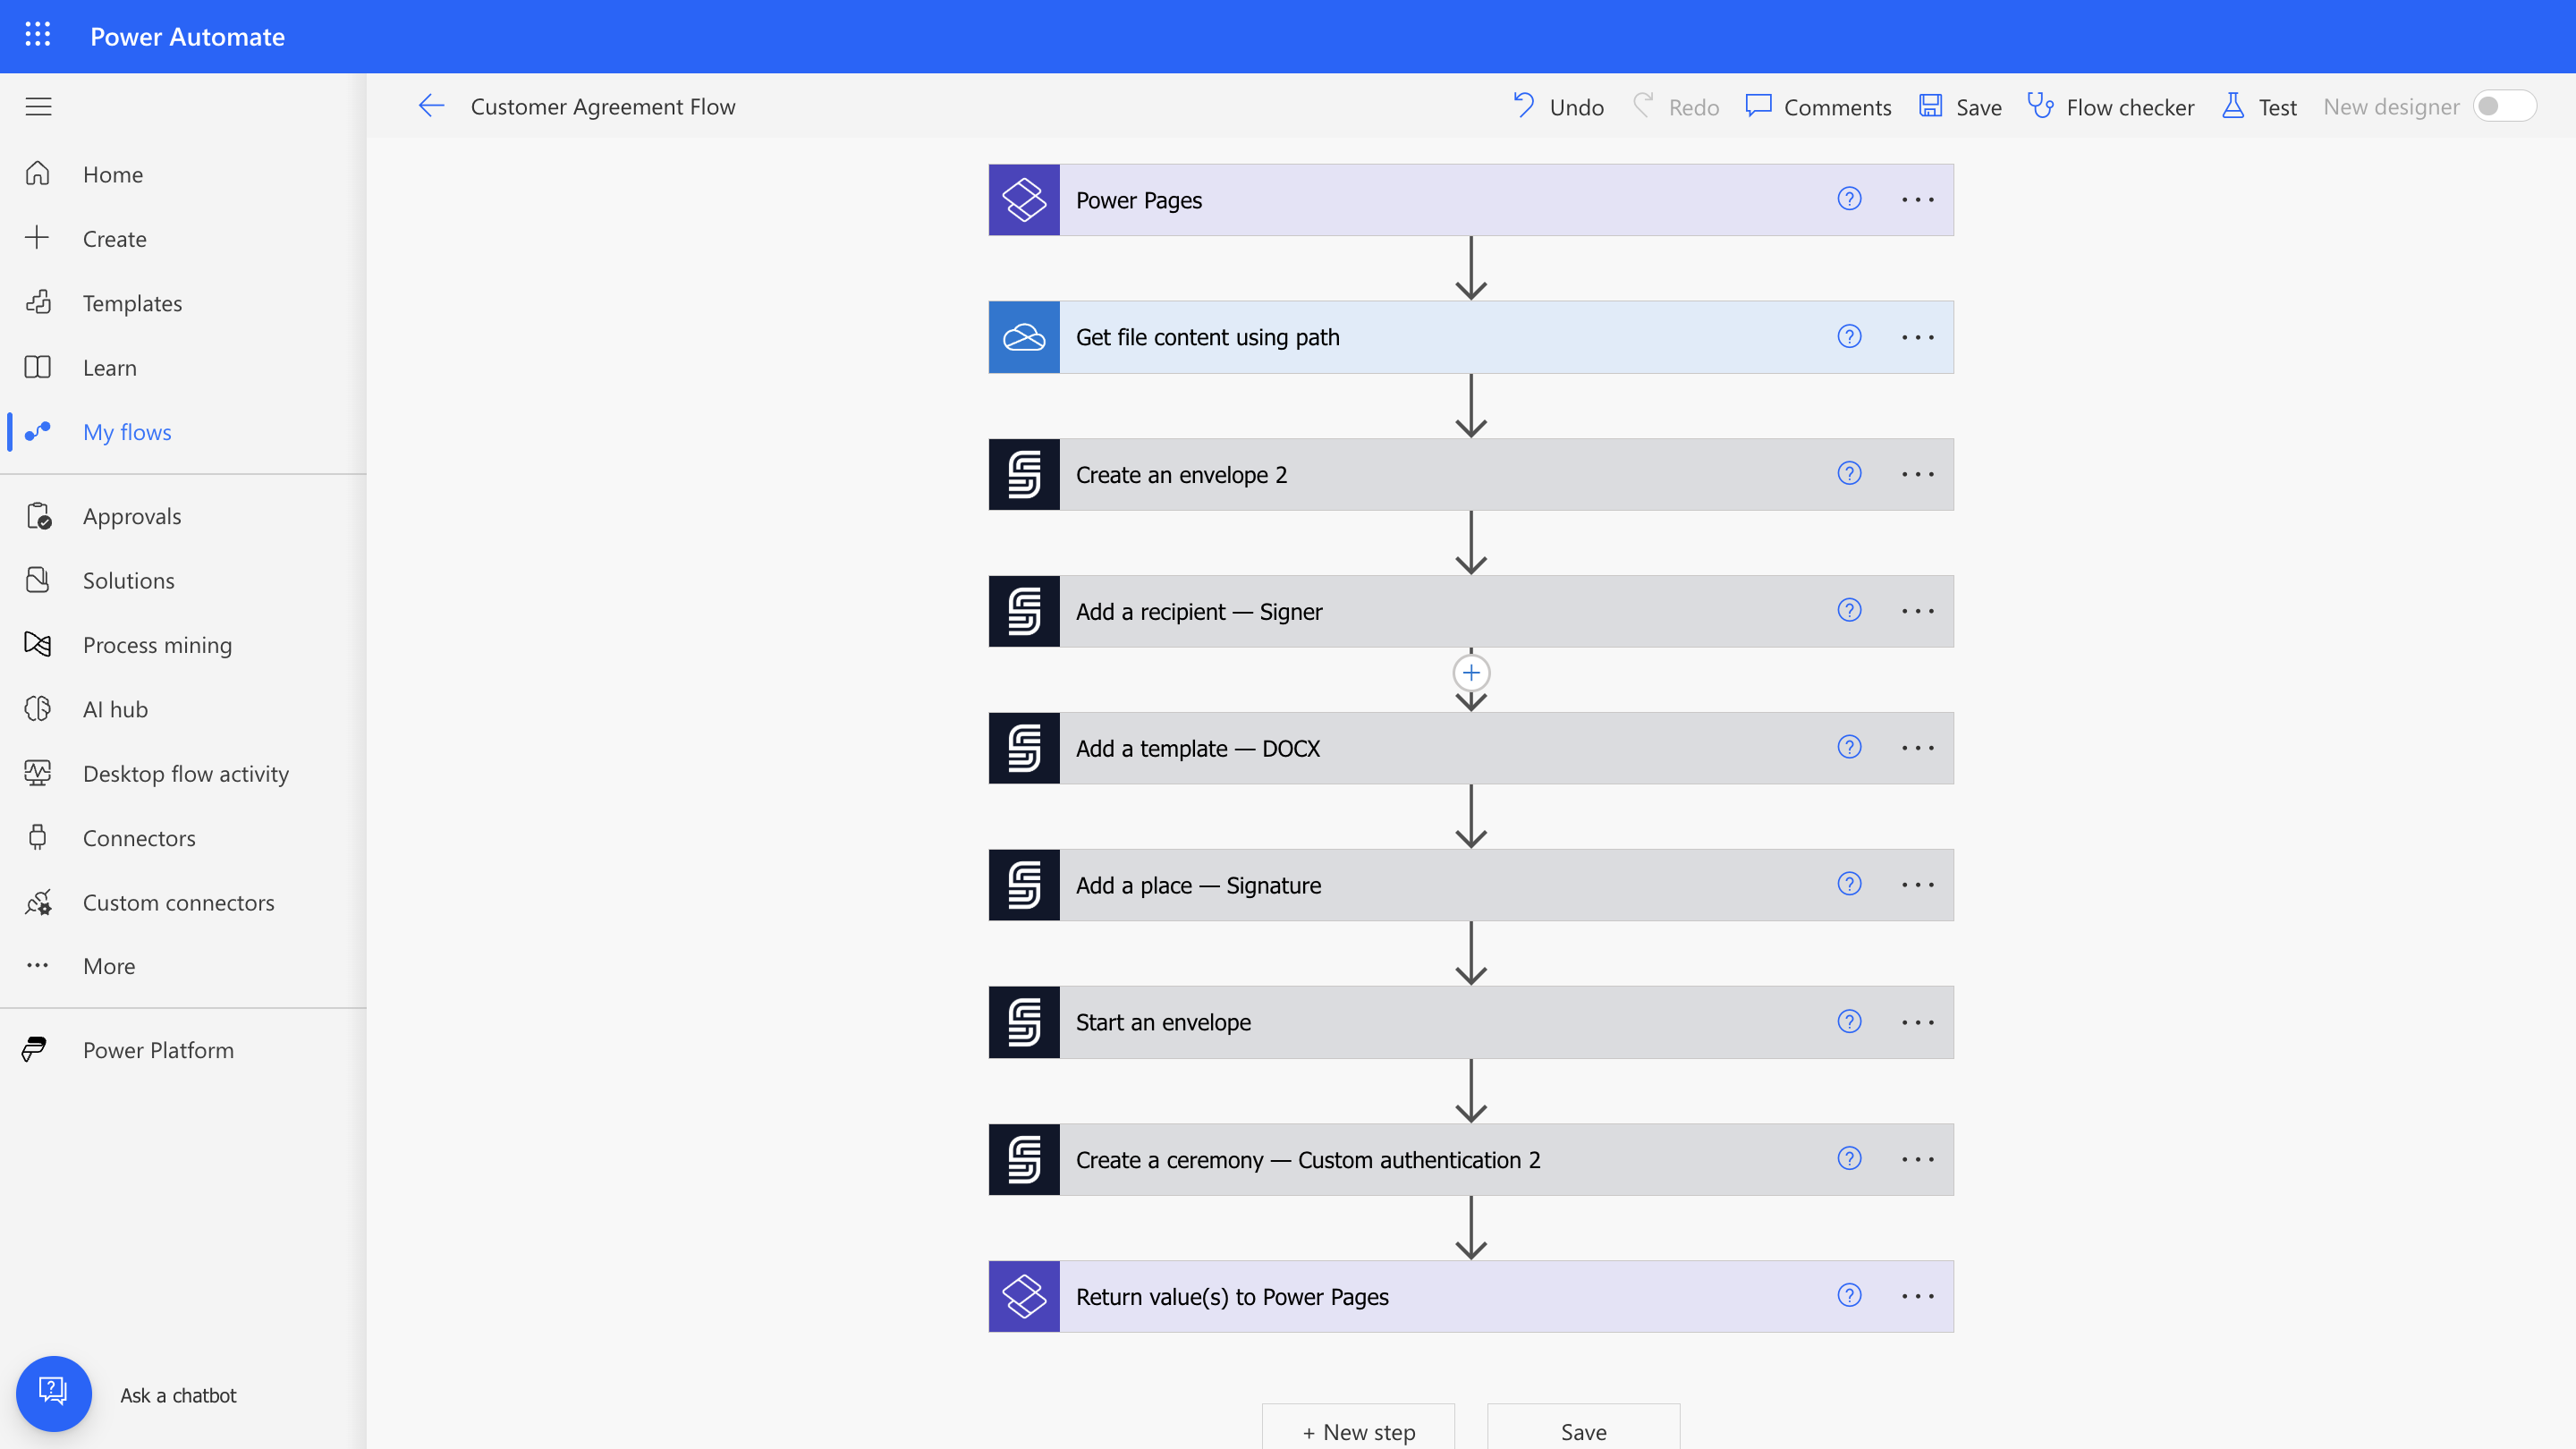
Step 3: Set Up the Power Automate Flow
Create the automated workflow in Power Automate directly from Power Pages.3.1 Set the Flow Trigger
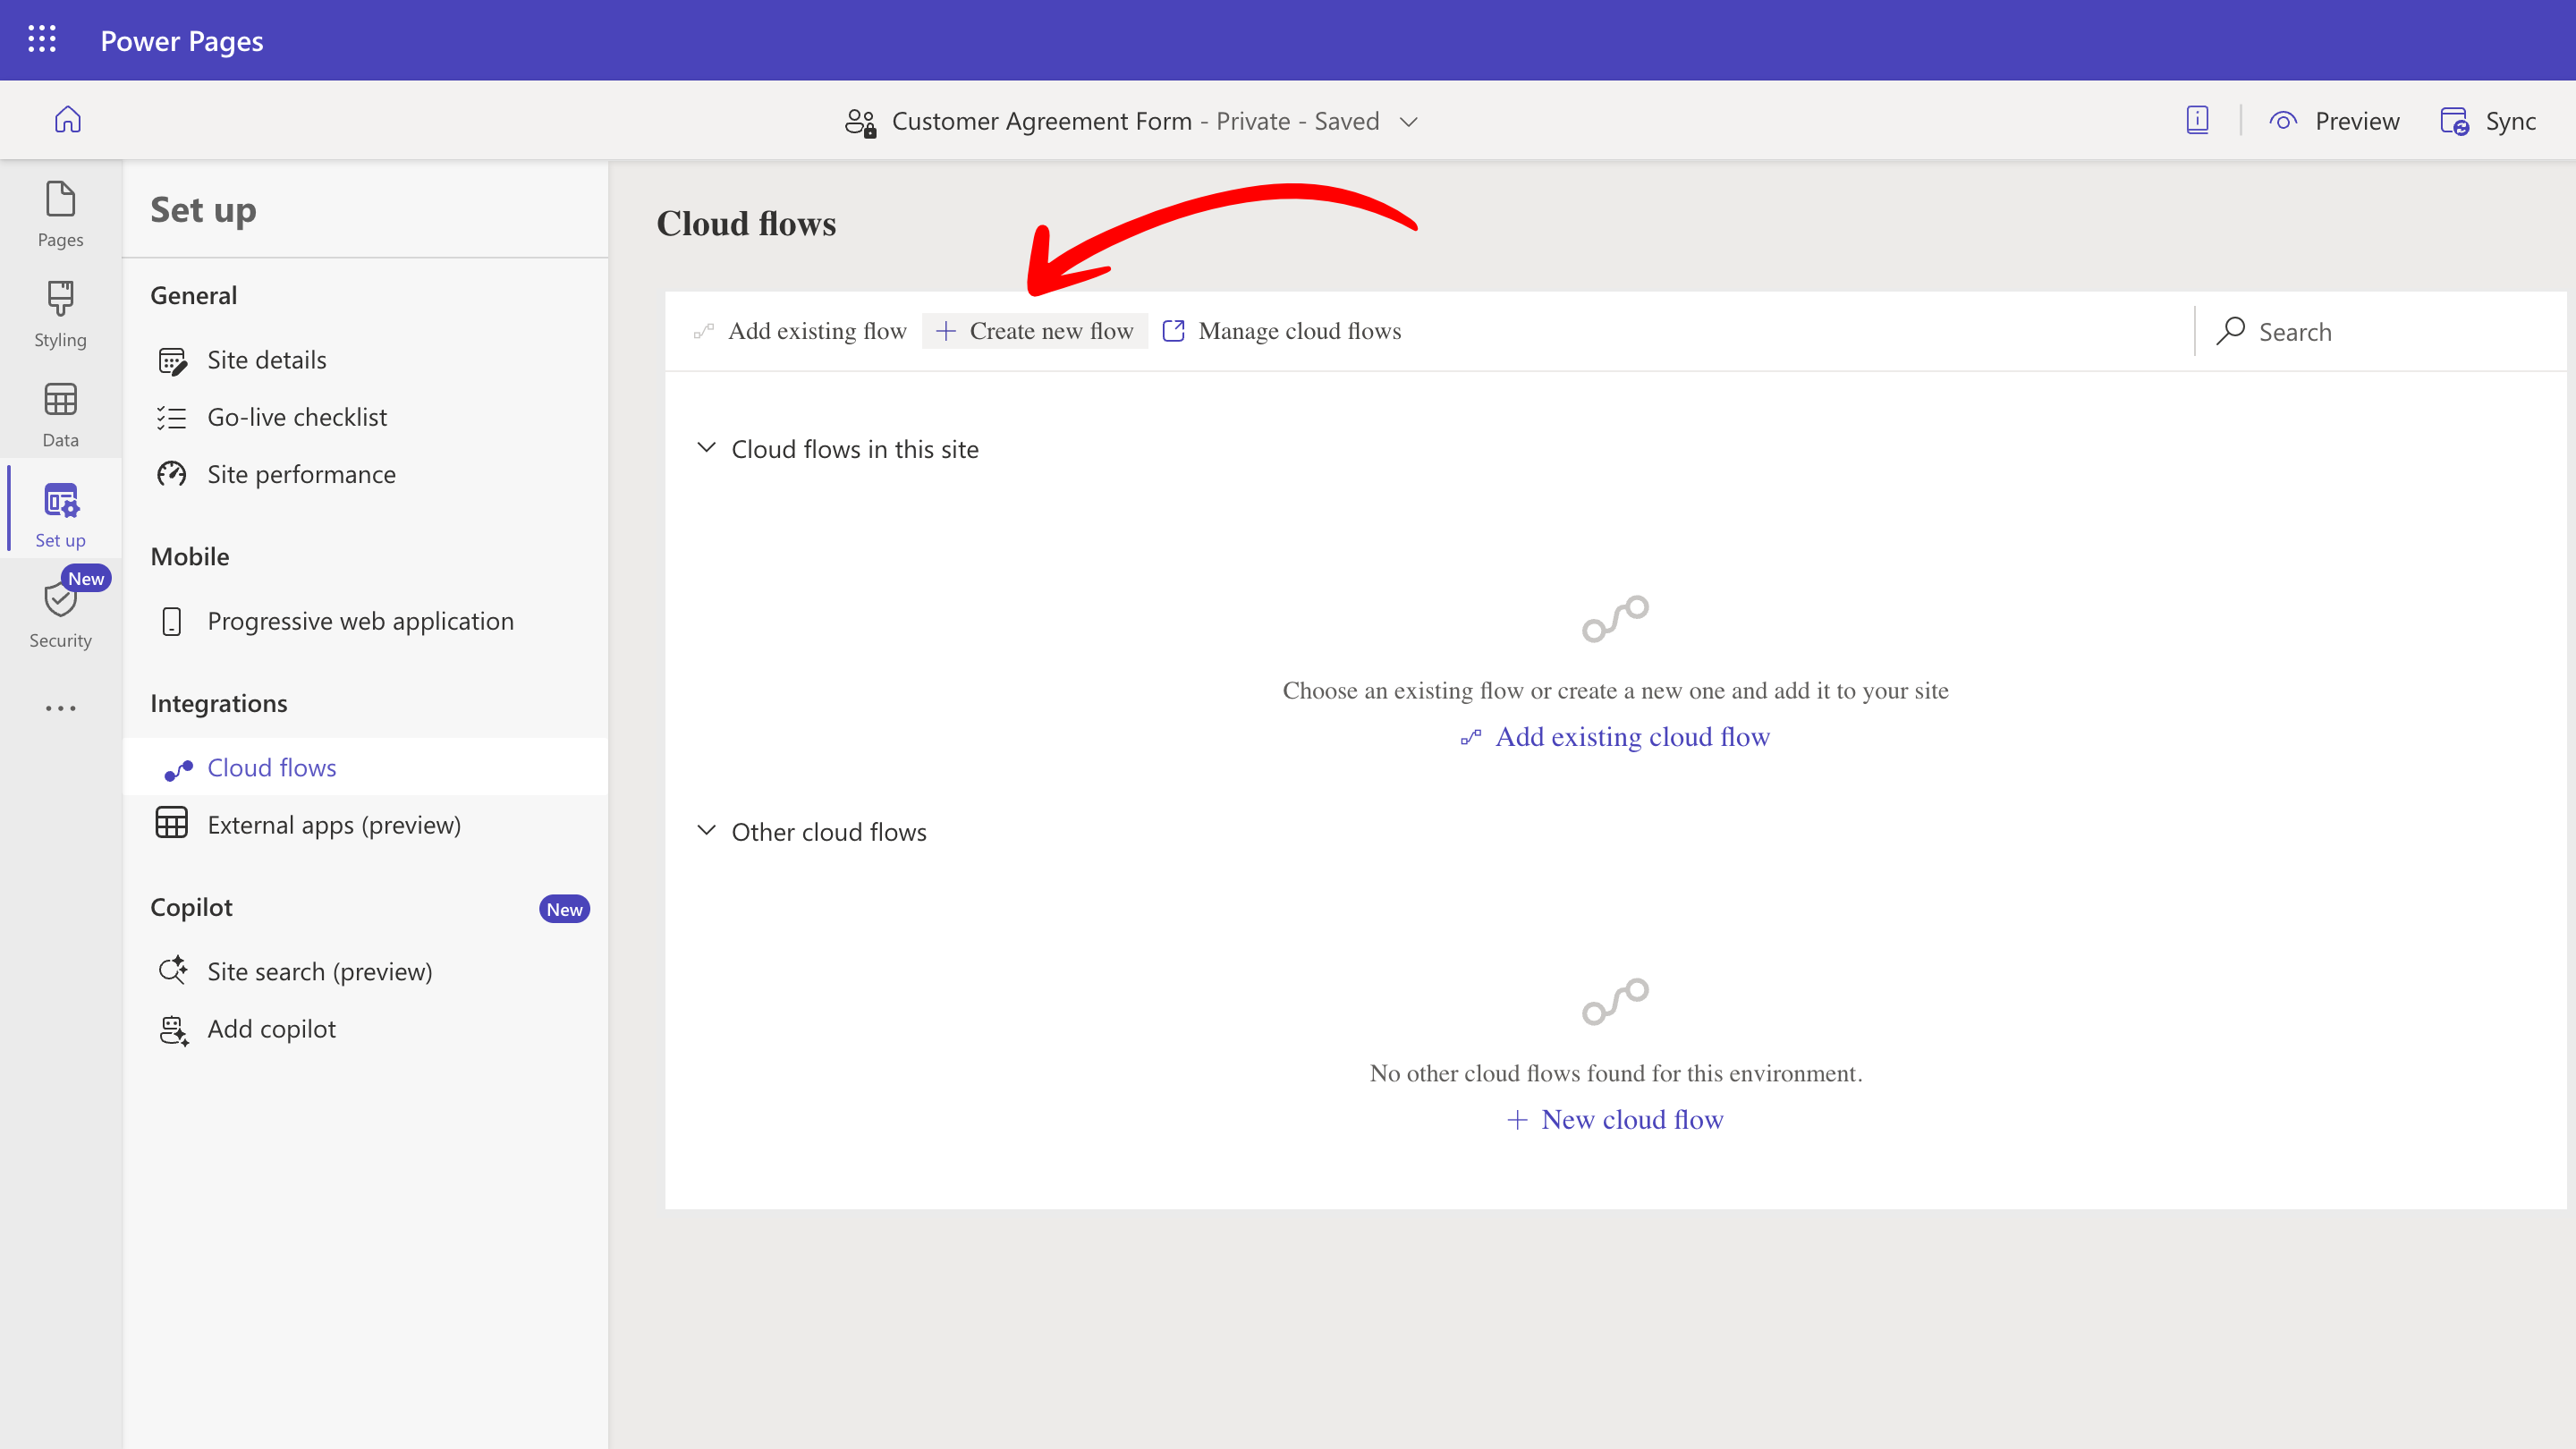
- From the left-hand menu bar, click Set up and select Cloud Flows.
-
Click Create new flow.
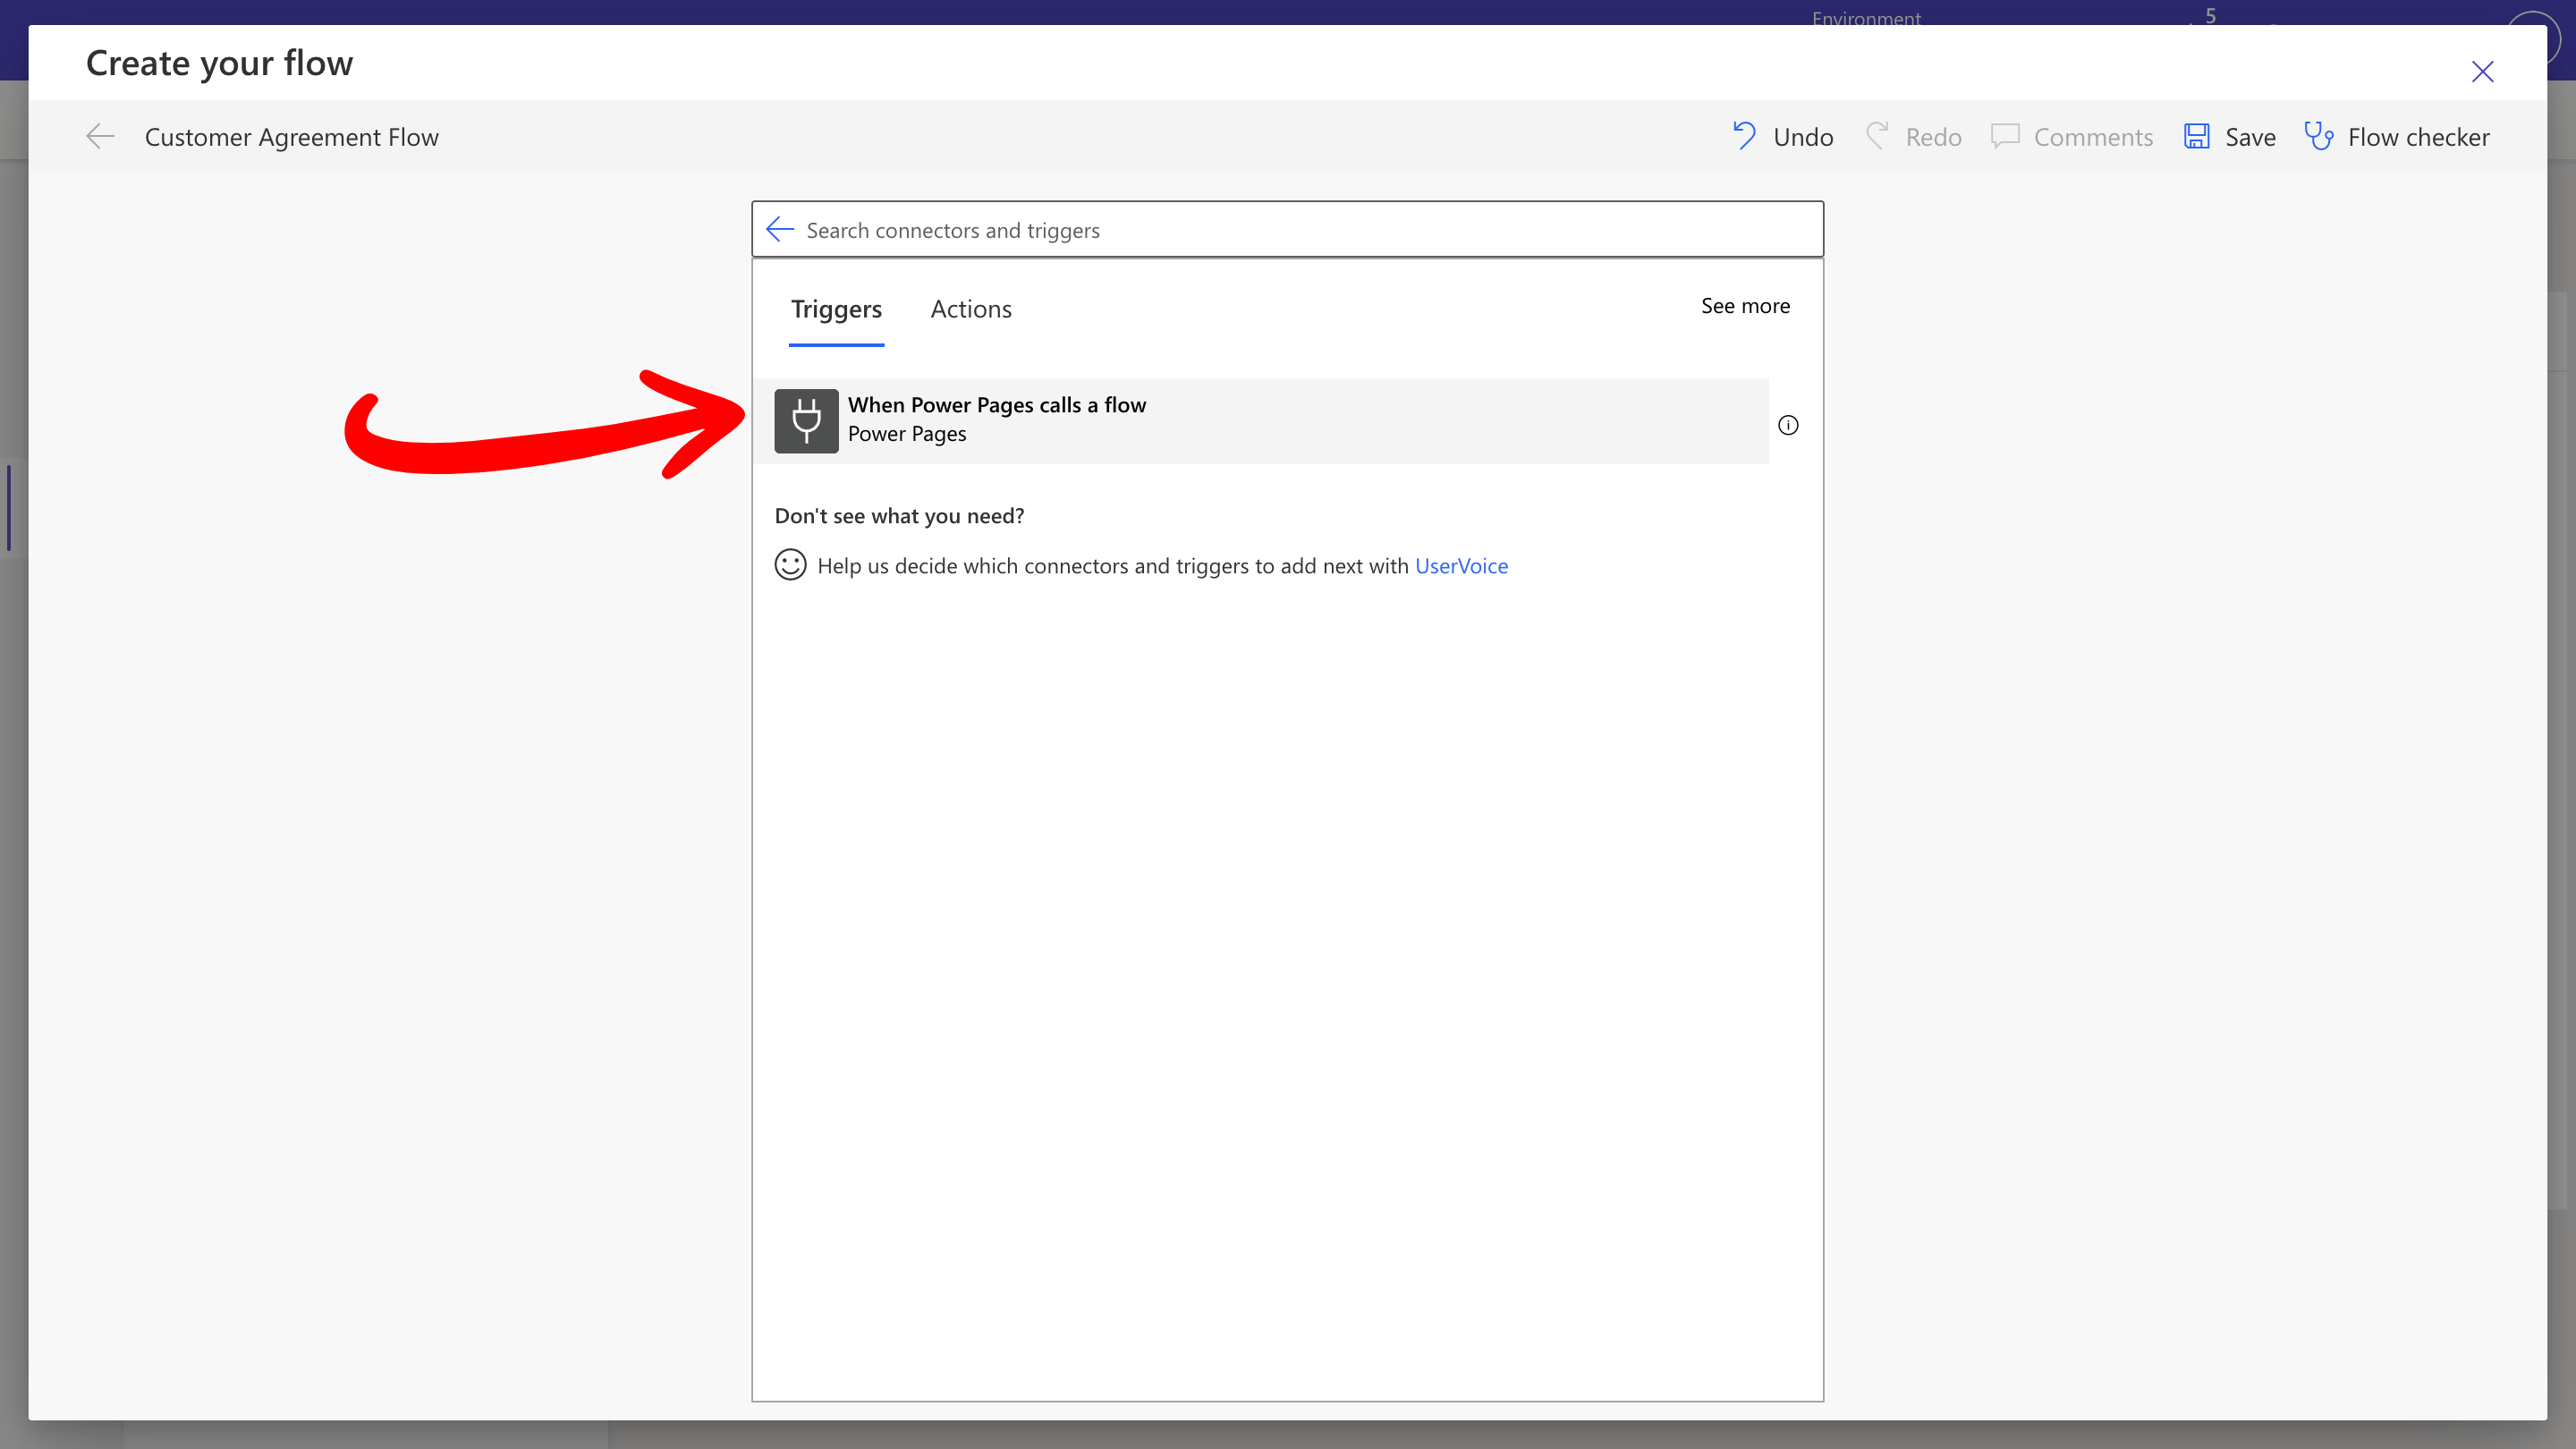
-
Rename the flow (for example, “Customer Agreement Flow”), select the When Power Pages calls a flow trigger, and give it a name (for example, “Customer Agreement”).
3.2 Add Inputs
-
Click on the trigger and select Add an input. Choose the Text type and enter
customerNameas the input name. -
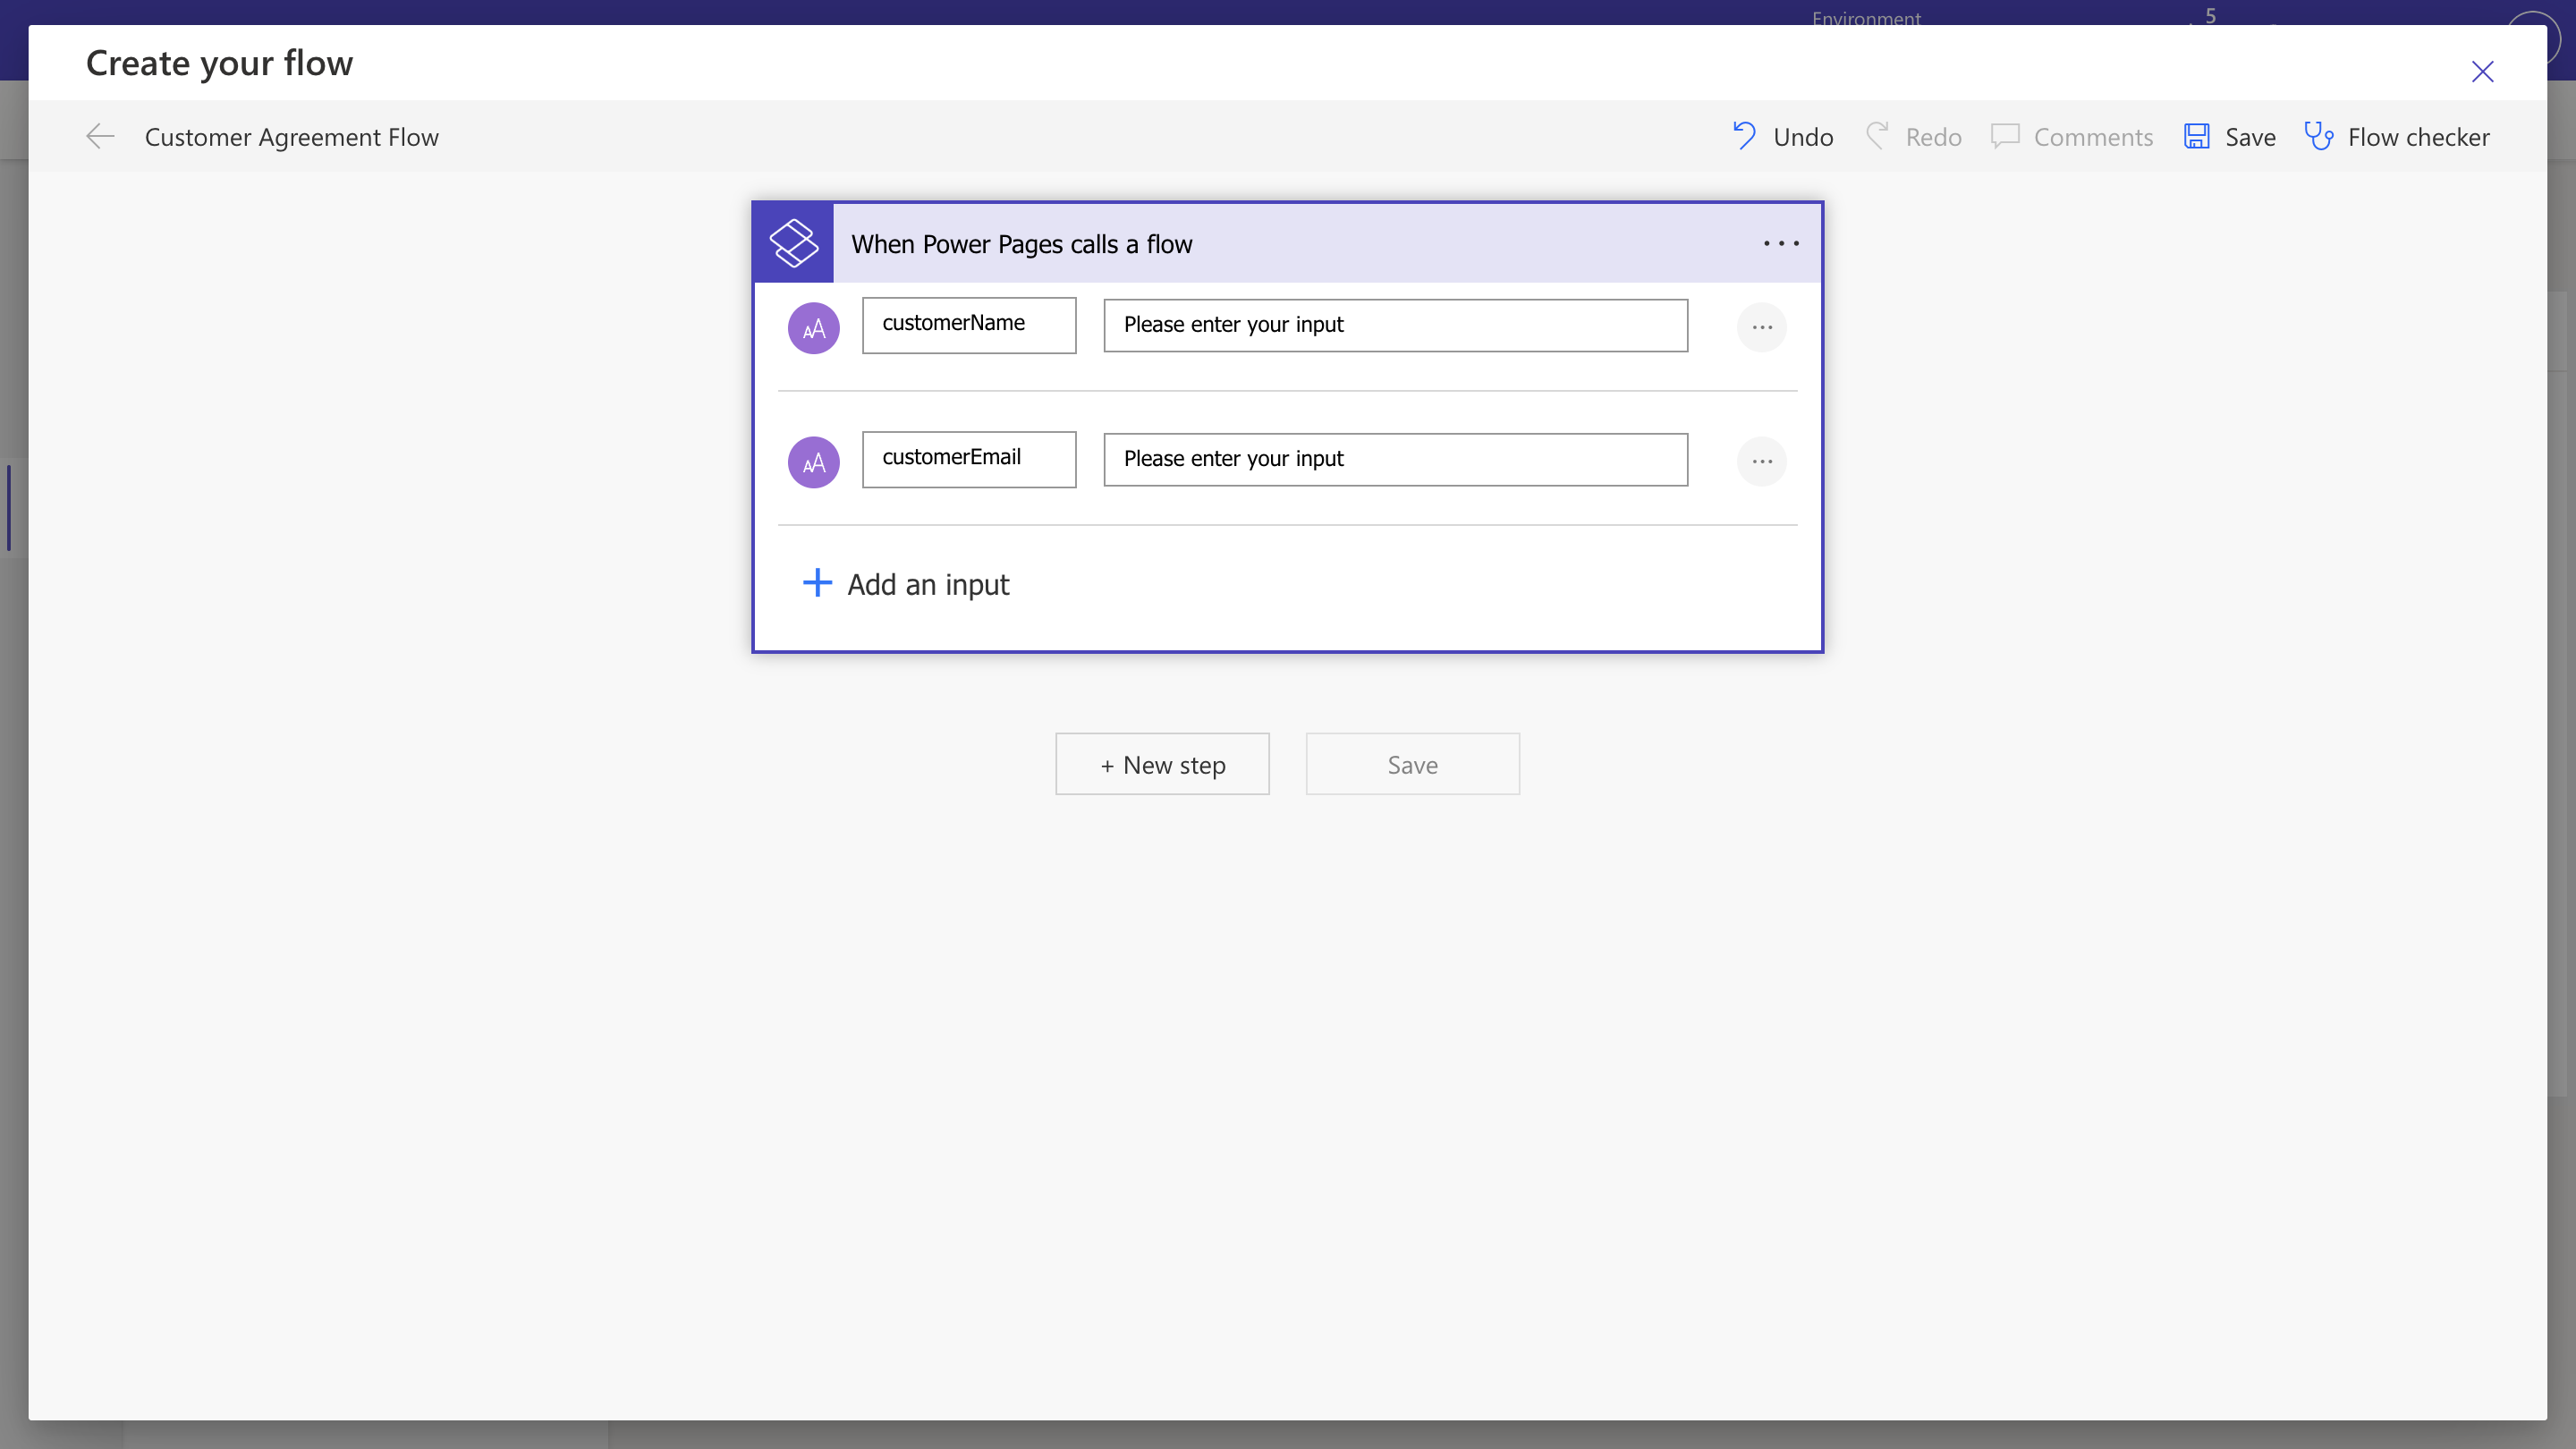
Repeat this step to add a second text input named
customerEmail.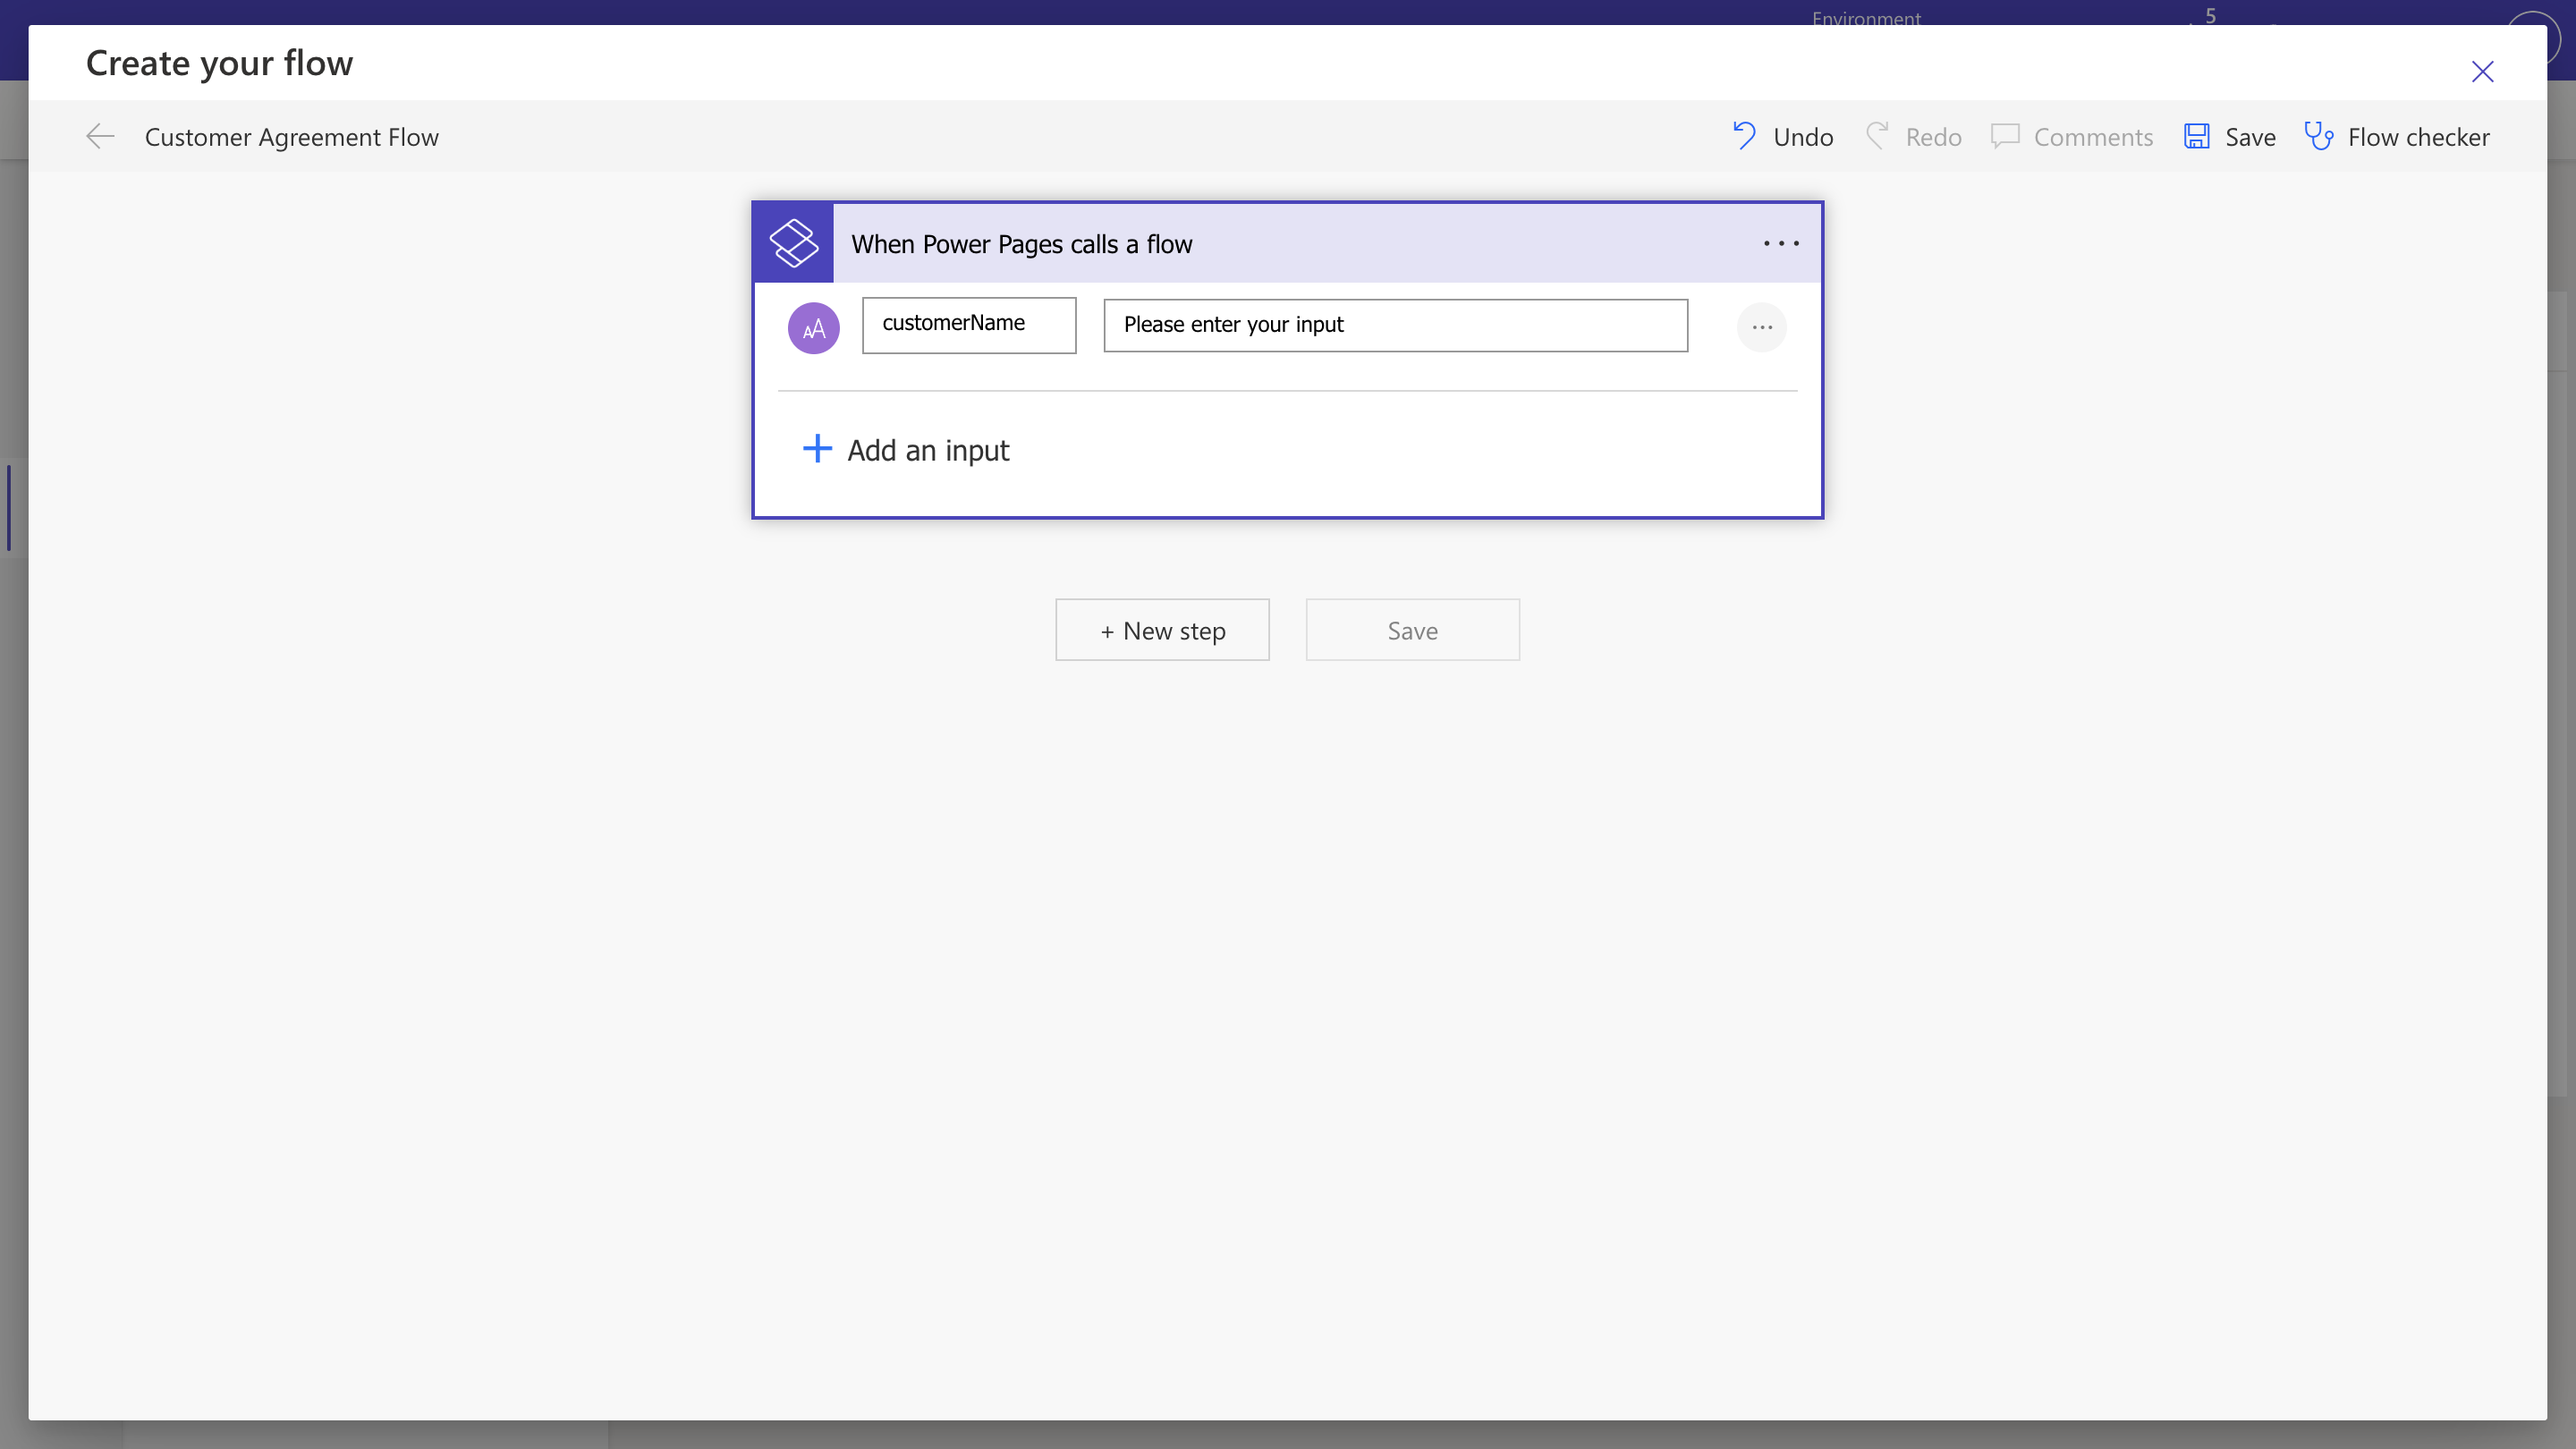
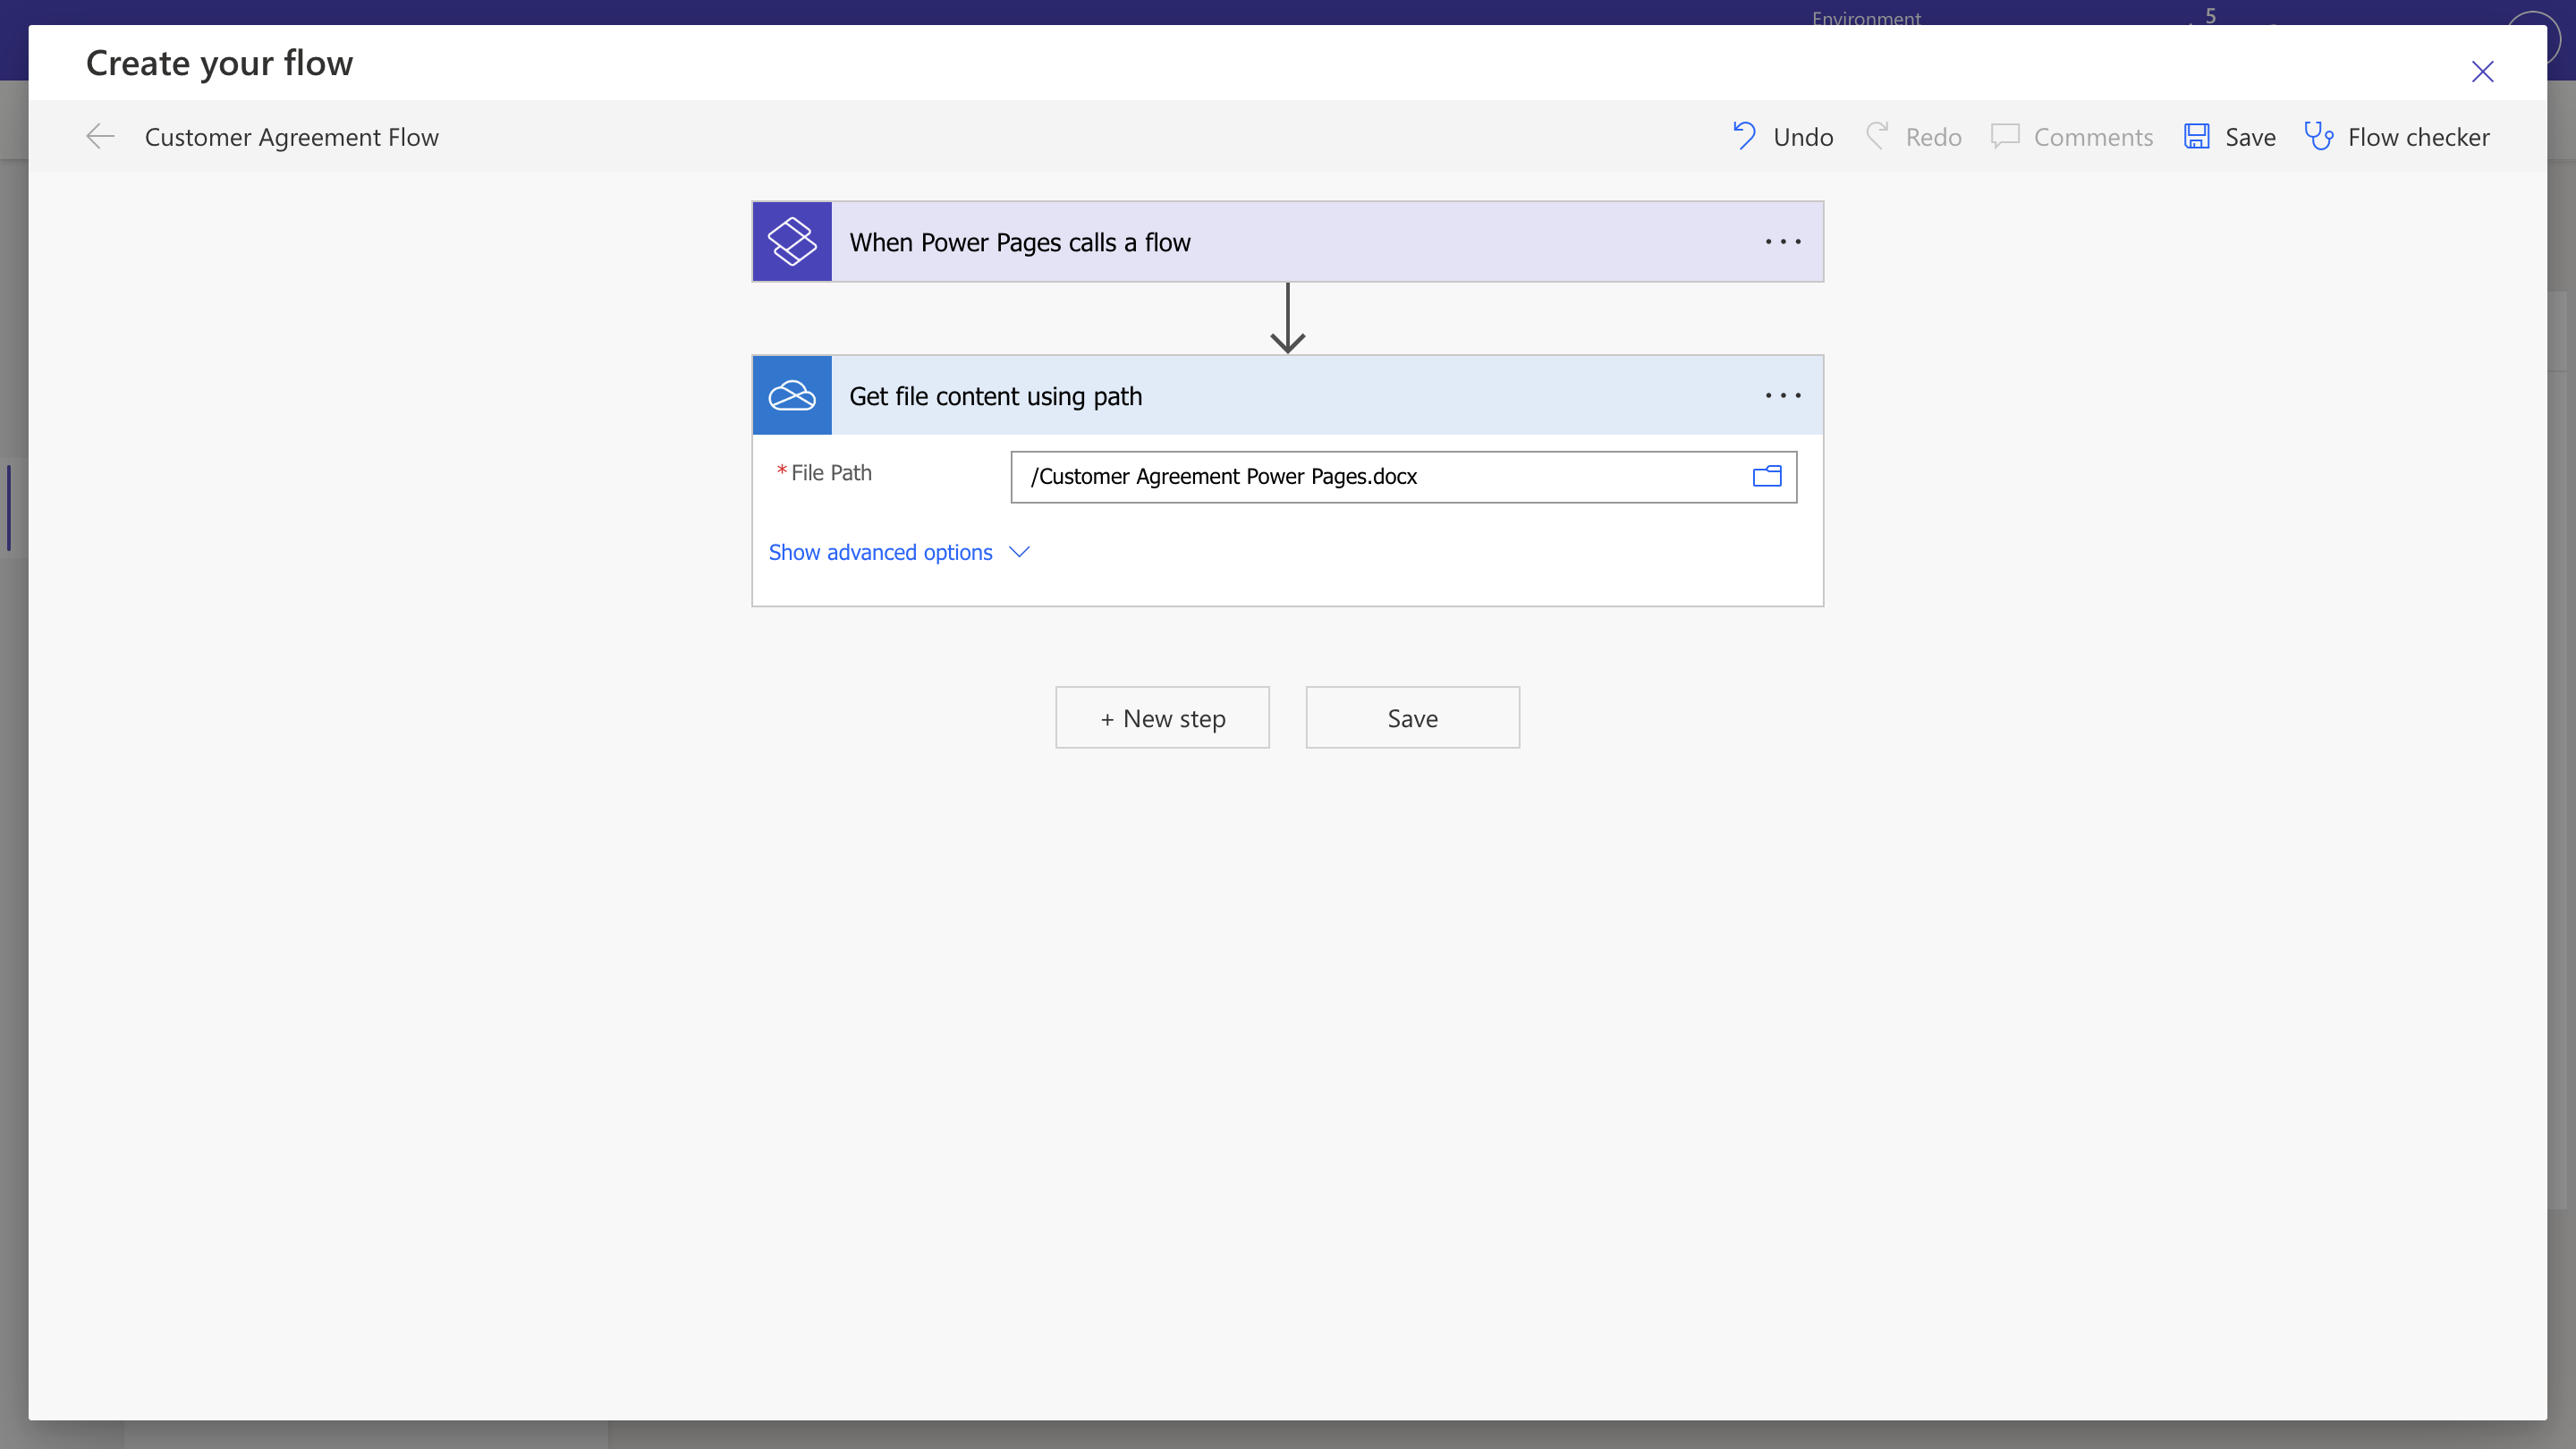
Step 4: Retrieve the Contract Template from OneDrive
Fetch your customer agreement template stored in OneDrive.- Add the Get File Content using Path action from the OneDrive connector.
-
Select the DOCX template stored in your OneDrive.
Step 5: Set Up the Signature Process
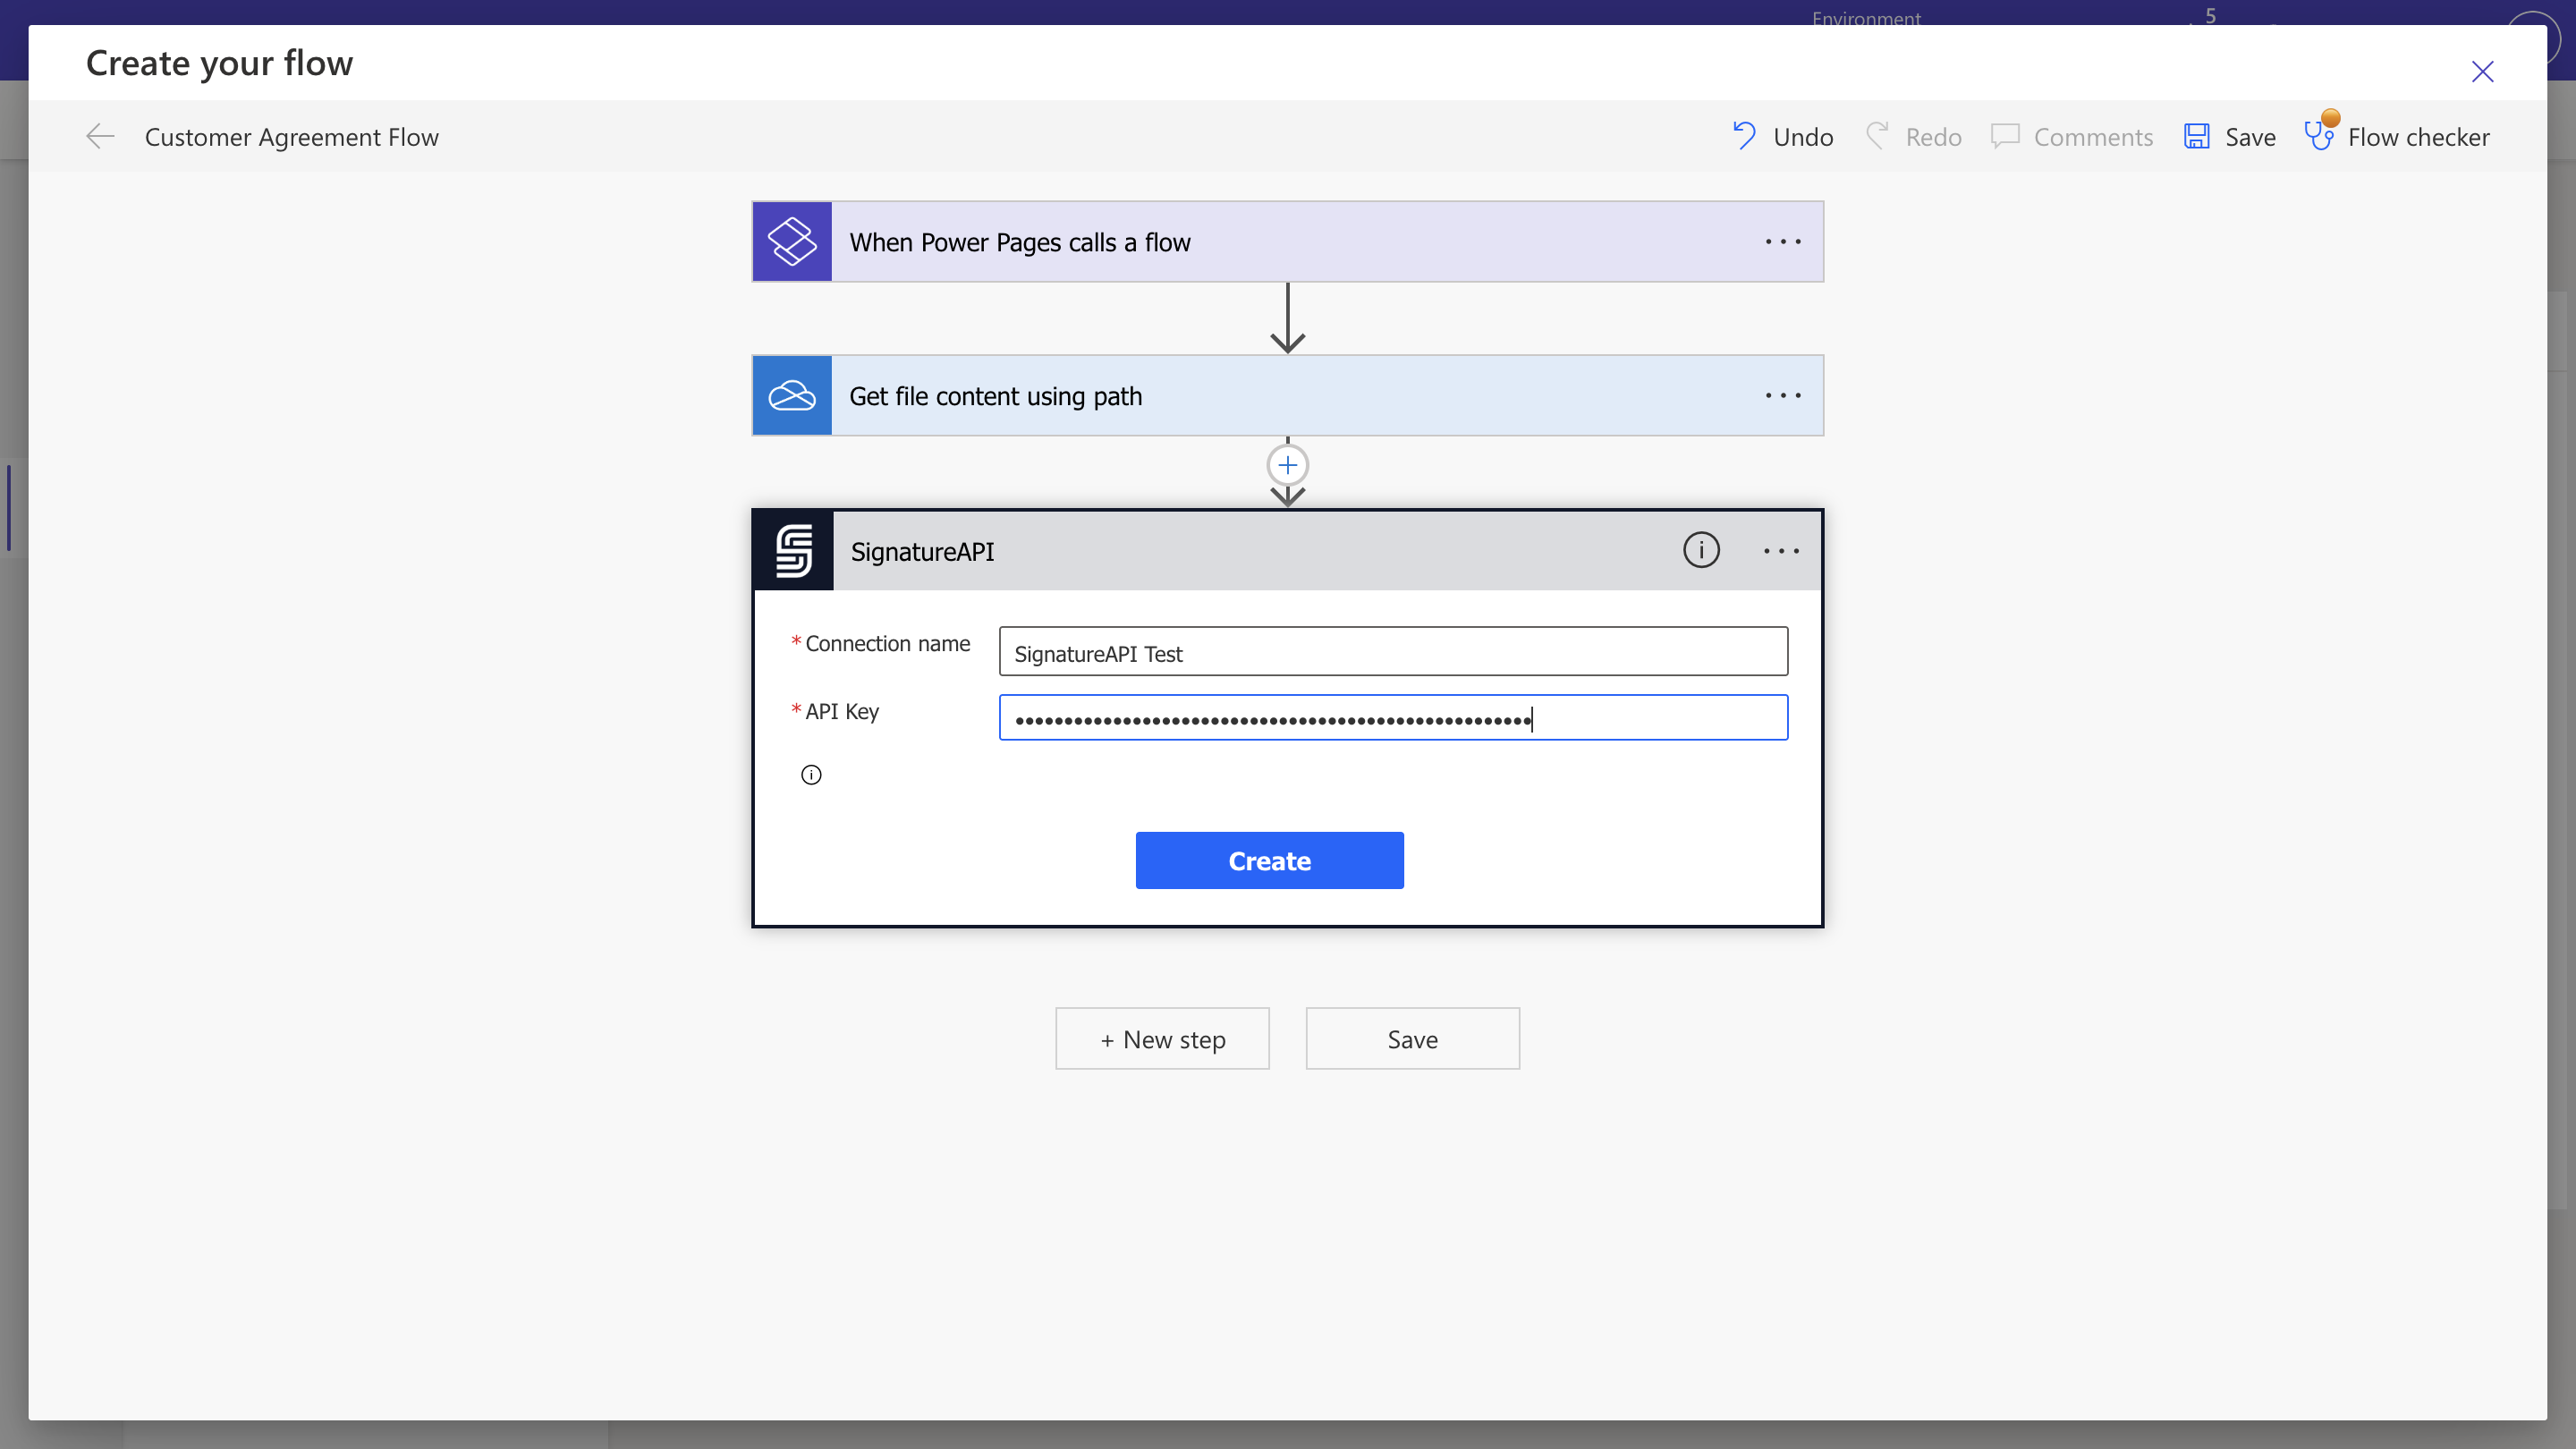
Configure SignatureAPI to create, send, and track the signature process.5.1 Create a SignatureAPI Envelope
- Add the Create an Envelope action from the SignatureAPI connector.
-
If prompted, authenticate your connection using your SignatureAPI key from the SignatureAPI Dashboard.
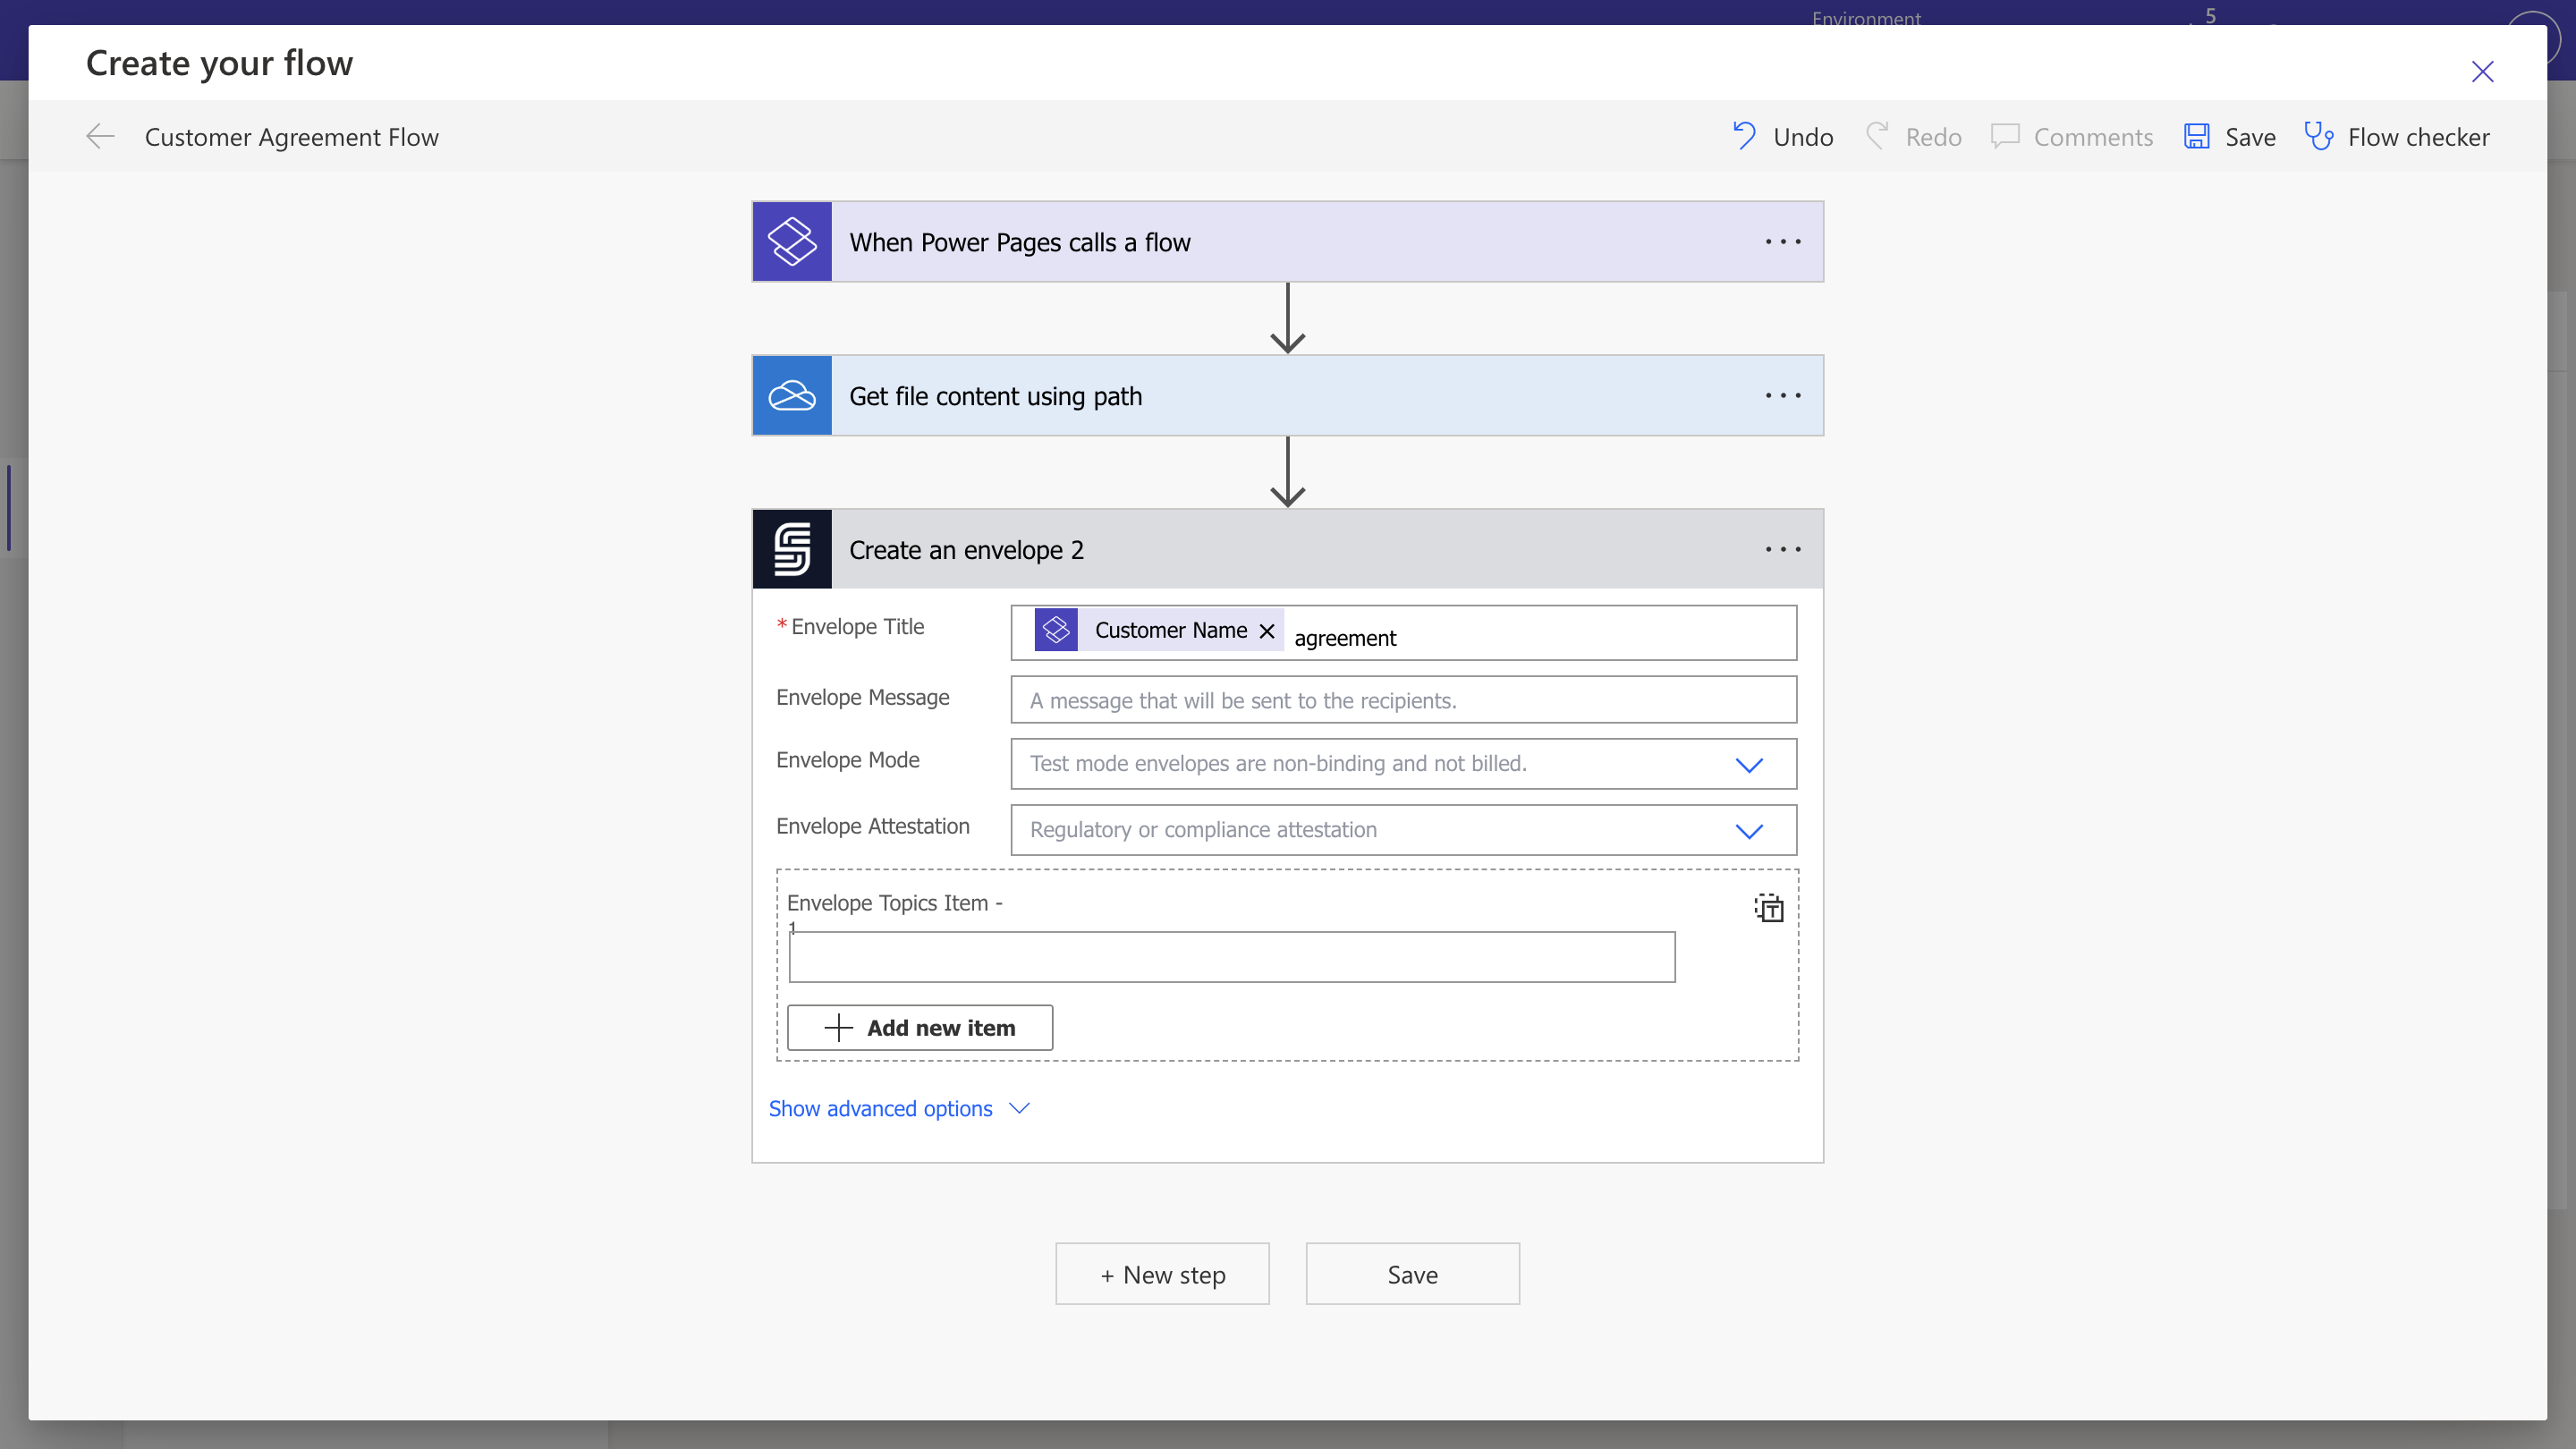
-
Set an Envelope Title (for example, the customer name) and an email message using dynamic content.
5.2 Add the Recipient (Signer)
Specify who will receive and sign the contract, with manual ceremony creation.- Add the Add Recipient - Signer action.
- Set the Envelope ID from the dynamic content.
- Map the Recipient Name and Recipient Email using form details from dynamic content.
-
Set the Recipient Key (for example,
customer) to match your DOCX placeholders. -
In the advanced options, set Recipient Ceremony Creation to
manual.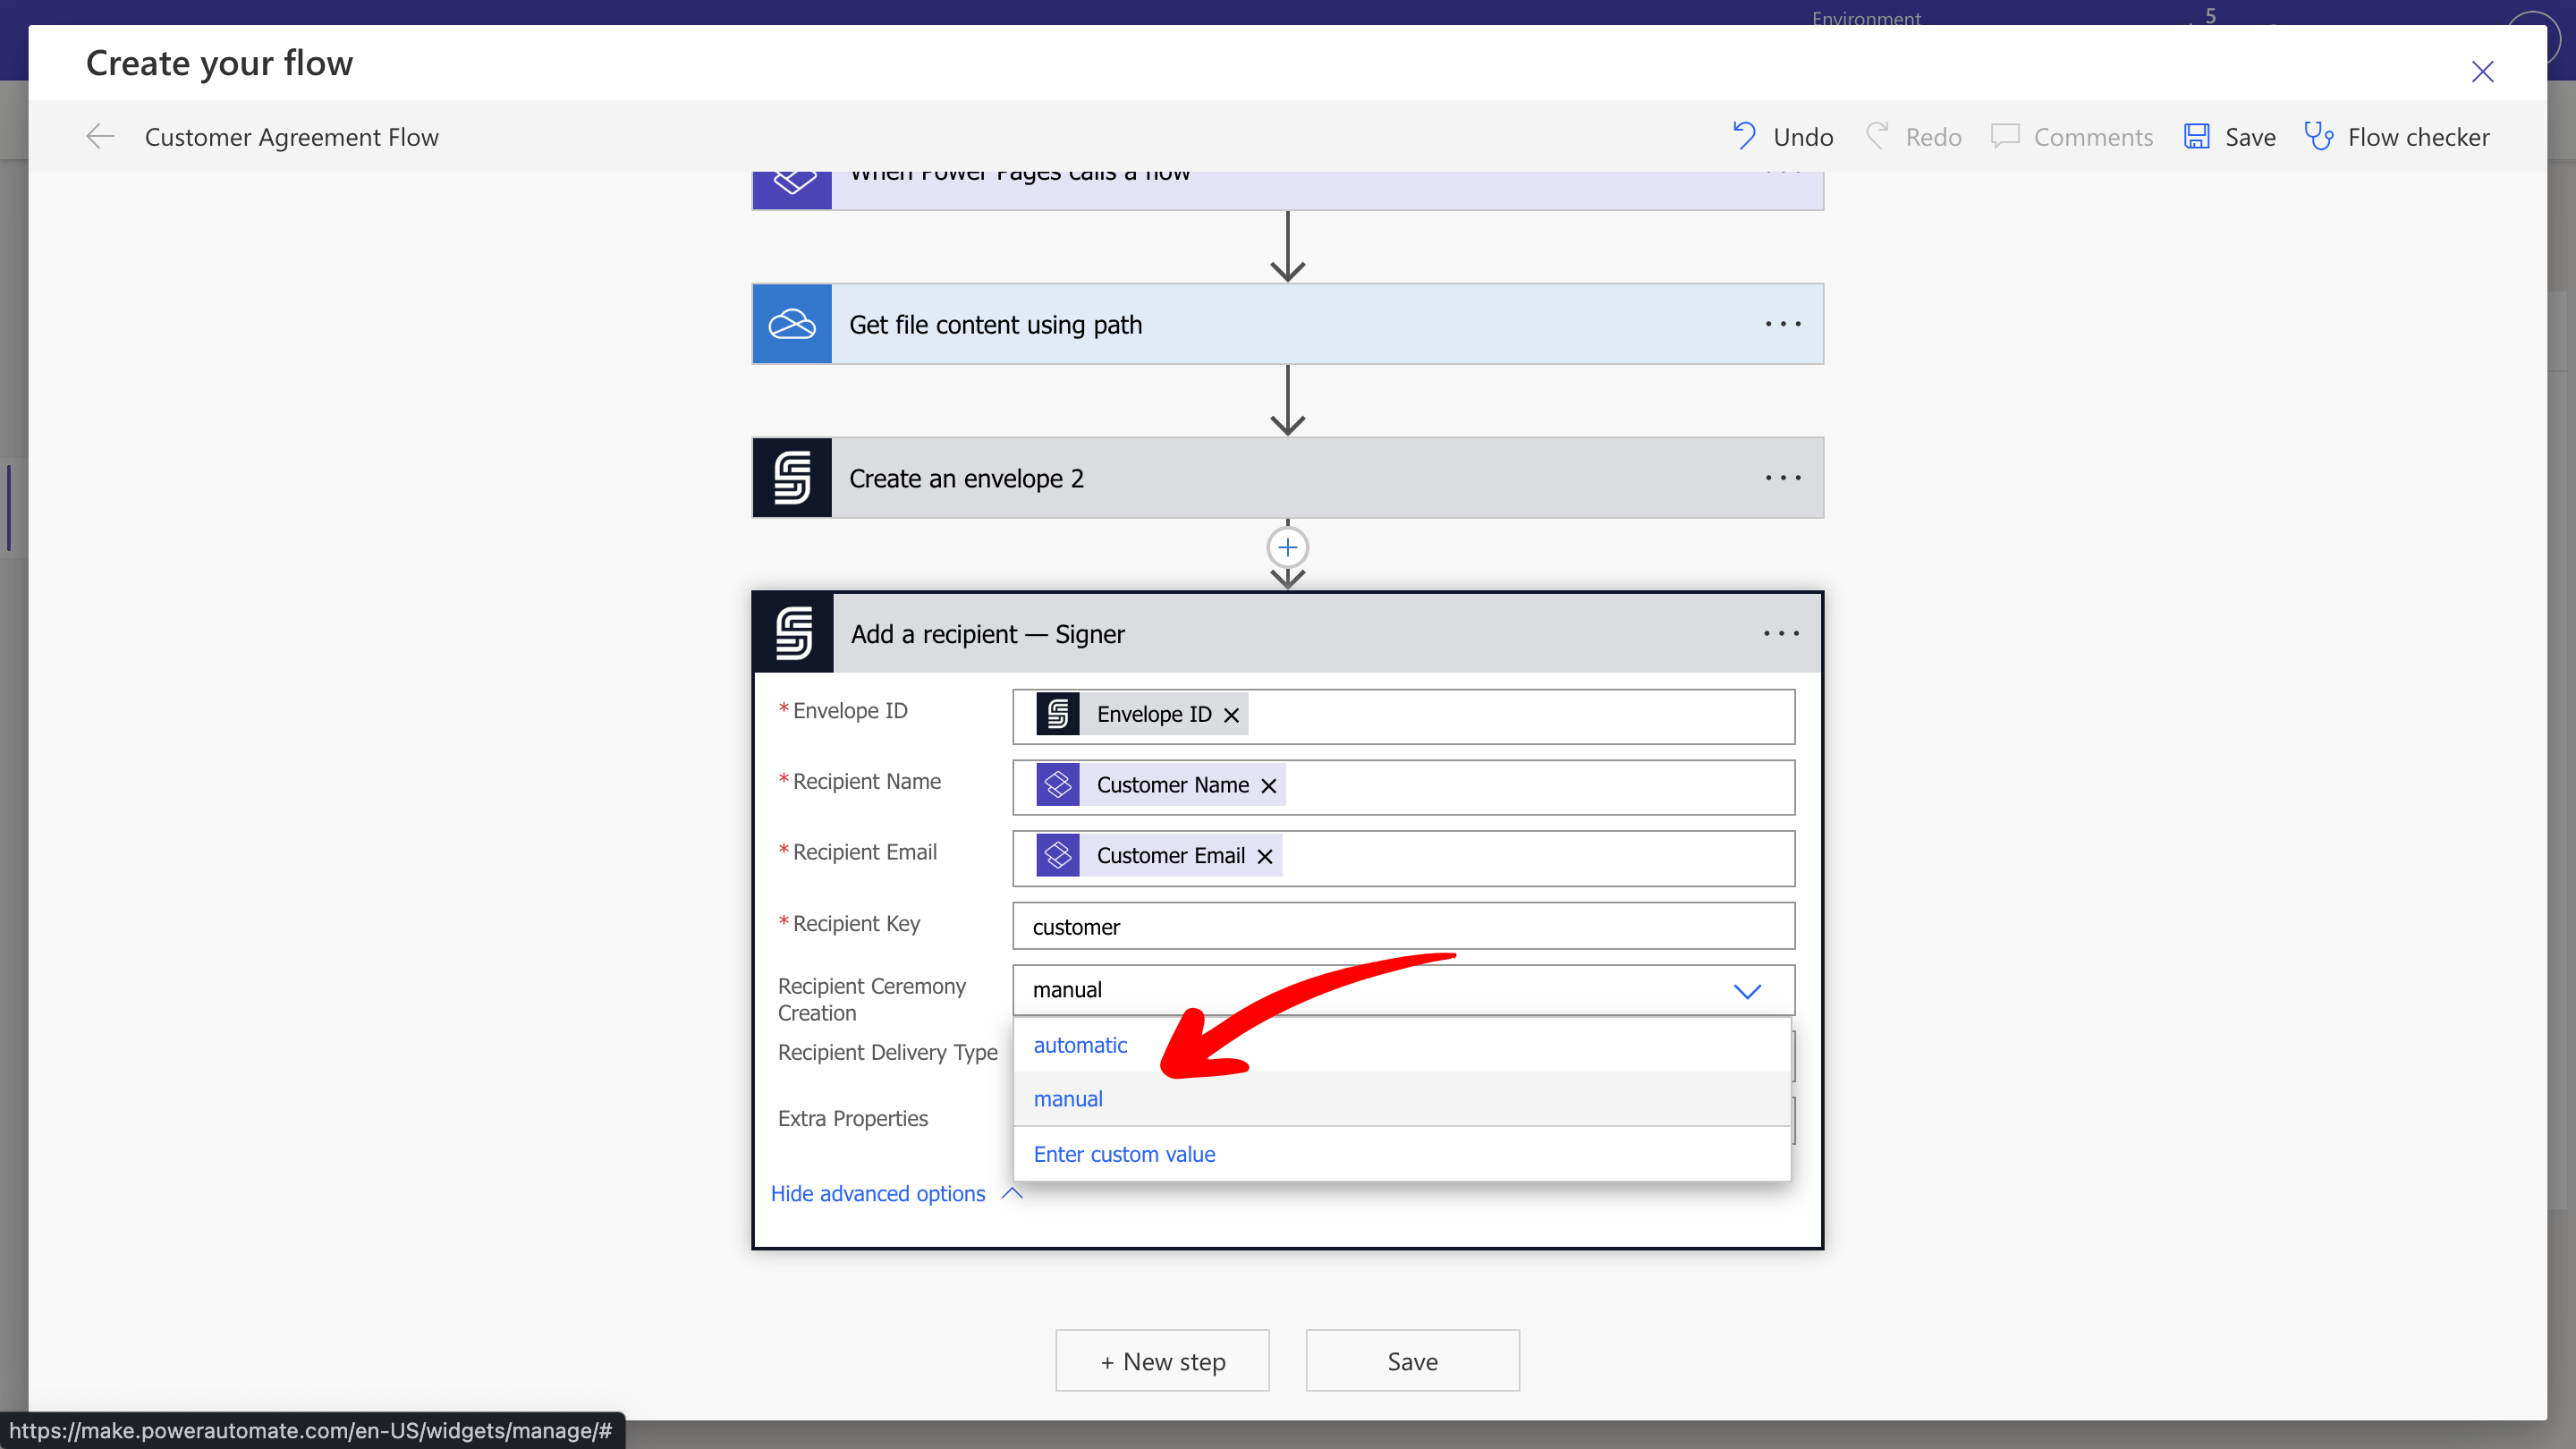
5.3 Attach the DOCX Contract Template
Attach your contract template to the envelope and populate it with customer details.- Add the Add a Template - DOCX action.
- Set the Envelope ID from the dynamic content.
- Select the File Content from the SharePoint action.
- Set the Document Title (for example, “Customer Agreement”).
-
Map each placeholder field (
{{customer.name}},{{customer.email}}) to the corresponding dynamic content from the flow inputs.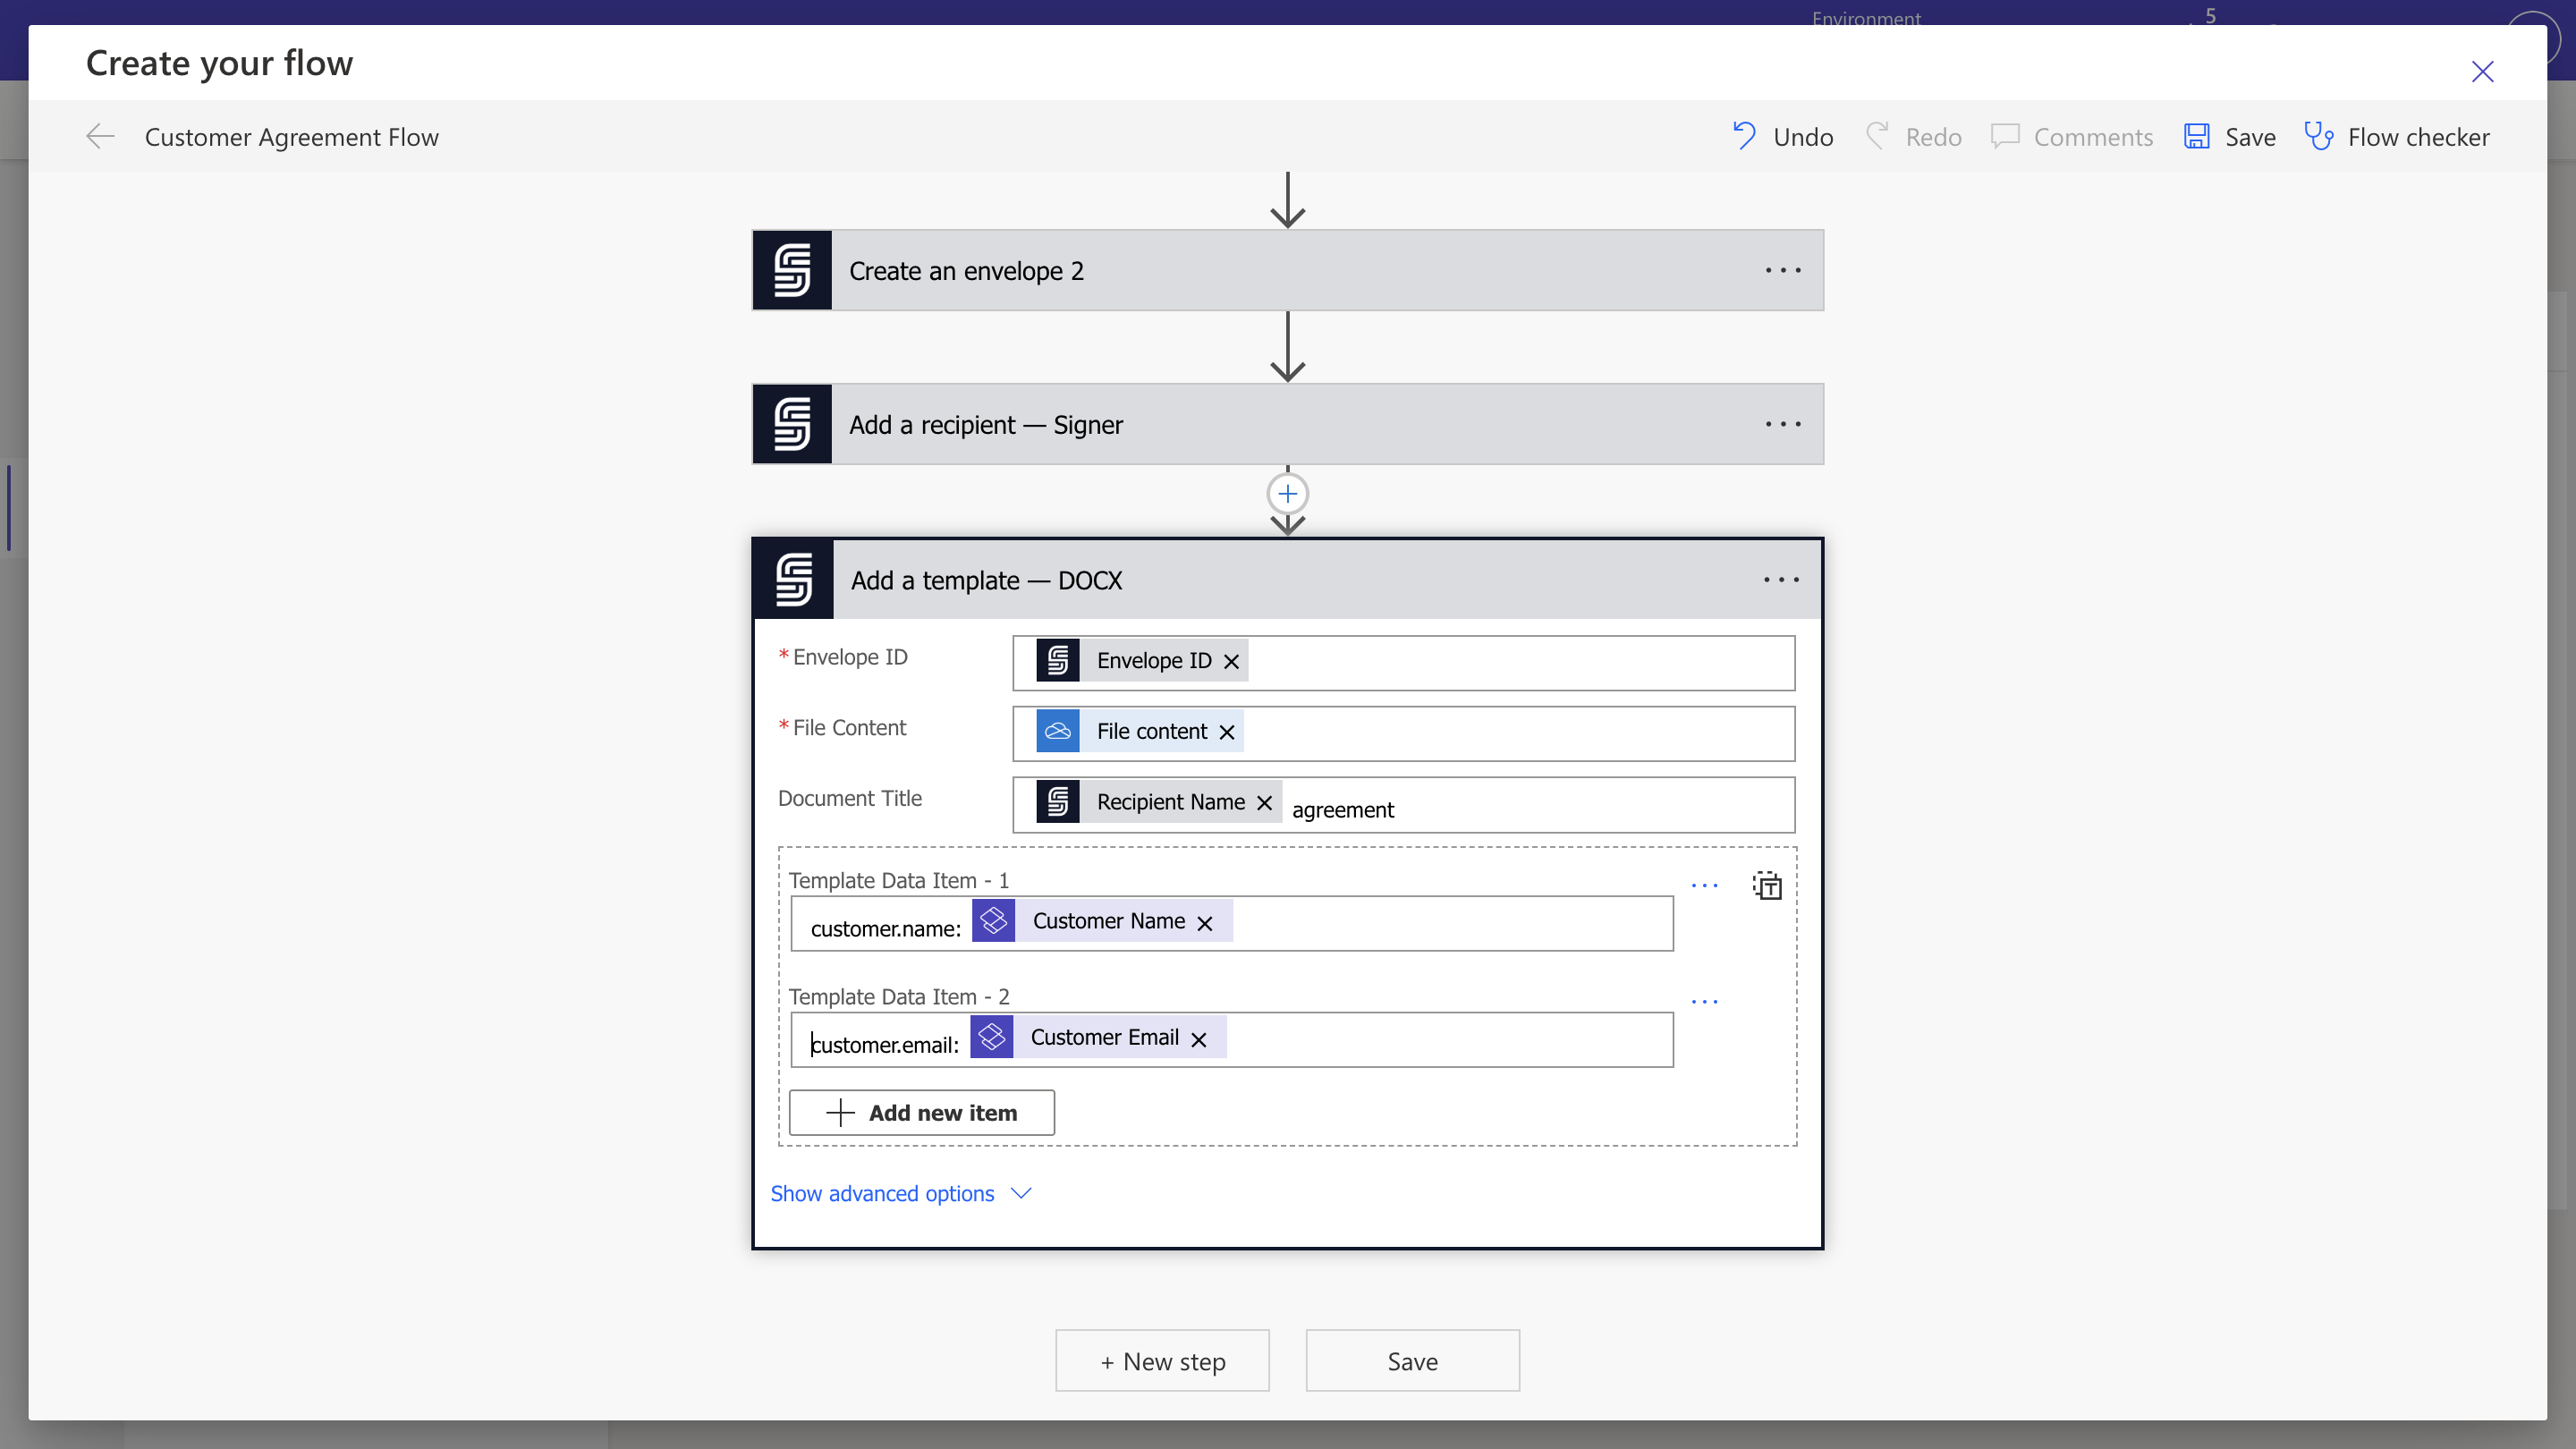
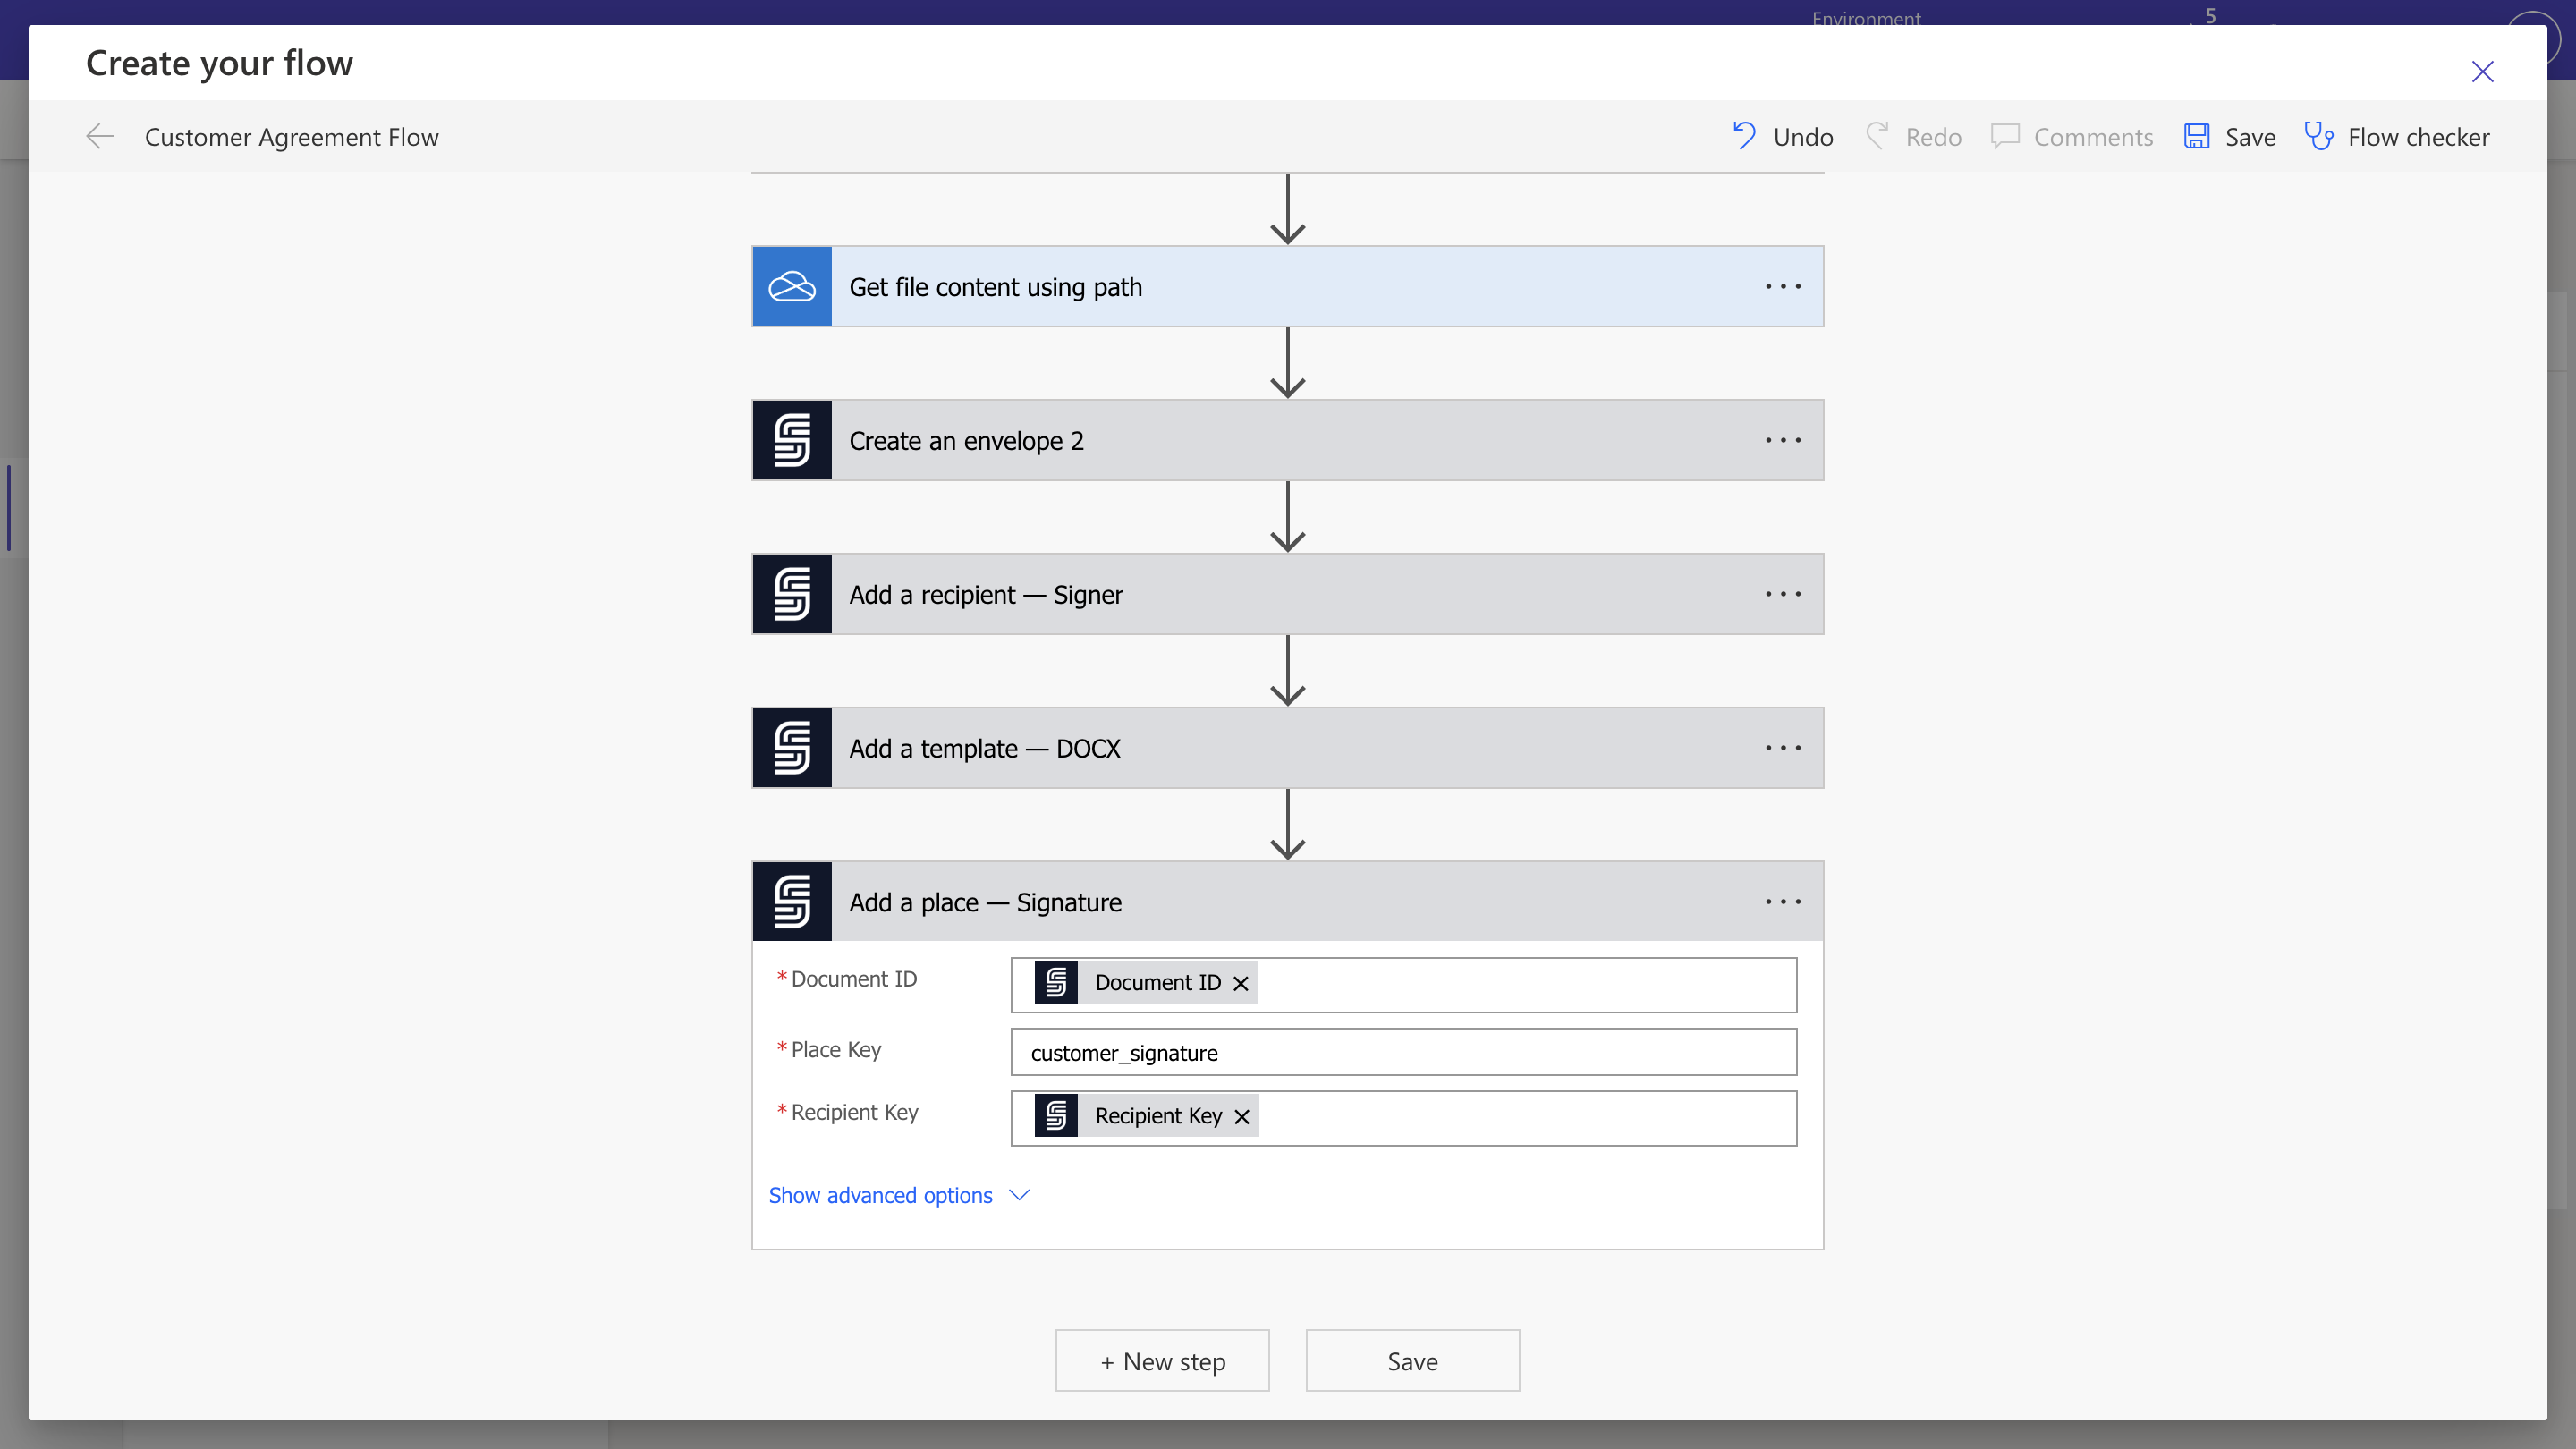
5.4 Define Signature Placement
Specify where the customer should sign on the document.- Add the Add a Place - Signature action.
- Set the Document ID using the dynamic content.
-
Enter the placeholder from your DOCX template (for example,
[[customer_signature]]). -
Set the Recipient Key using the dynamic content.
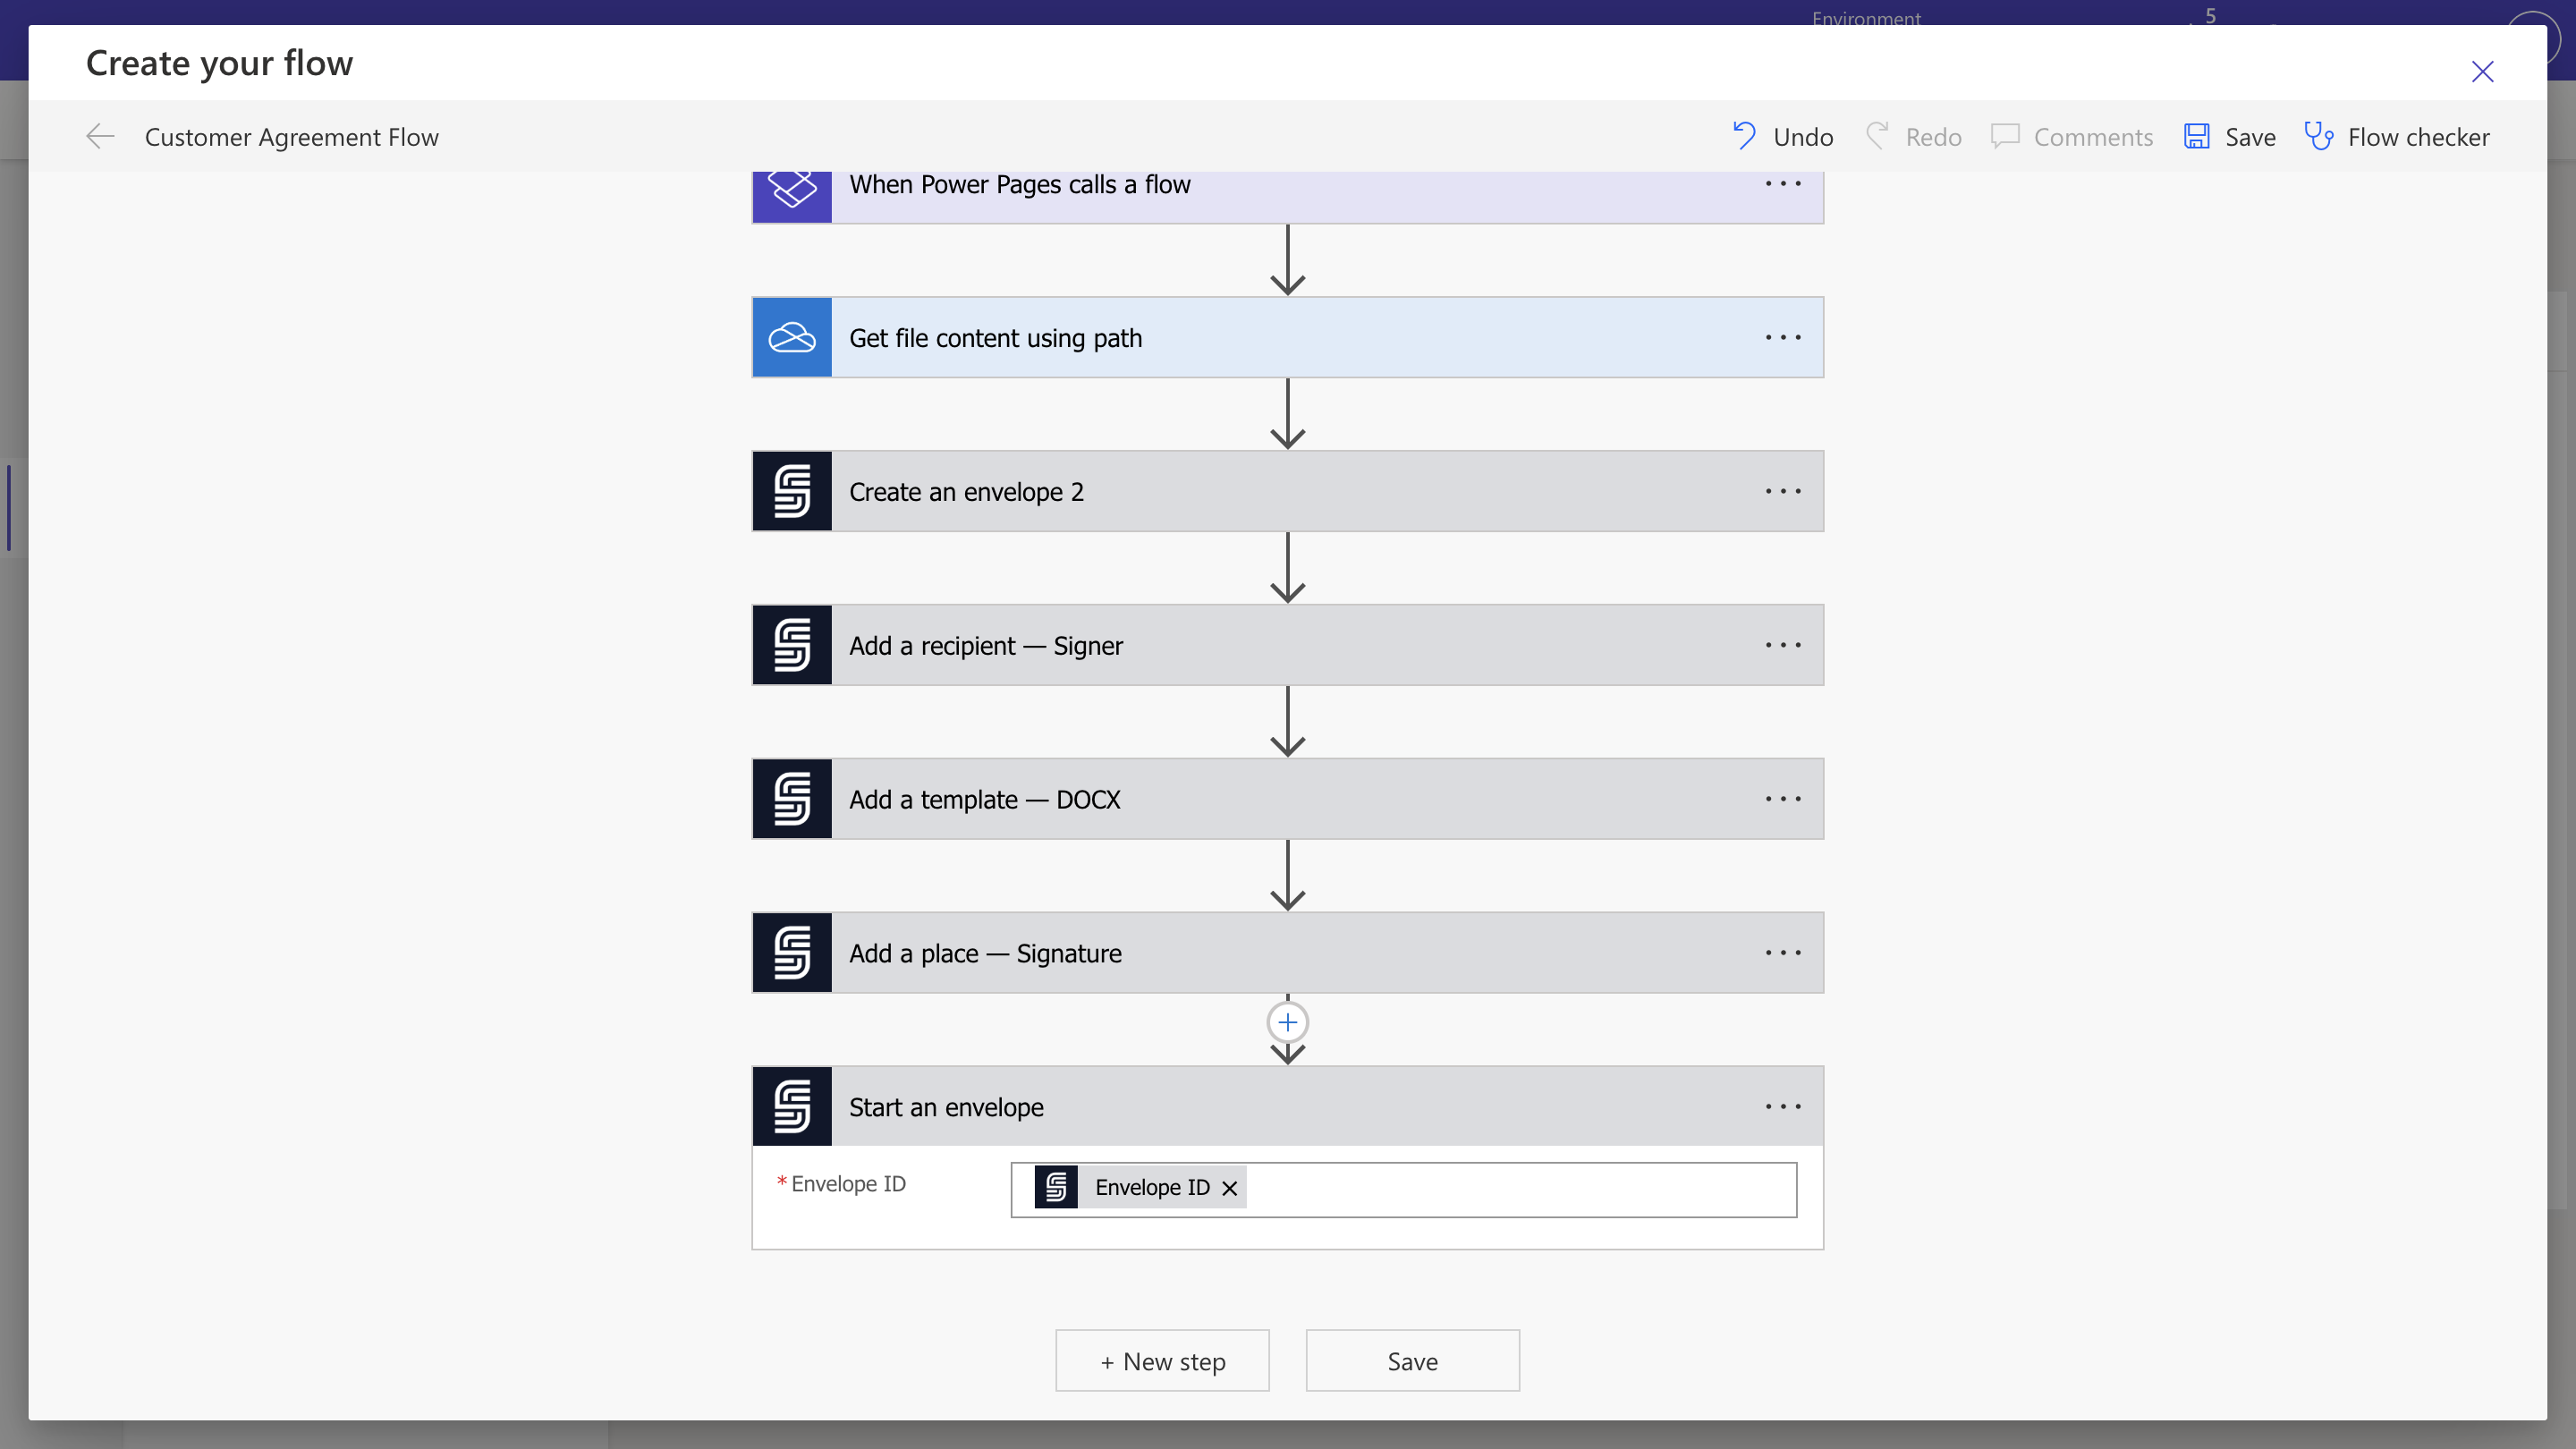
5.5 Start the Signing Process
Trigger the sending of your envelope to the customer for signing.- Add the Start Envelope action.
-
Set the Envelope ID using the dynamic content.
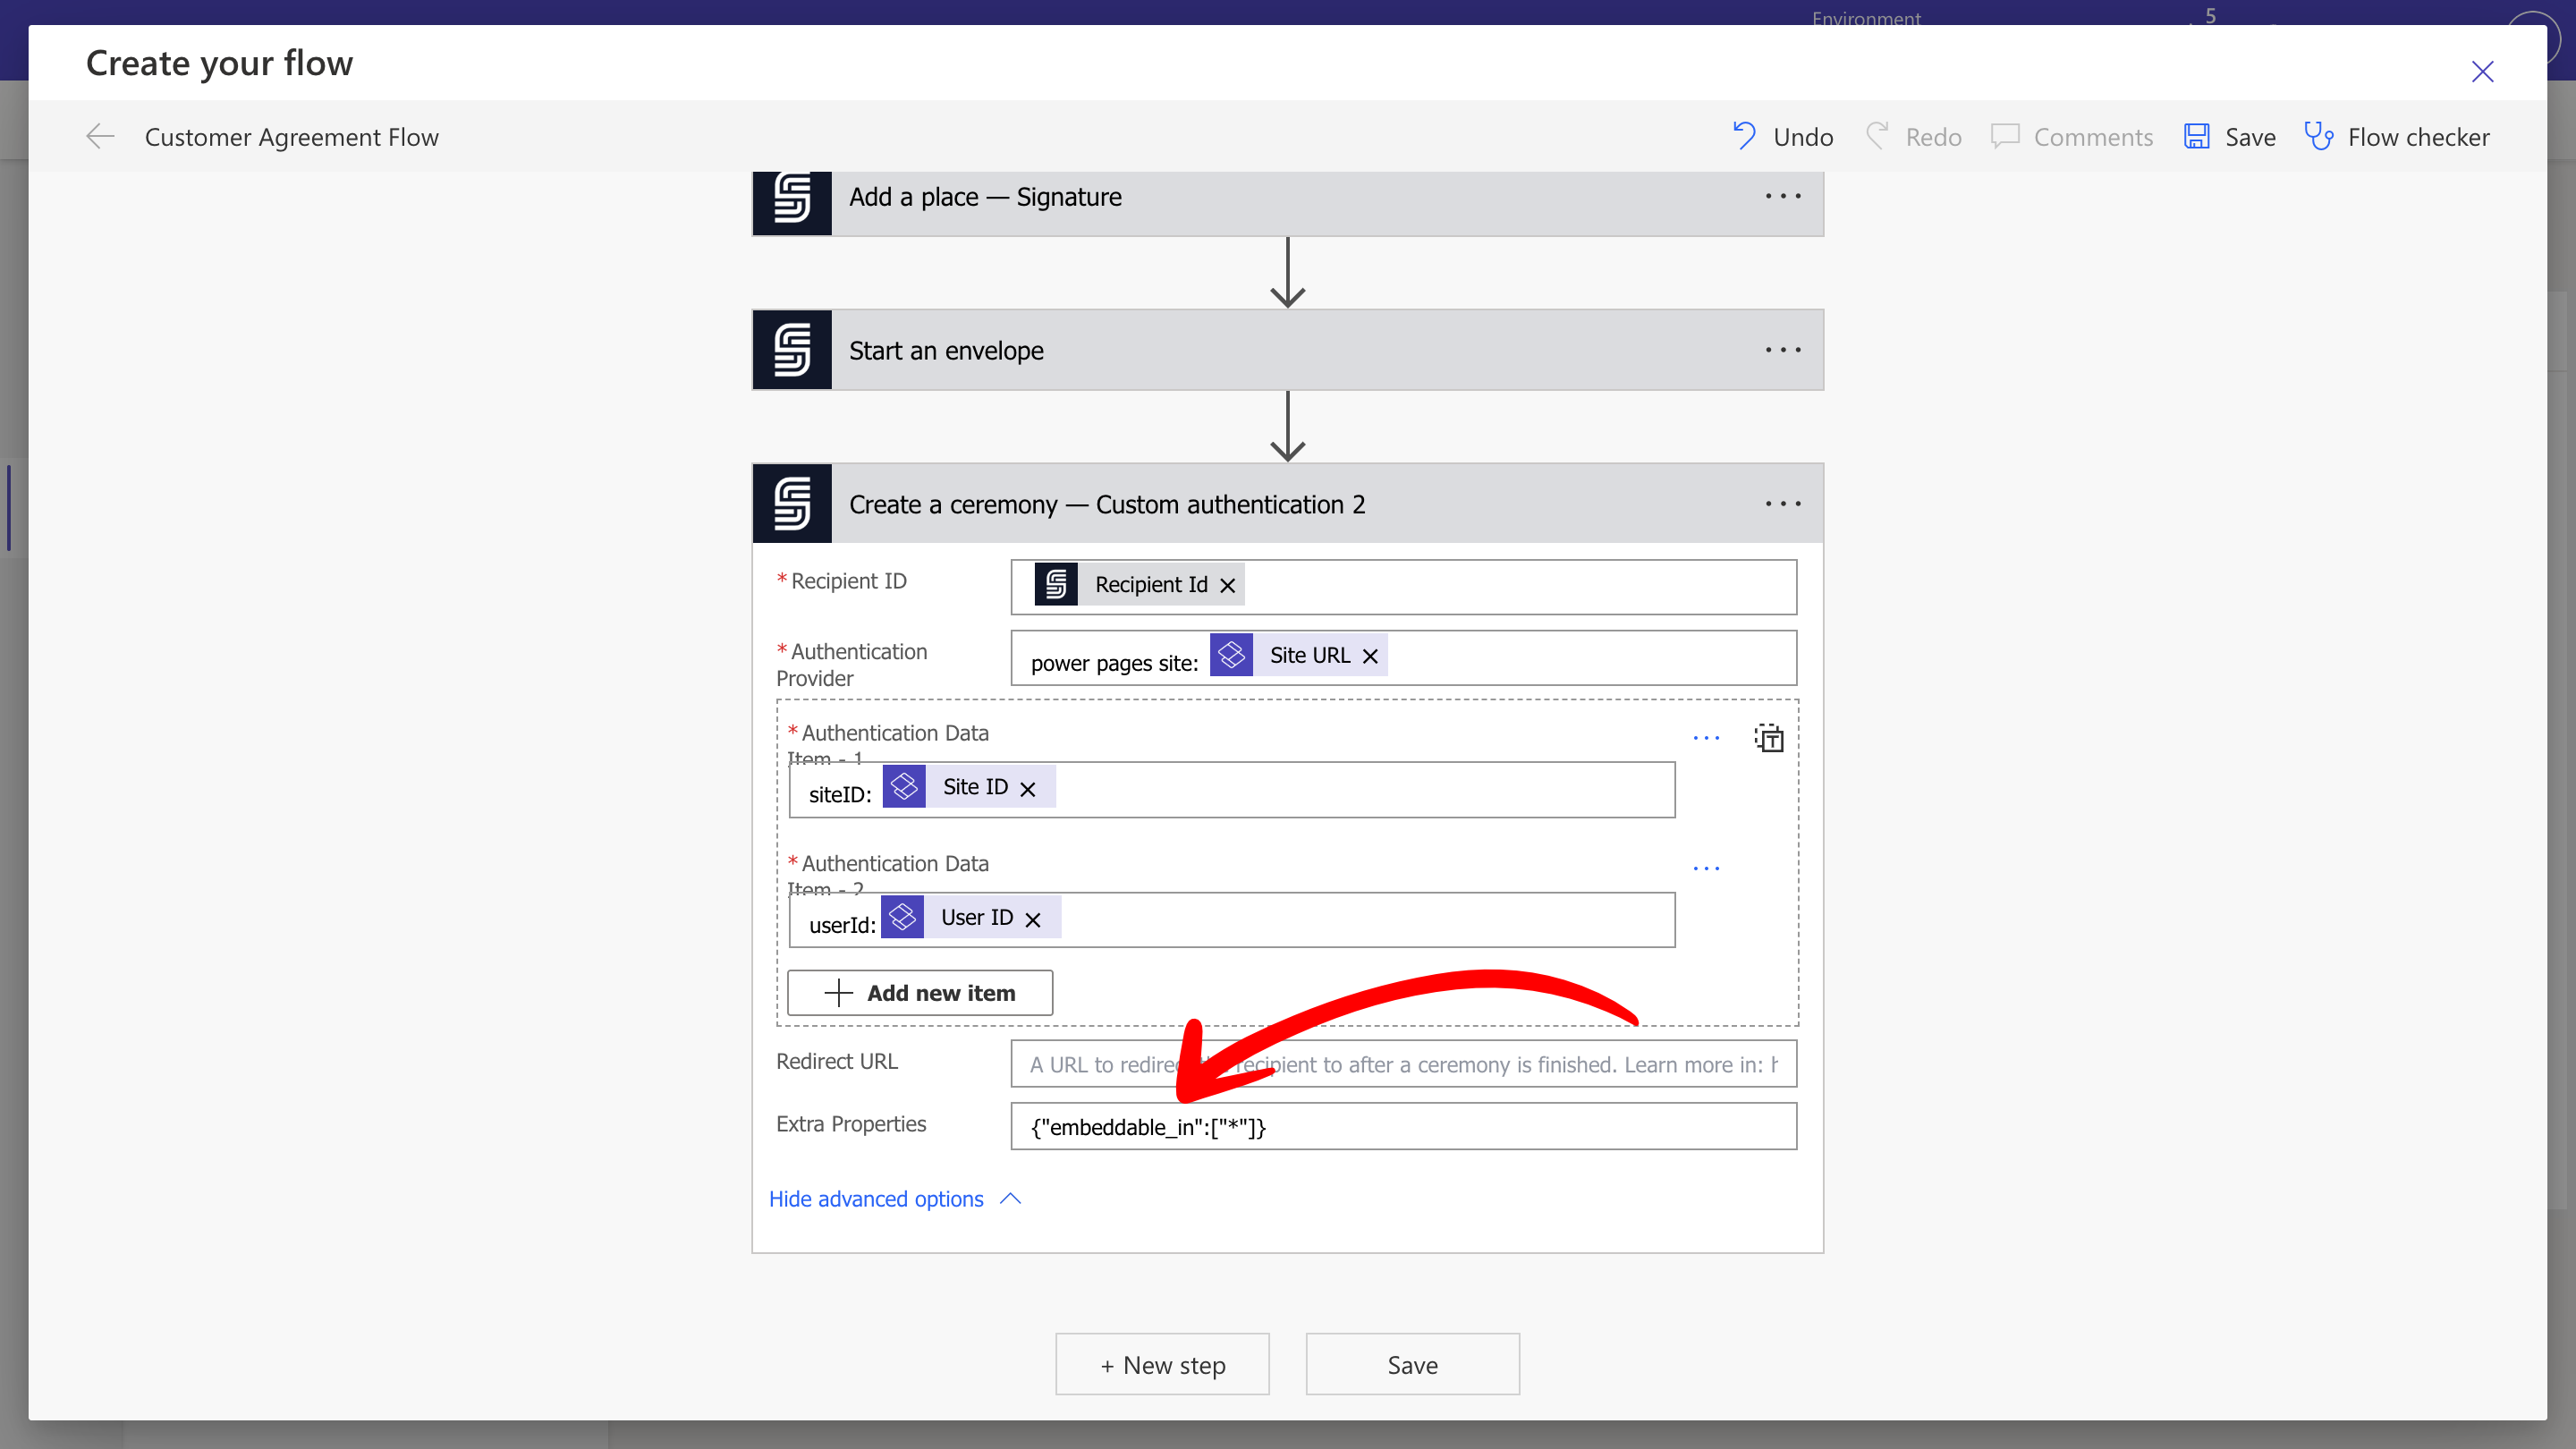
5.6 Create the Ceremony
Create a ceremony with custom authentication. This returns a URL that you will use to embed the signing experience in Power Pages.- Add the Create Ceremony - Custom authentication action from the SignatureAPI connector.
- Set the Recipient ID using dynamic content.
- Set the Authentication Provider to the provider you want to use. This value appears in the Audit Log of the deliverable as the security provider for the ceremony.
- Set the Authentication Data to the verification data for the user and provider. This also appears in the Audit Log.
-
In the advanced options, under the Extra Properties section, add the following JSON:
This allows the ceremony to be embedded in any Power Pages site.
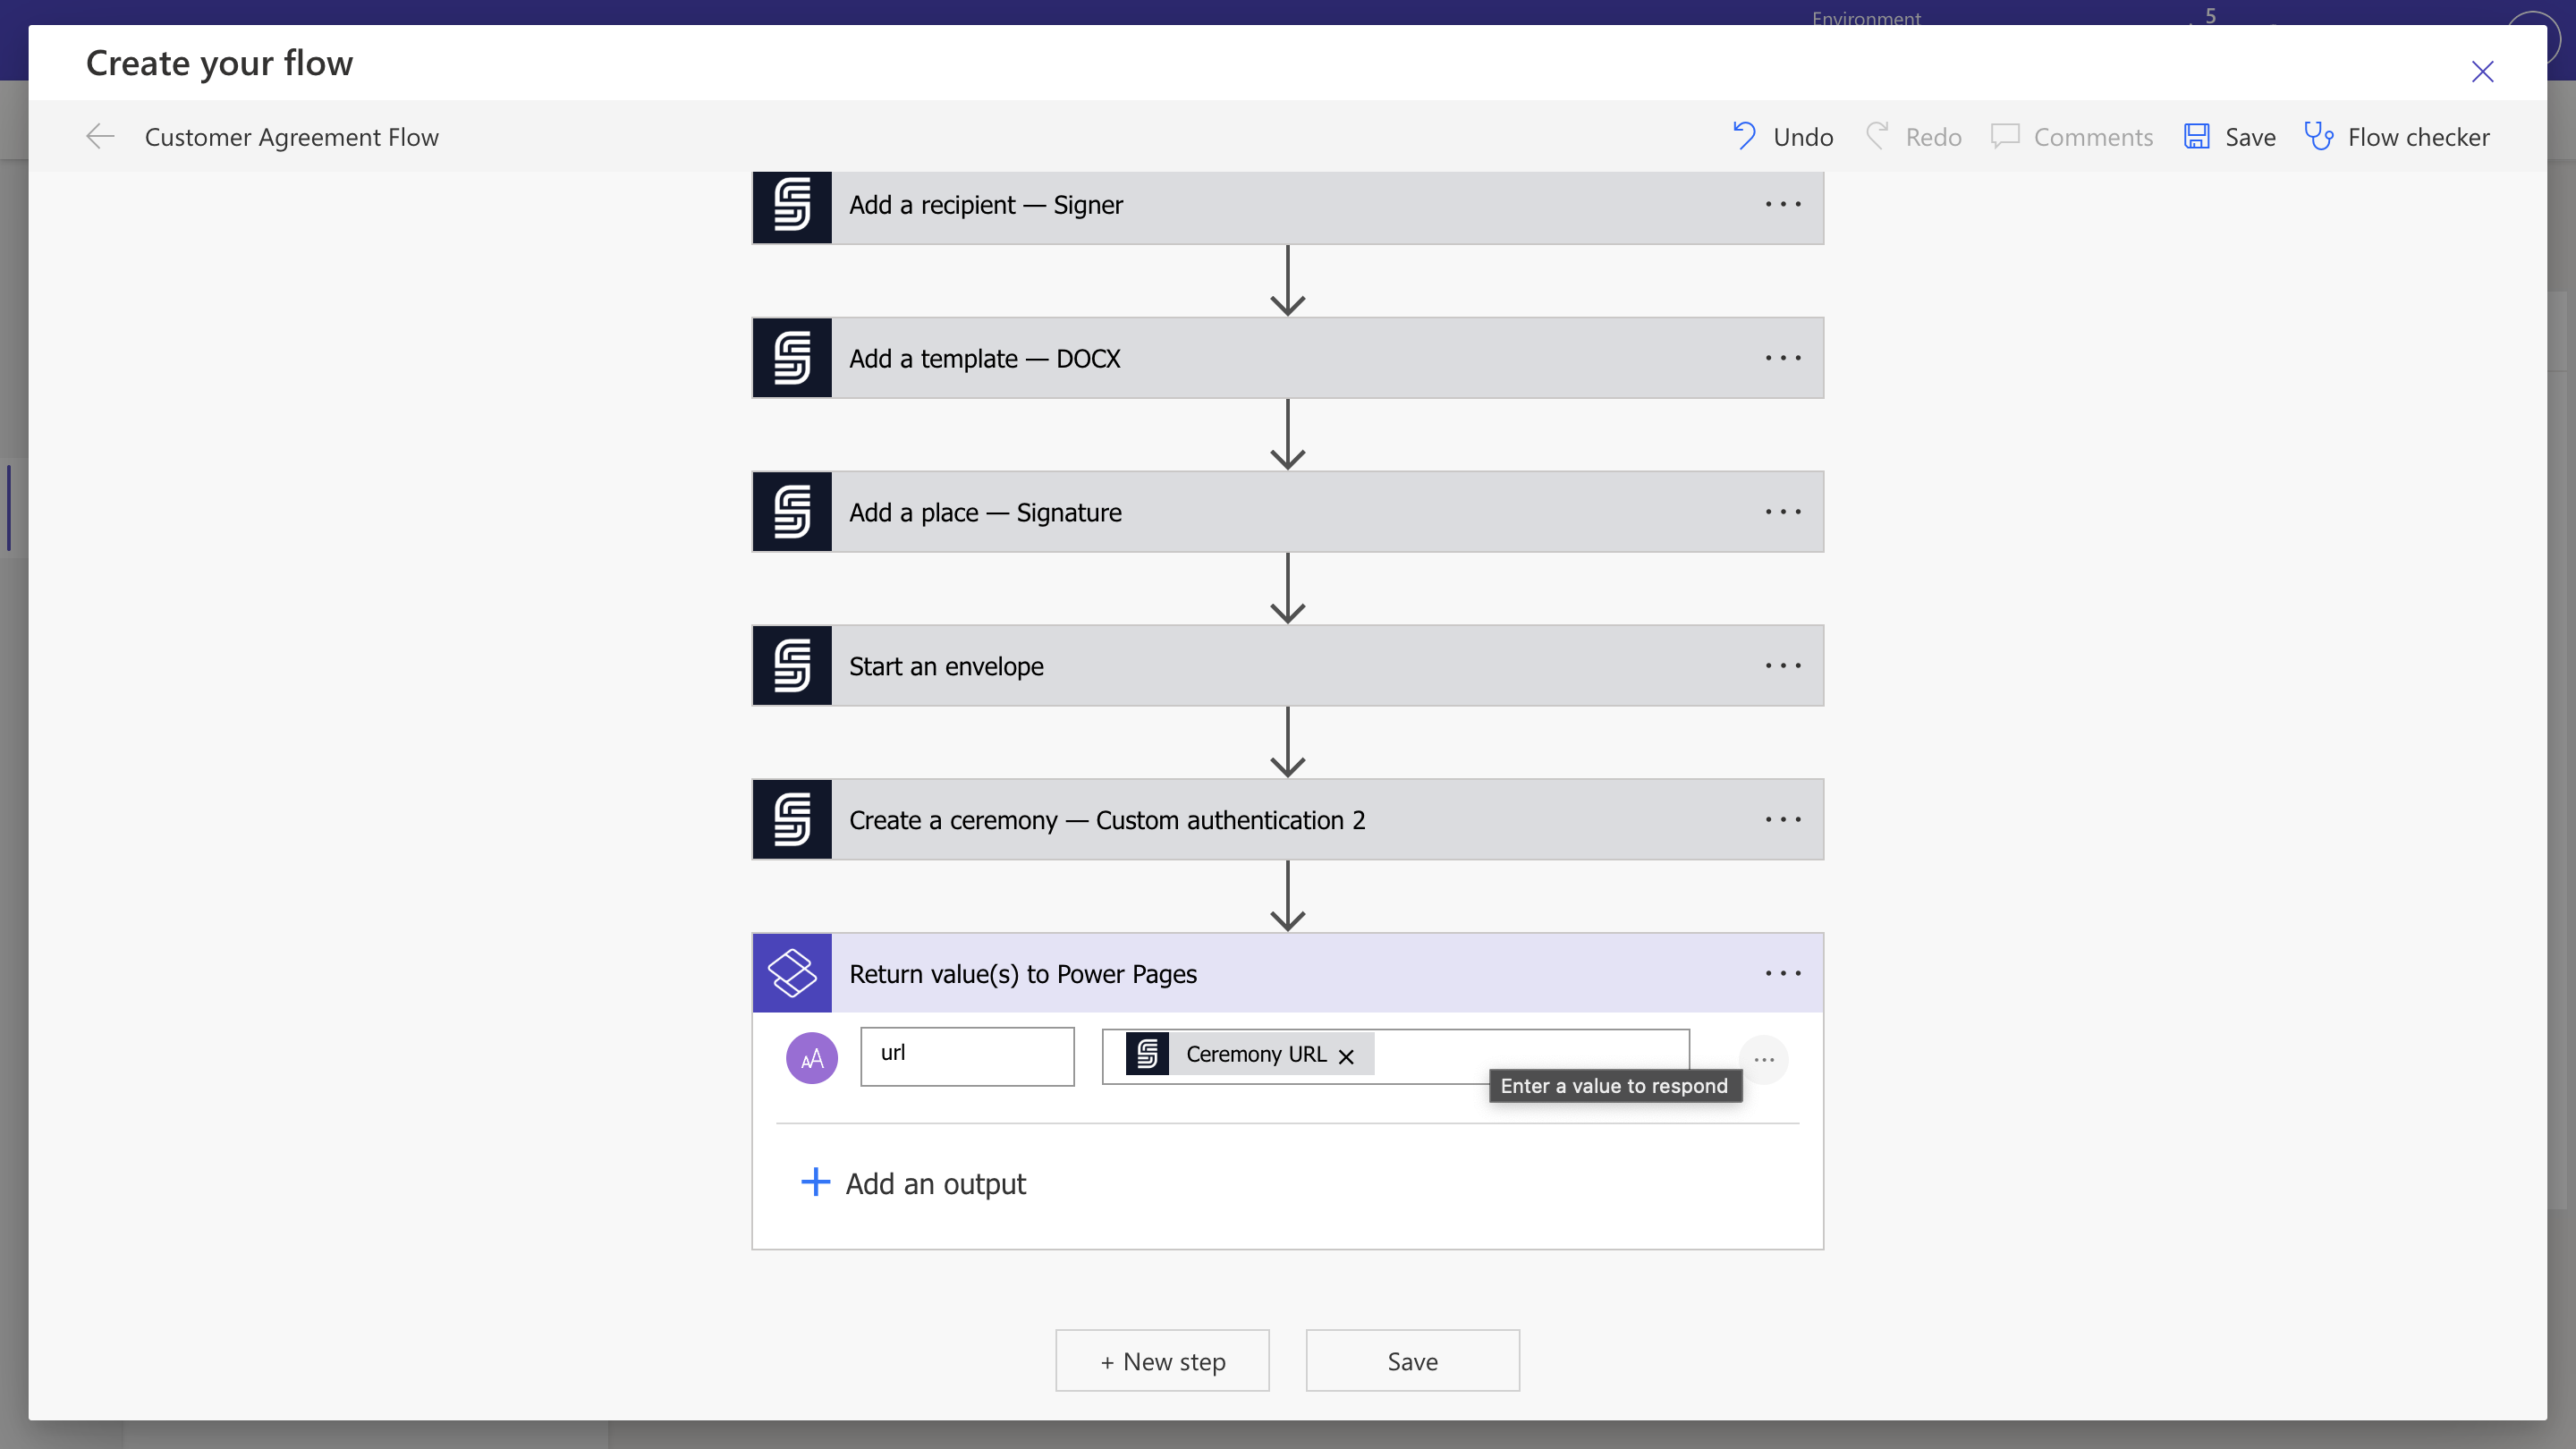
5.7 Return the Ceremony URL to Power Pages
- Add an output of type Text.
-
Set the Name to the variable name you want to return (for example,
url). -
Set the Value to the ceremony URL from the Create Ceremony - Custom authentication action using dynamic content.
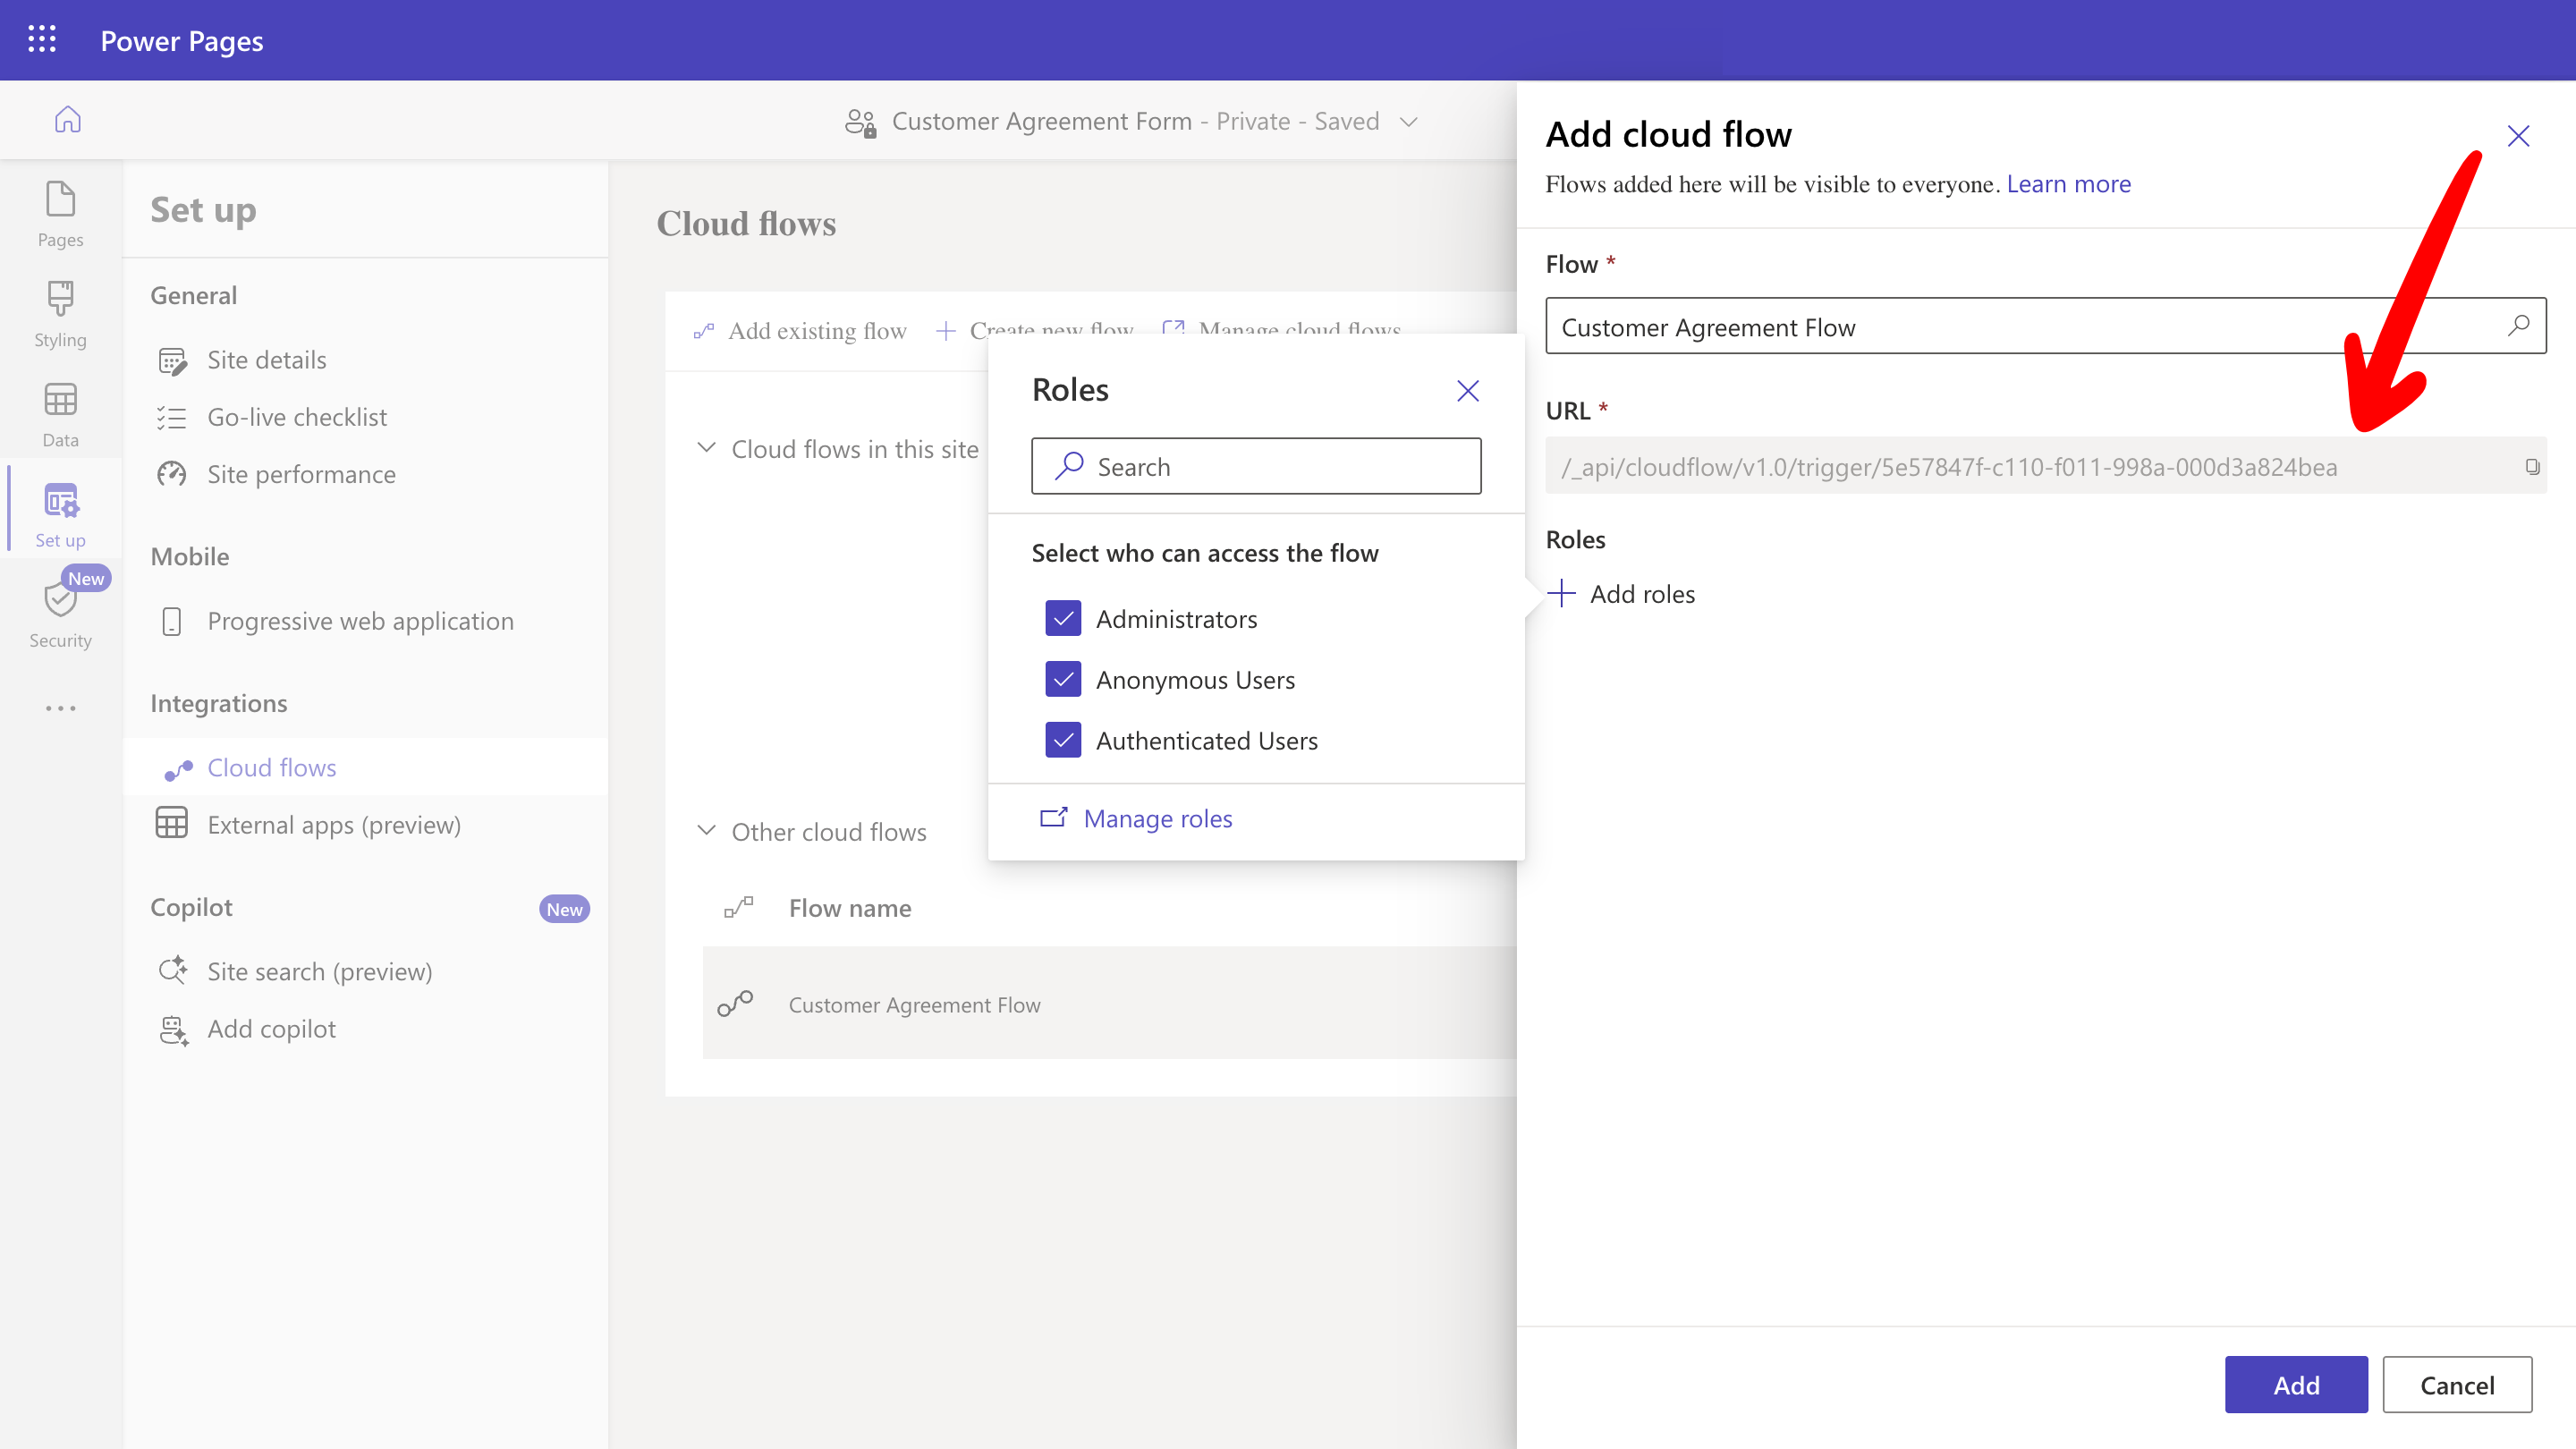
Step 6: Save the Flow and Add It to Power Pages
- Save the flow and copy the flow URL.
-
Set the roles and permissions for the flow. In this example, allow all roles to access the flow.
Step 7: Add the Form and Embed the Ceremony in Power Pages
To invoke the Power Automate flow from a form submission, you need to add custom HTML and JavaScript to your Power Pages site using the Visual Studio Code editor.7.1 Open Power Pages in the VS Code Editor
-
From the left-hand menu bar, click Pages to view all pages on the site.
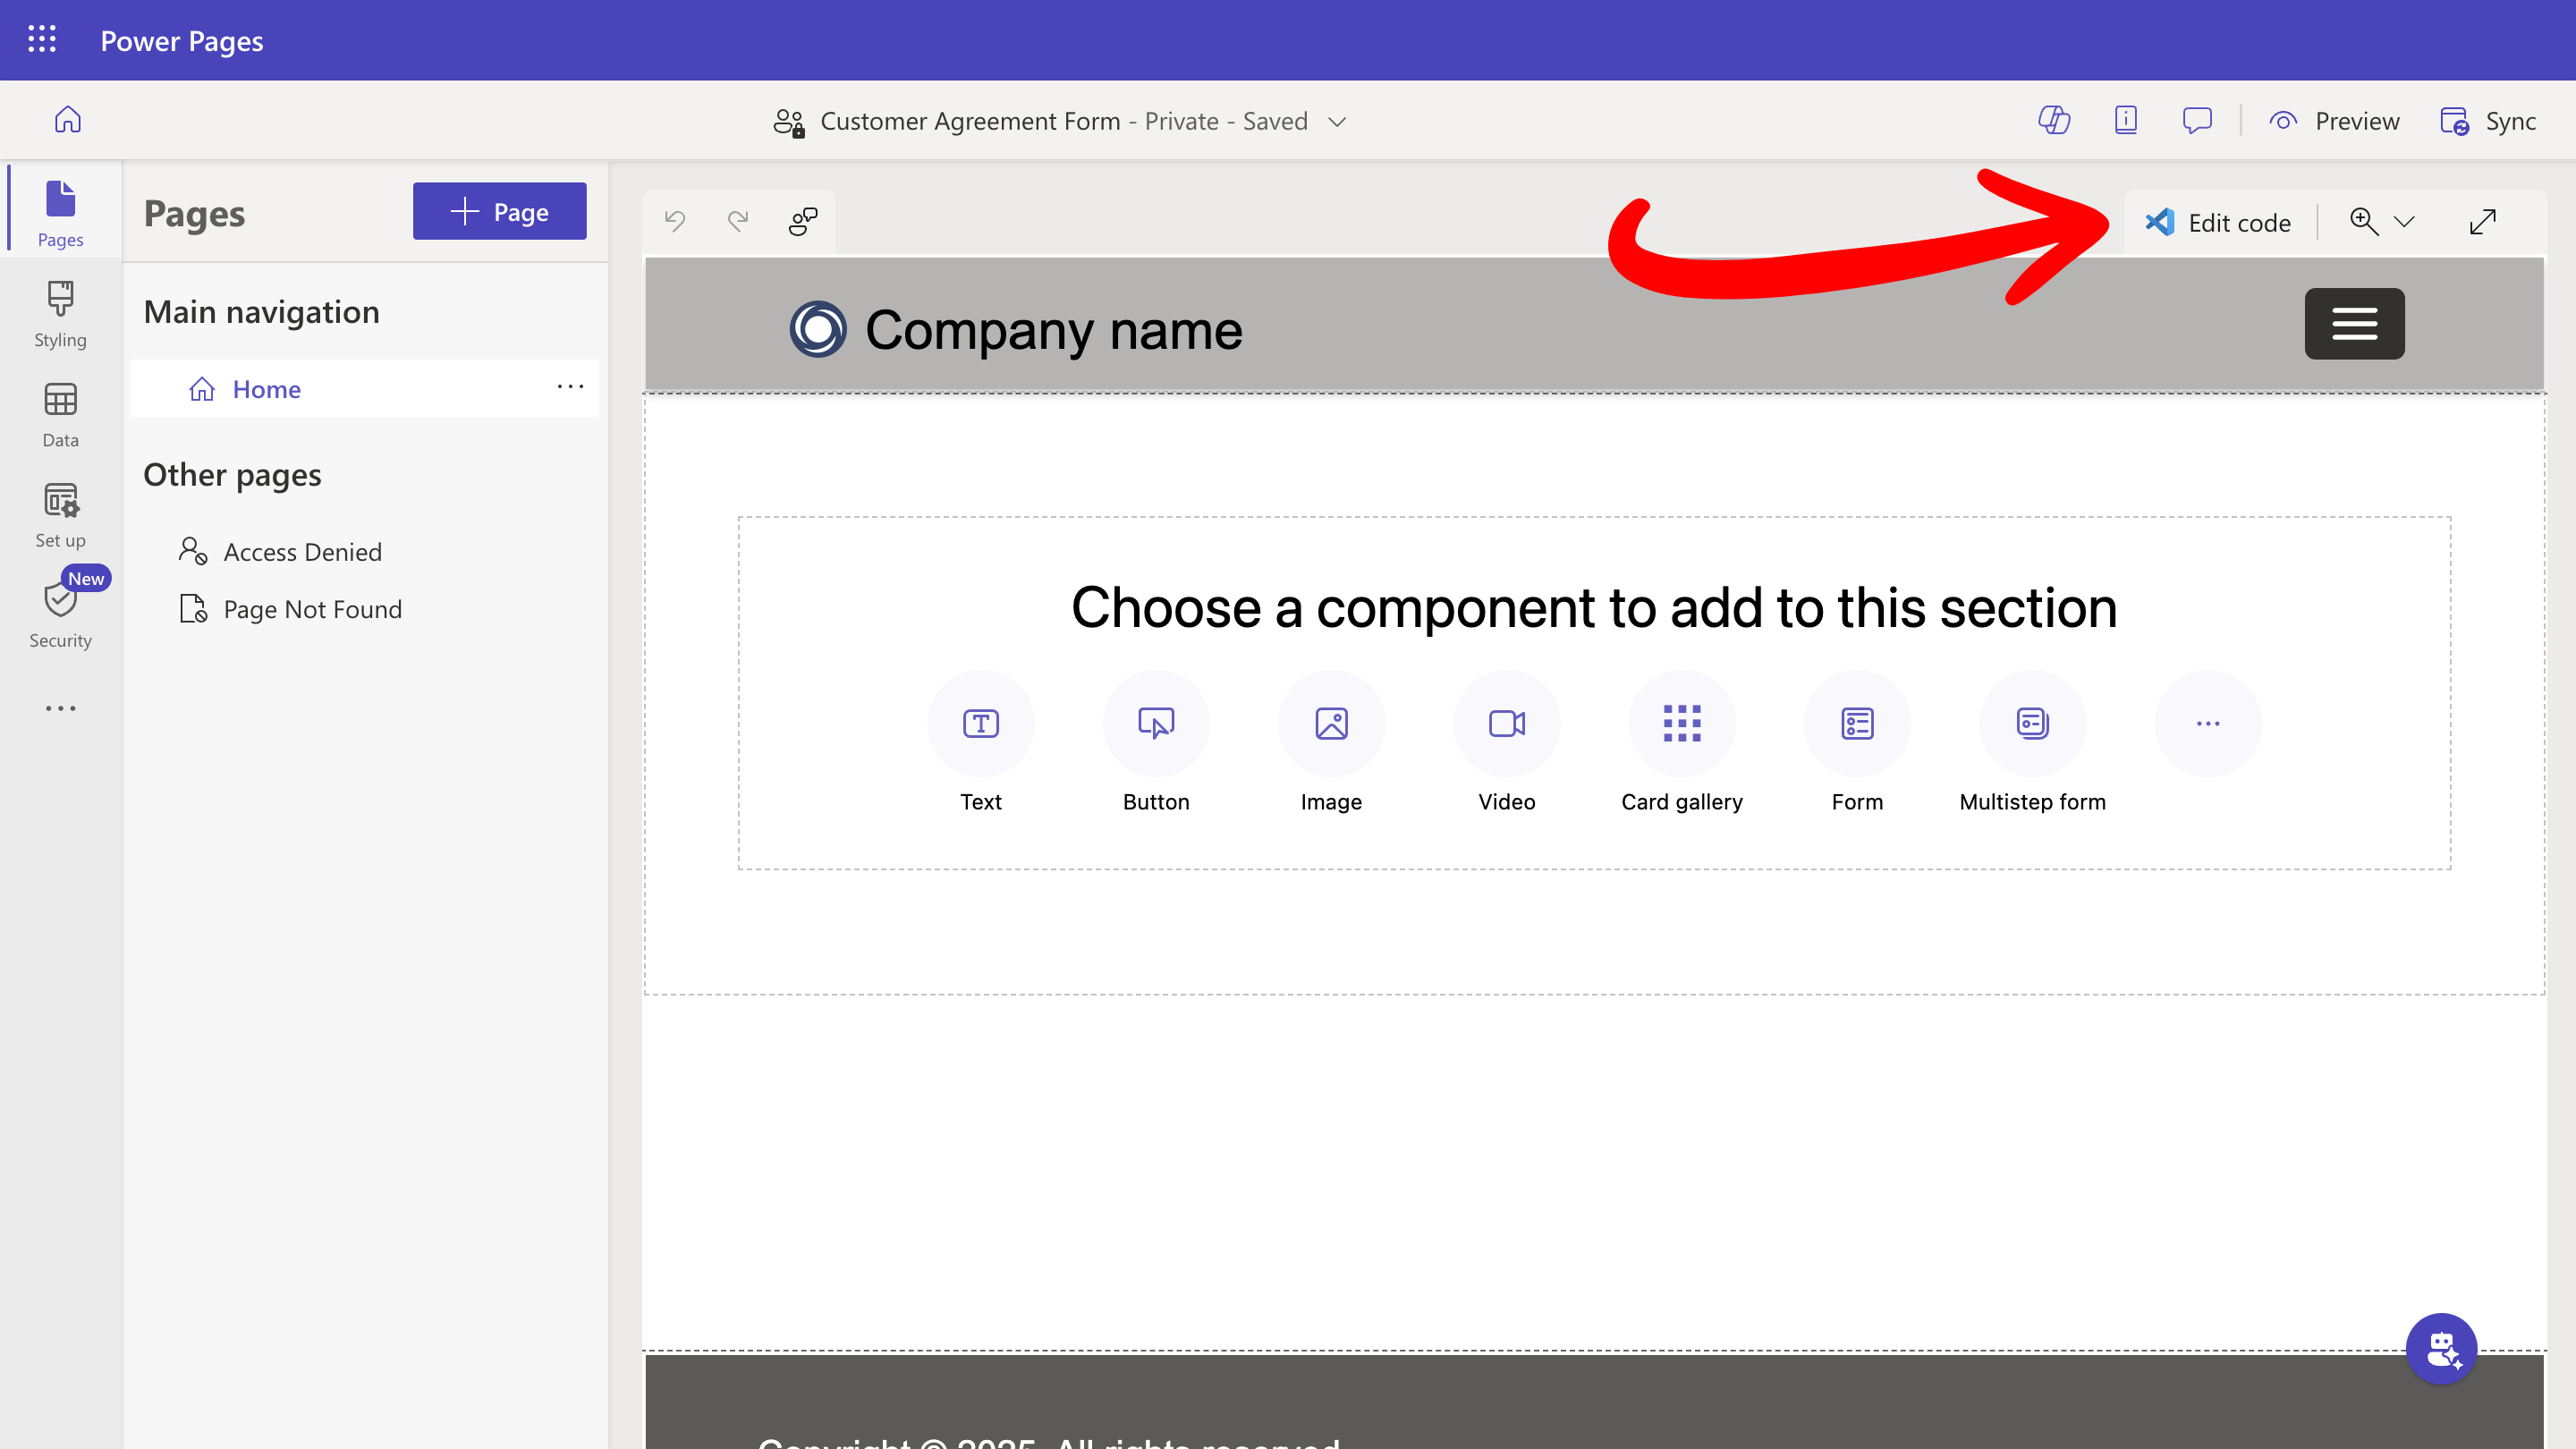
-
Click Edit code. This opens the VS Code editor with the Power Pages source code, starting on the home page.
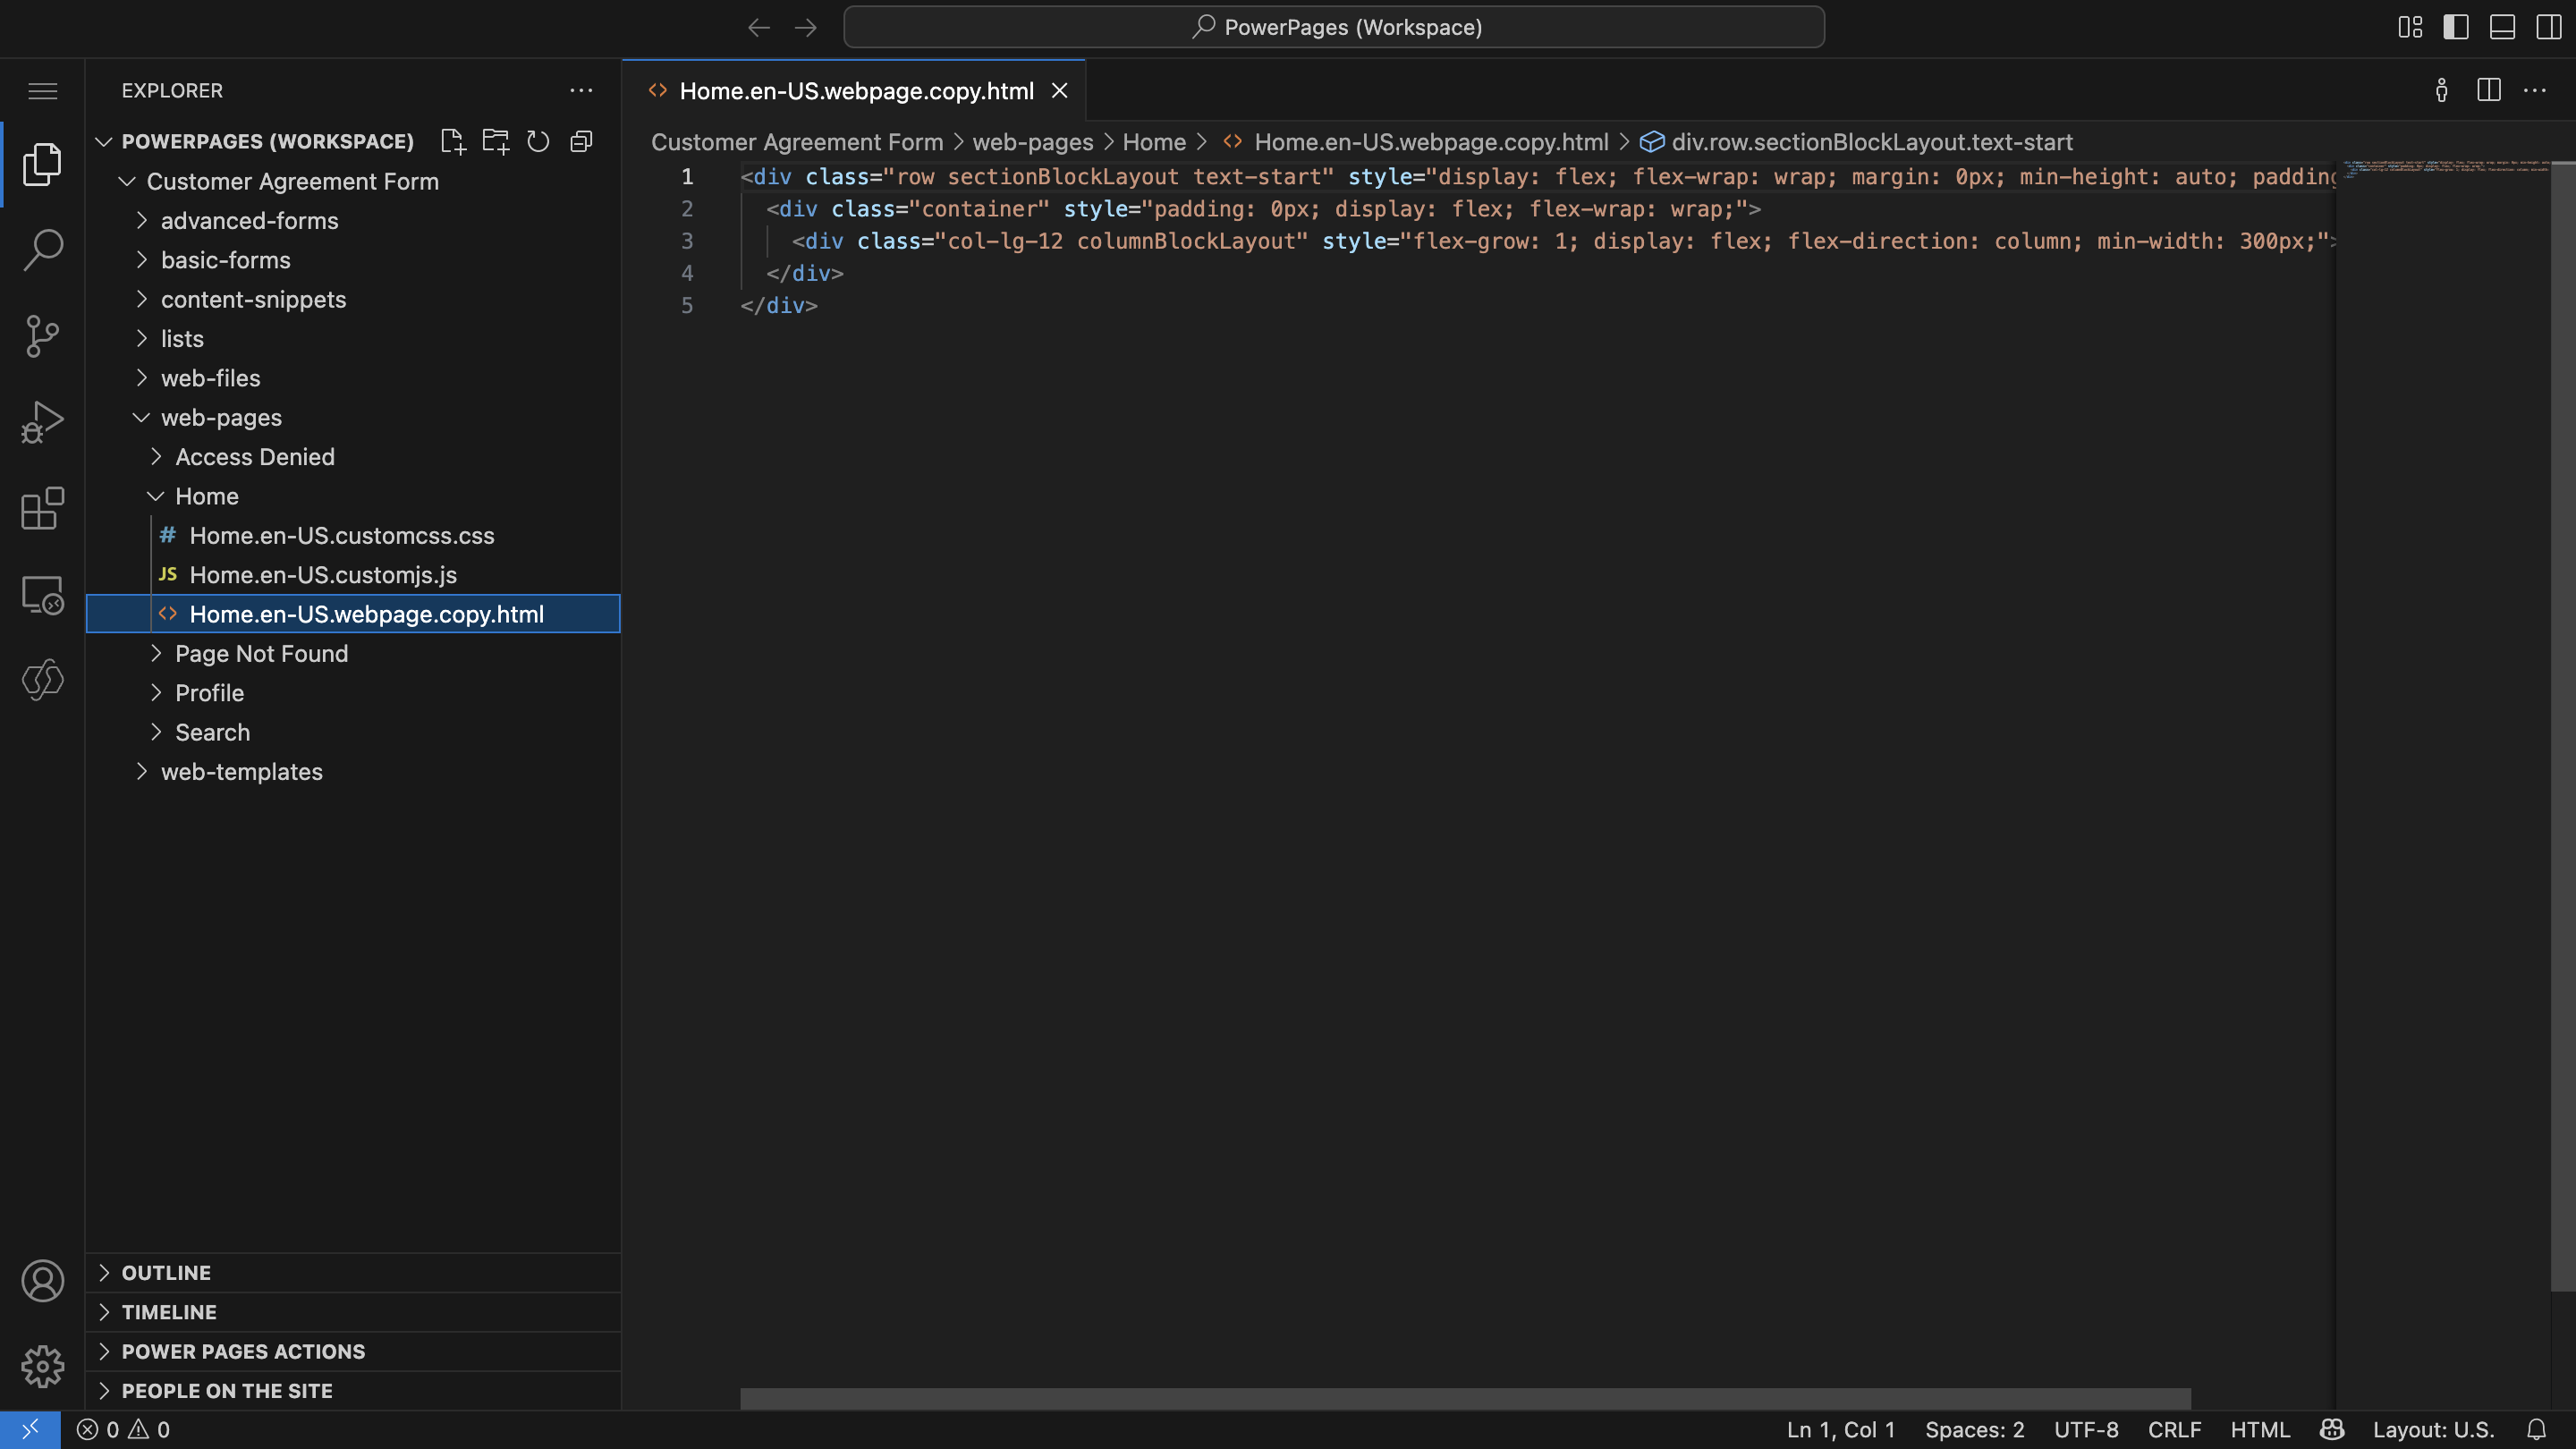
7.2 Add the Form and Ceremony Embed Code
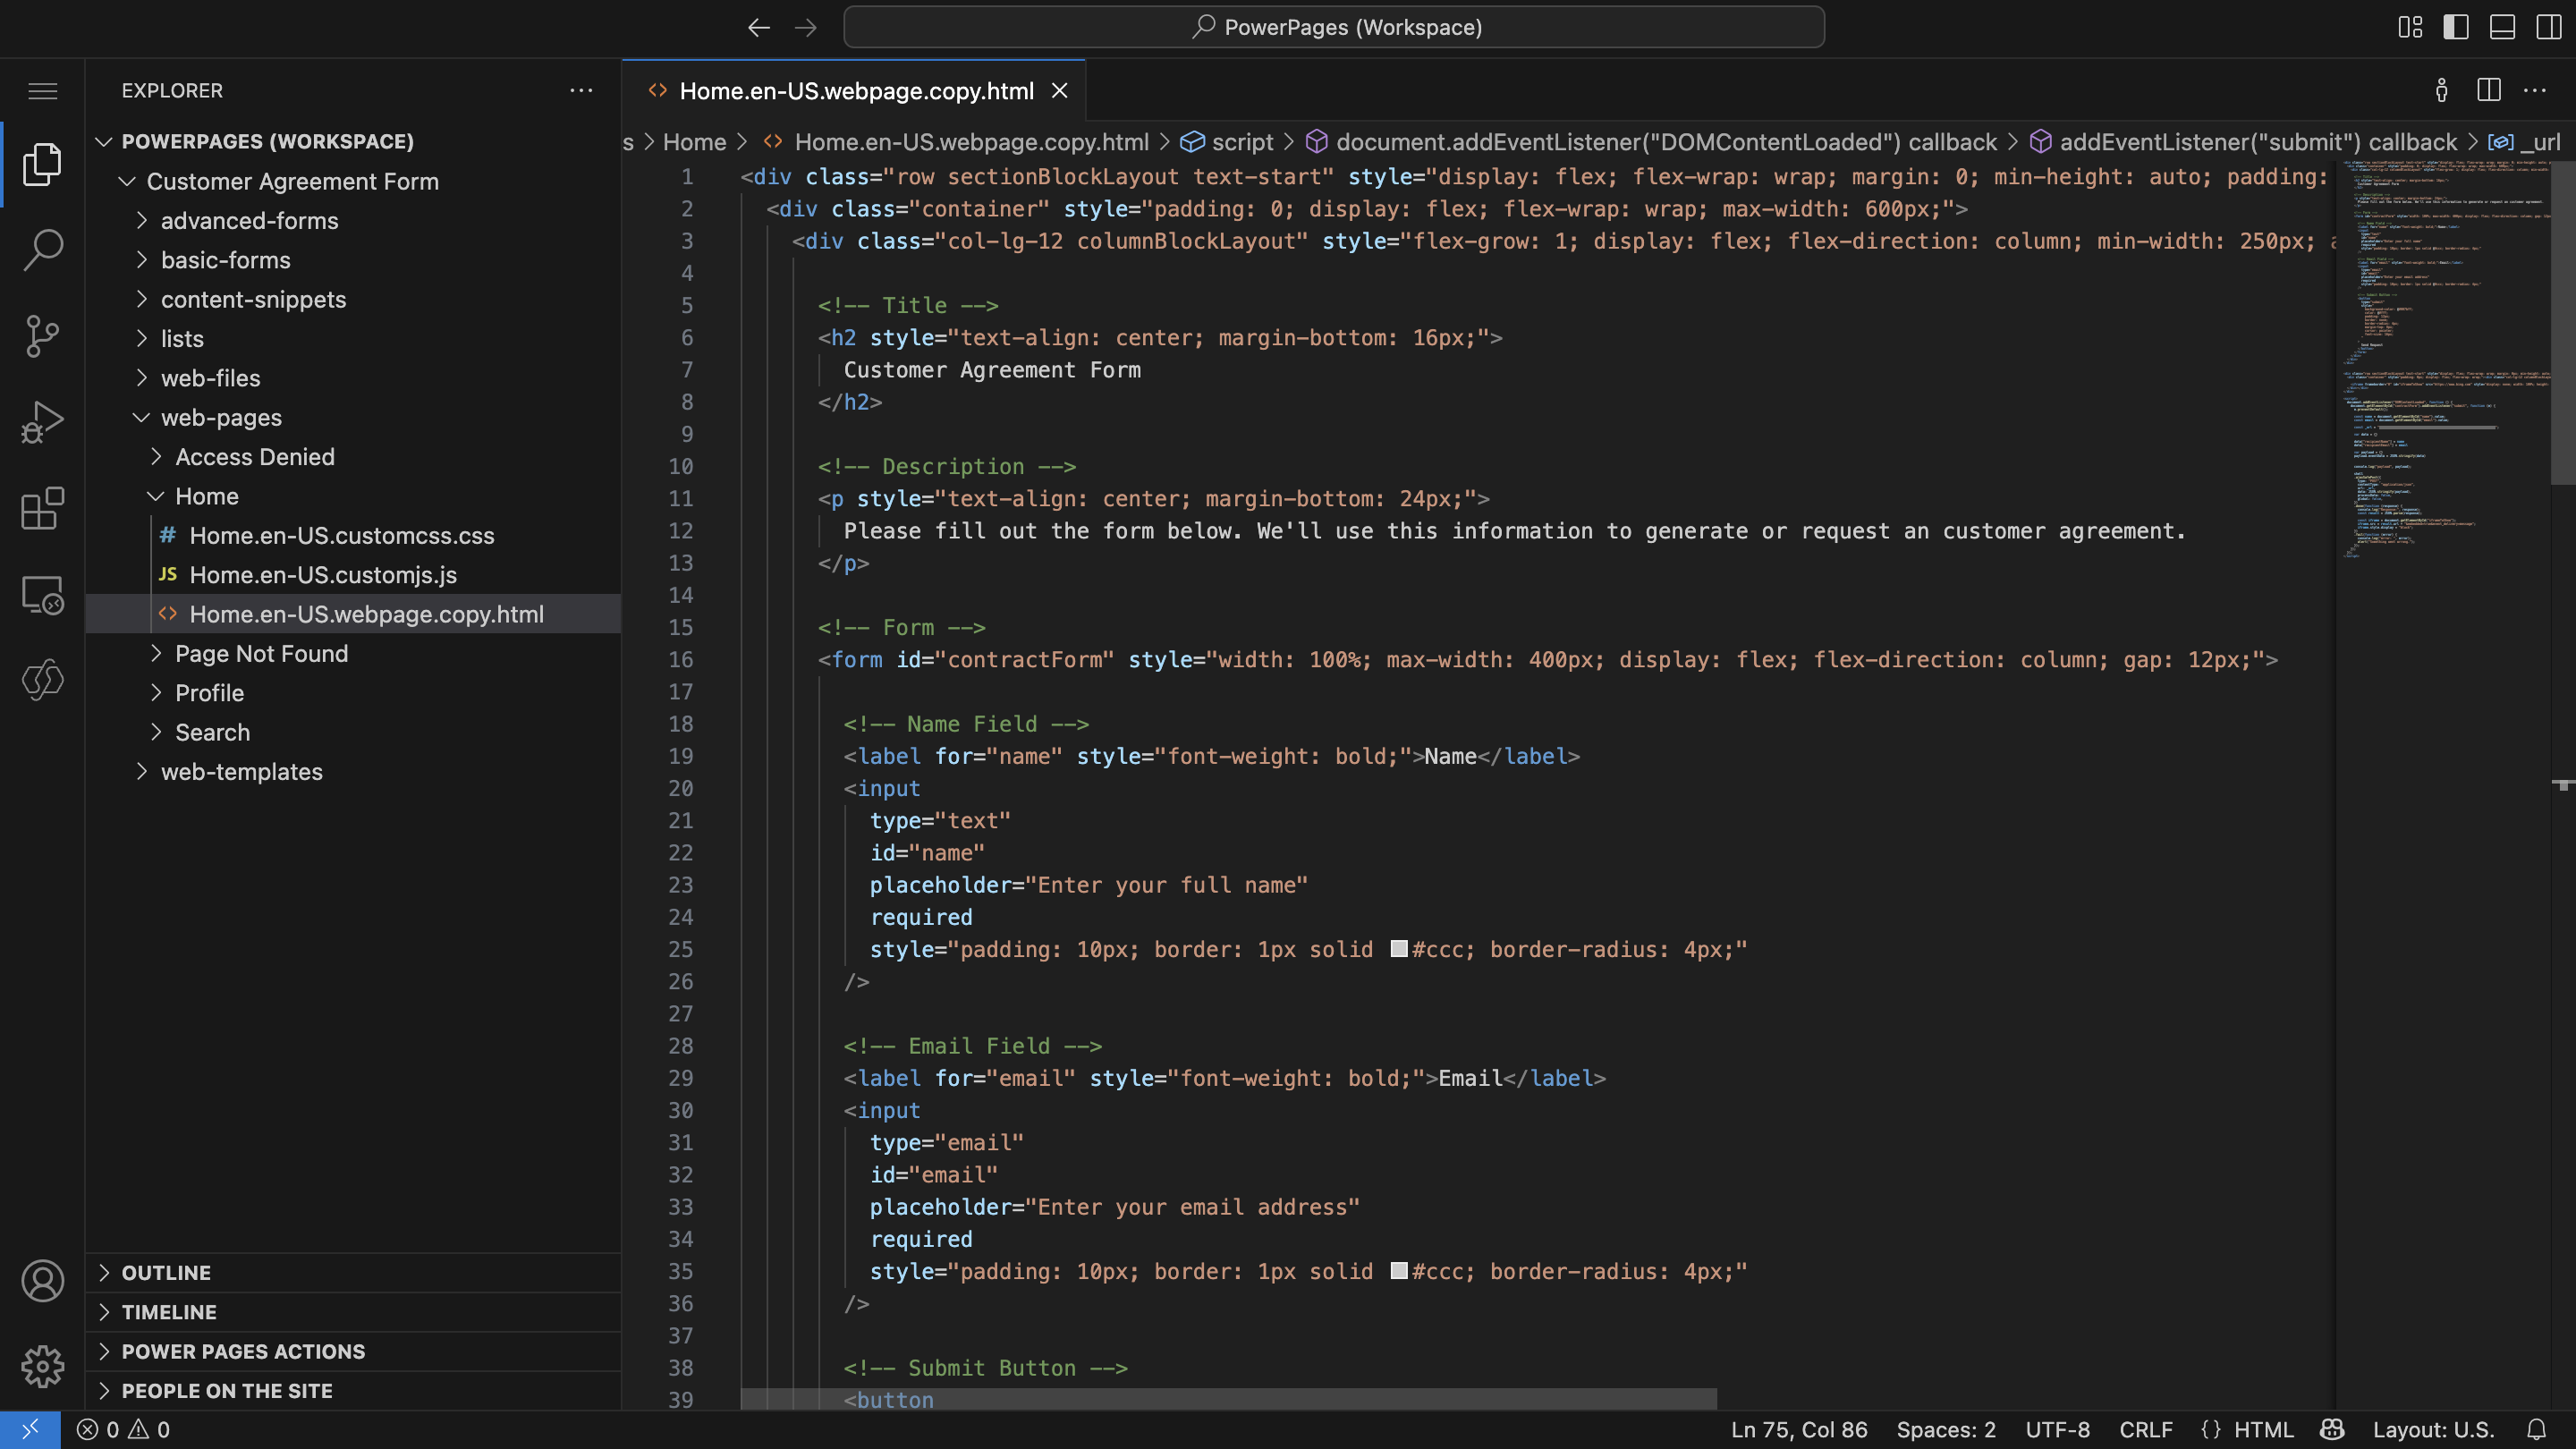
In the VS Code editor, open theHome.html file and add the following code. This creates a form that collects the customer’s name and email, calls the Power Automate flow on submission, and displays the returned ceremony in an iframe.
The code has three main sections:
- Form HTML — renders input fields for the customer’s name and email, along with a submit button.
- Iframe container — a hidden iframe that becomes visible once the ceremony URL is returned.
- JavaScript — handles form submission, sends the data to the Power Automate flow, and loads the ceremony URL into the iframe.
- Copy and paste the code into the VS Code editor.
-
Replace the
_urlvalue ("REPLACE_WITH_YOUR_FLOW_URL") with the actual flow URL you copied in Step 6.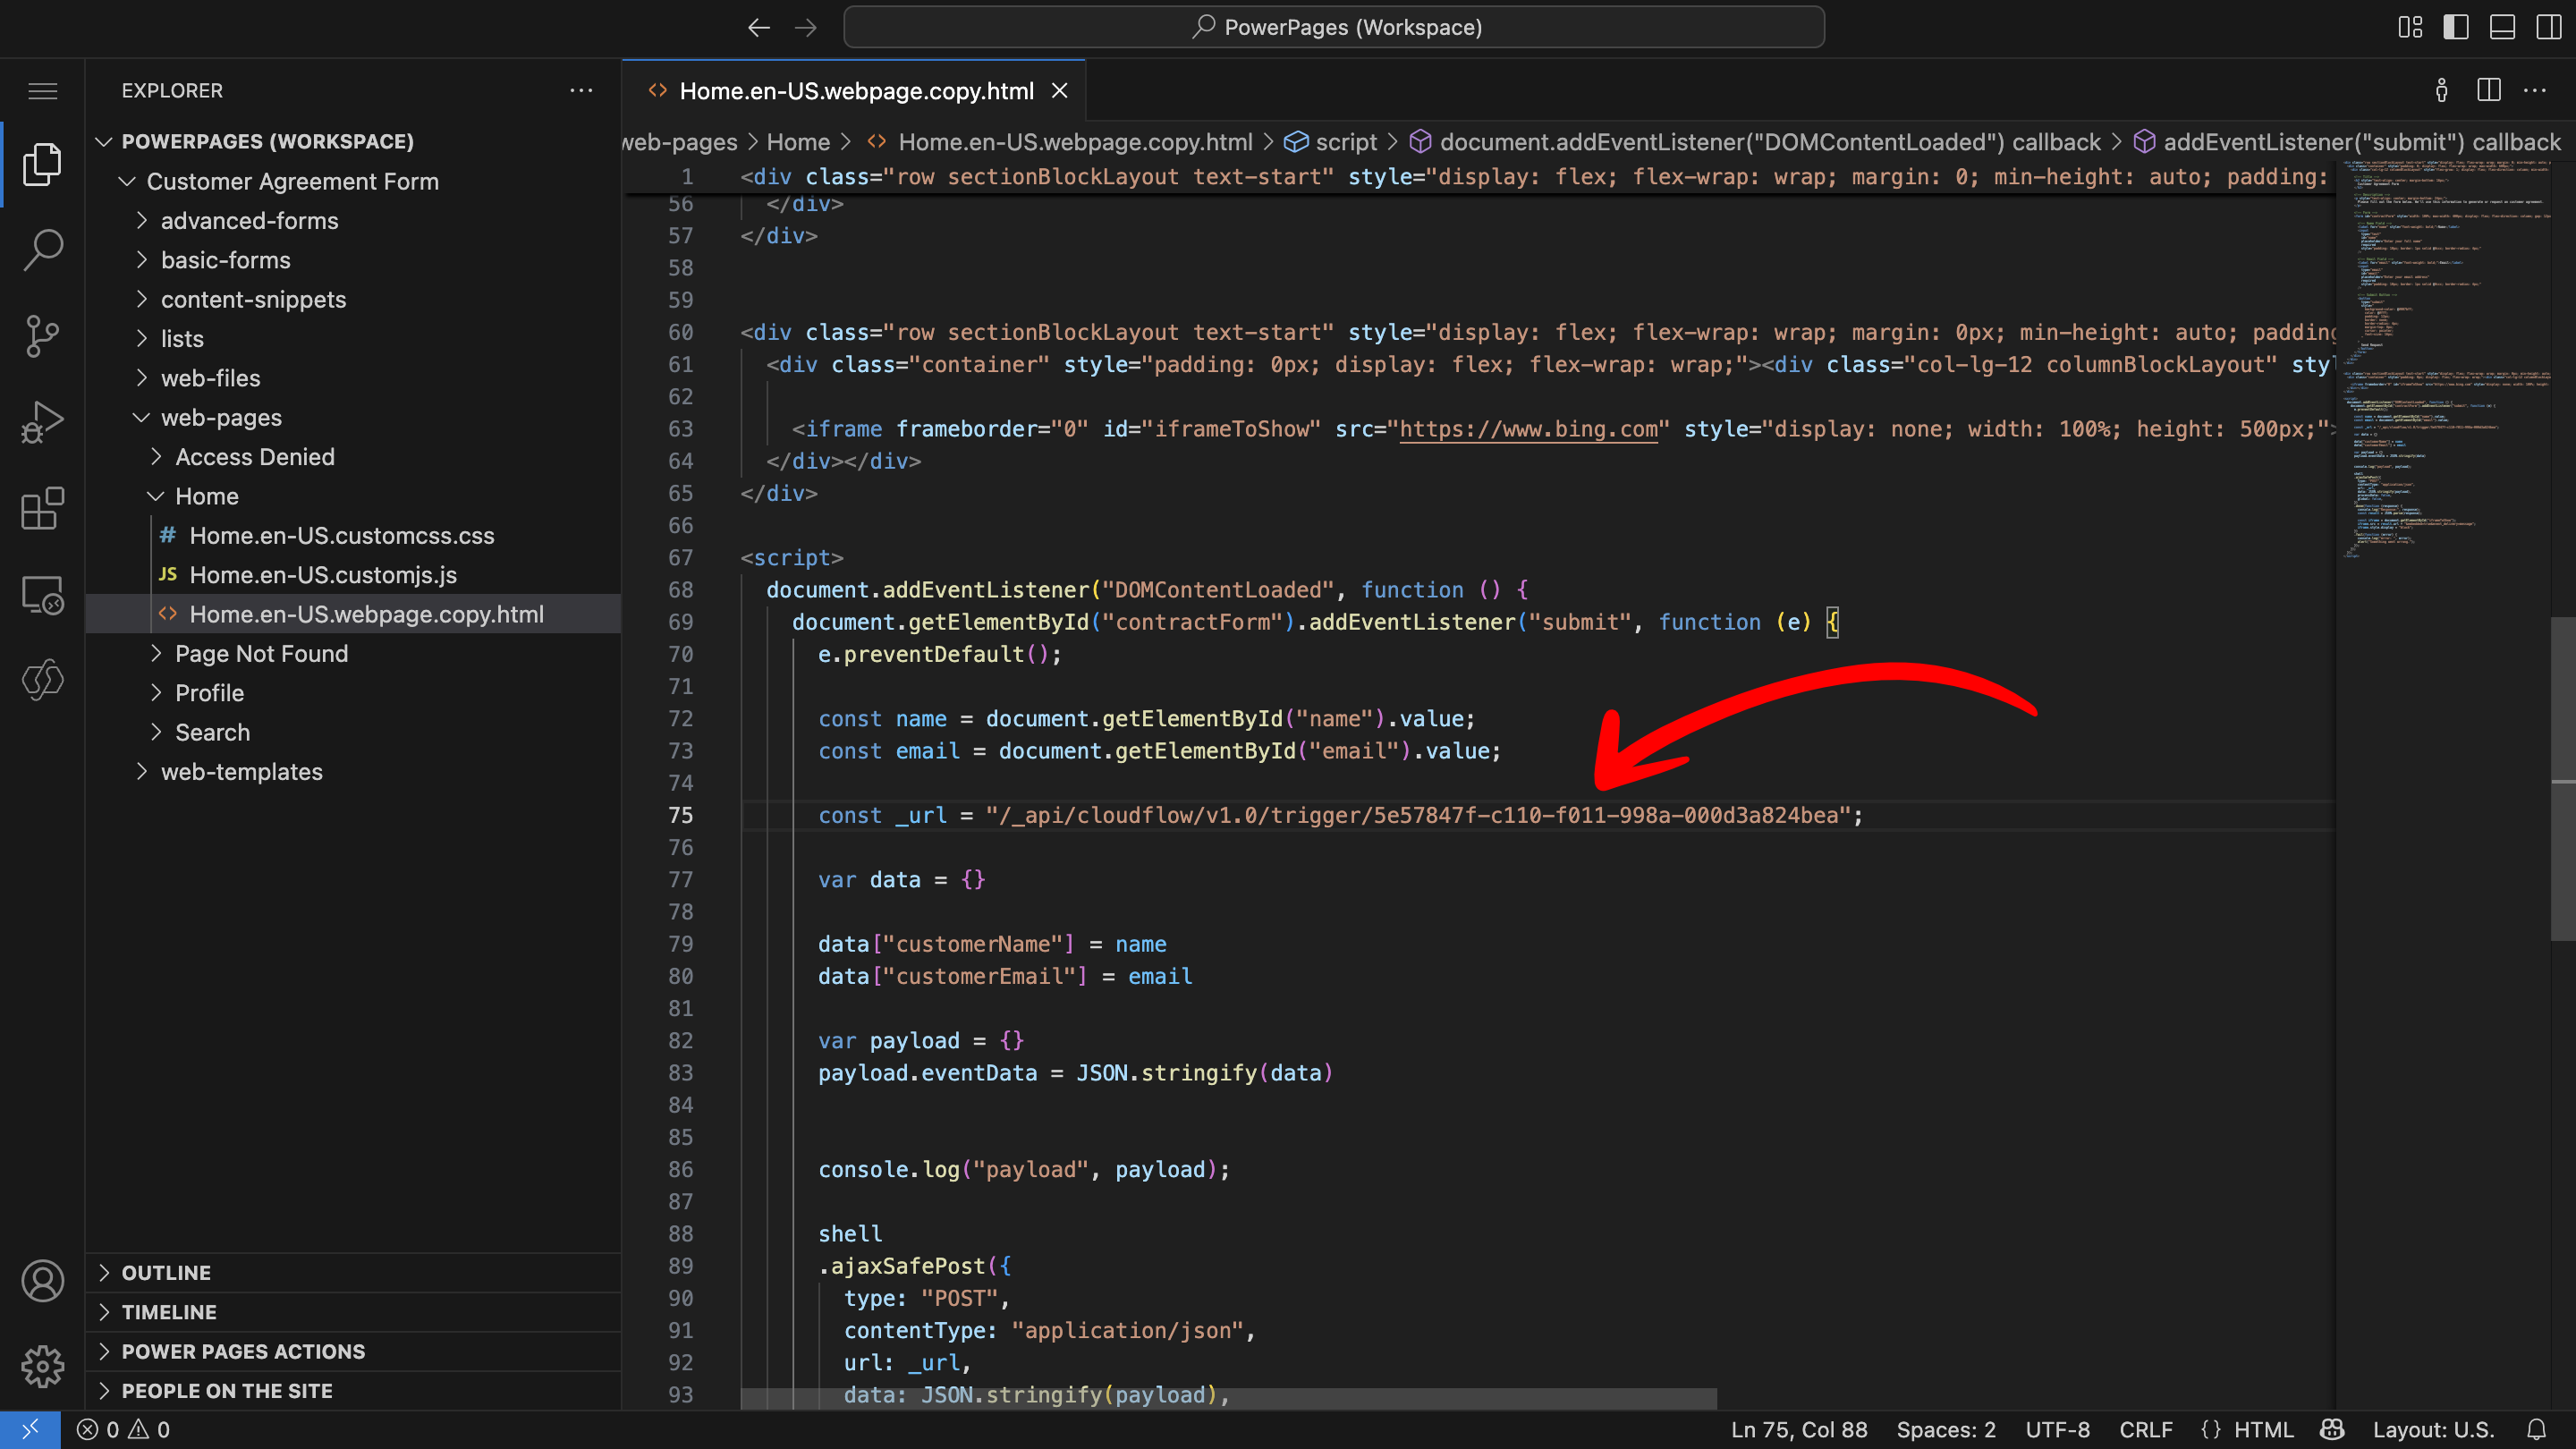
dataobject keys in the JavaScript must match the input names you defined in Step 3.2. If you rename or add inputs in the flow trigger, you must update the corresponding keys in the script. -
Save the file and refresh the Power Pages preview.
The form collects the customer’s details and, on submission, triggers the Power Automate flow and embeds the ceremony directly in the page. You can customize the styles and layout to match your site’s design.
Step 8: Test Your Automation
Test the entire process end-to-end.-
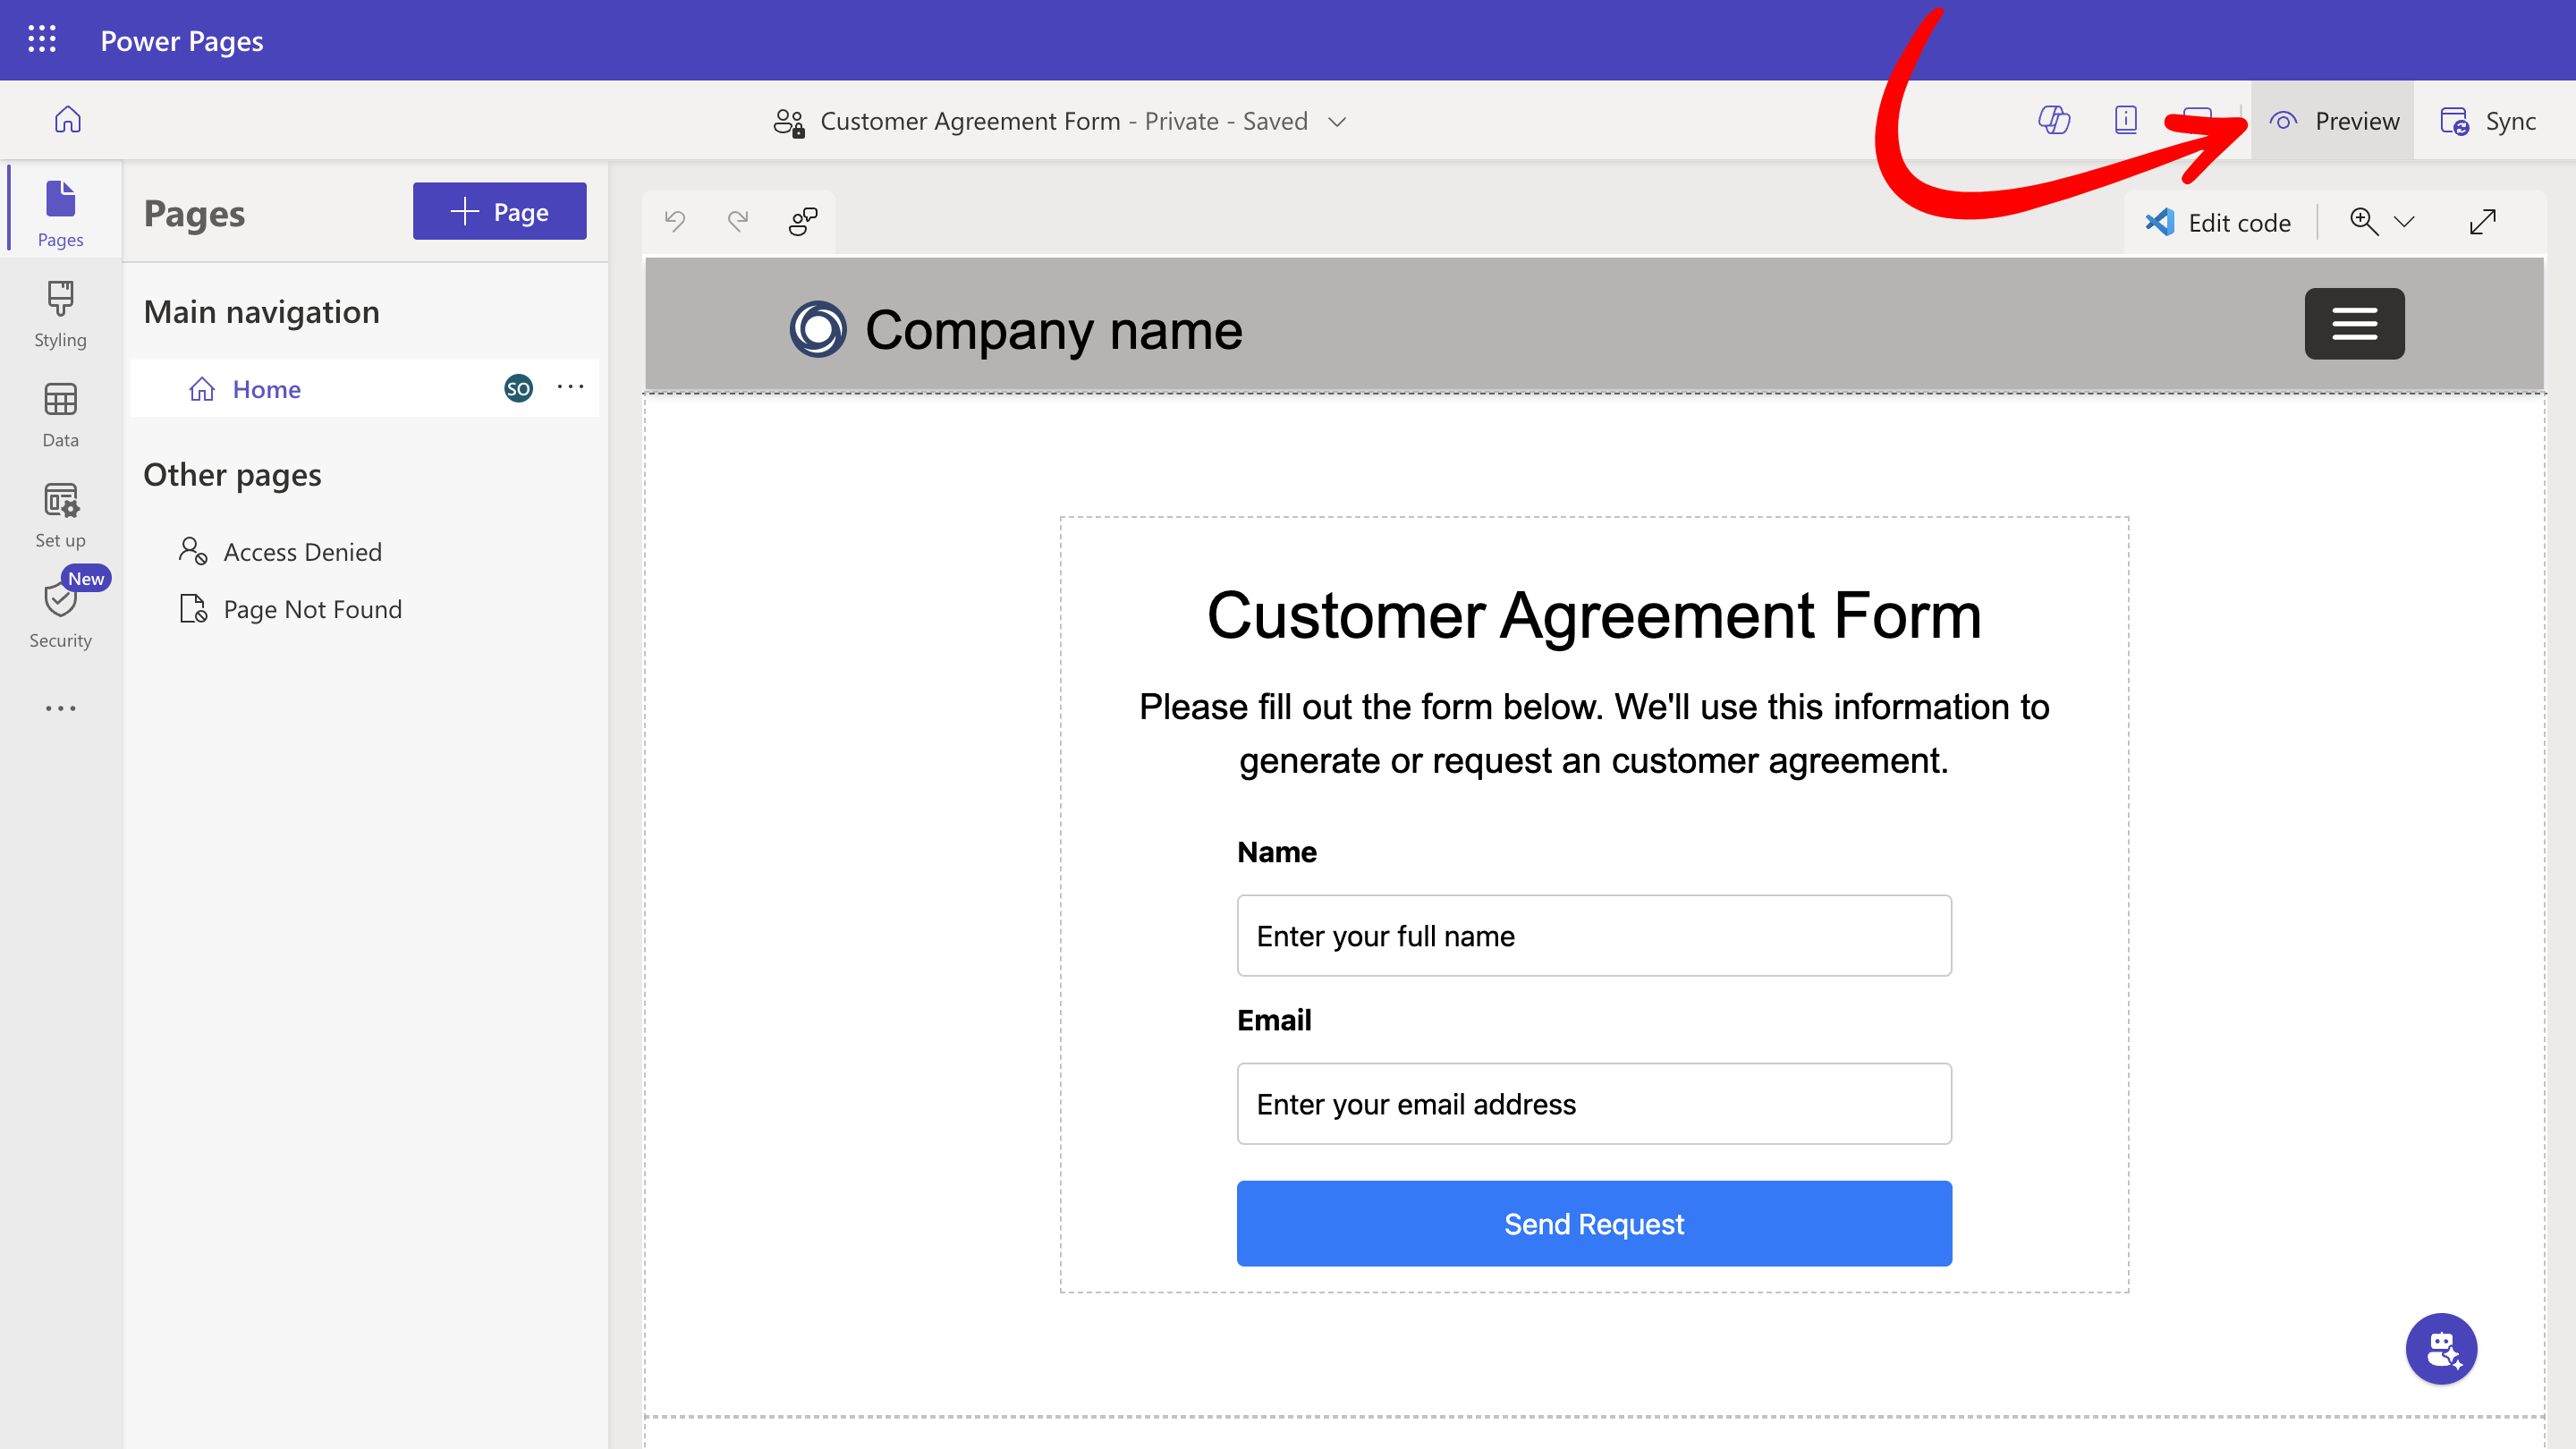
Go back to Power Pages. You should see the form on the home page. Click the Preview button and select the Desktop option.
-
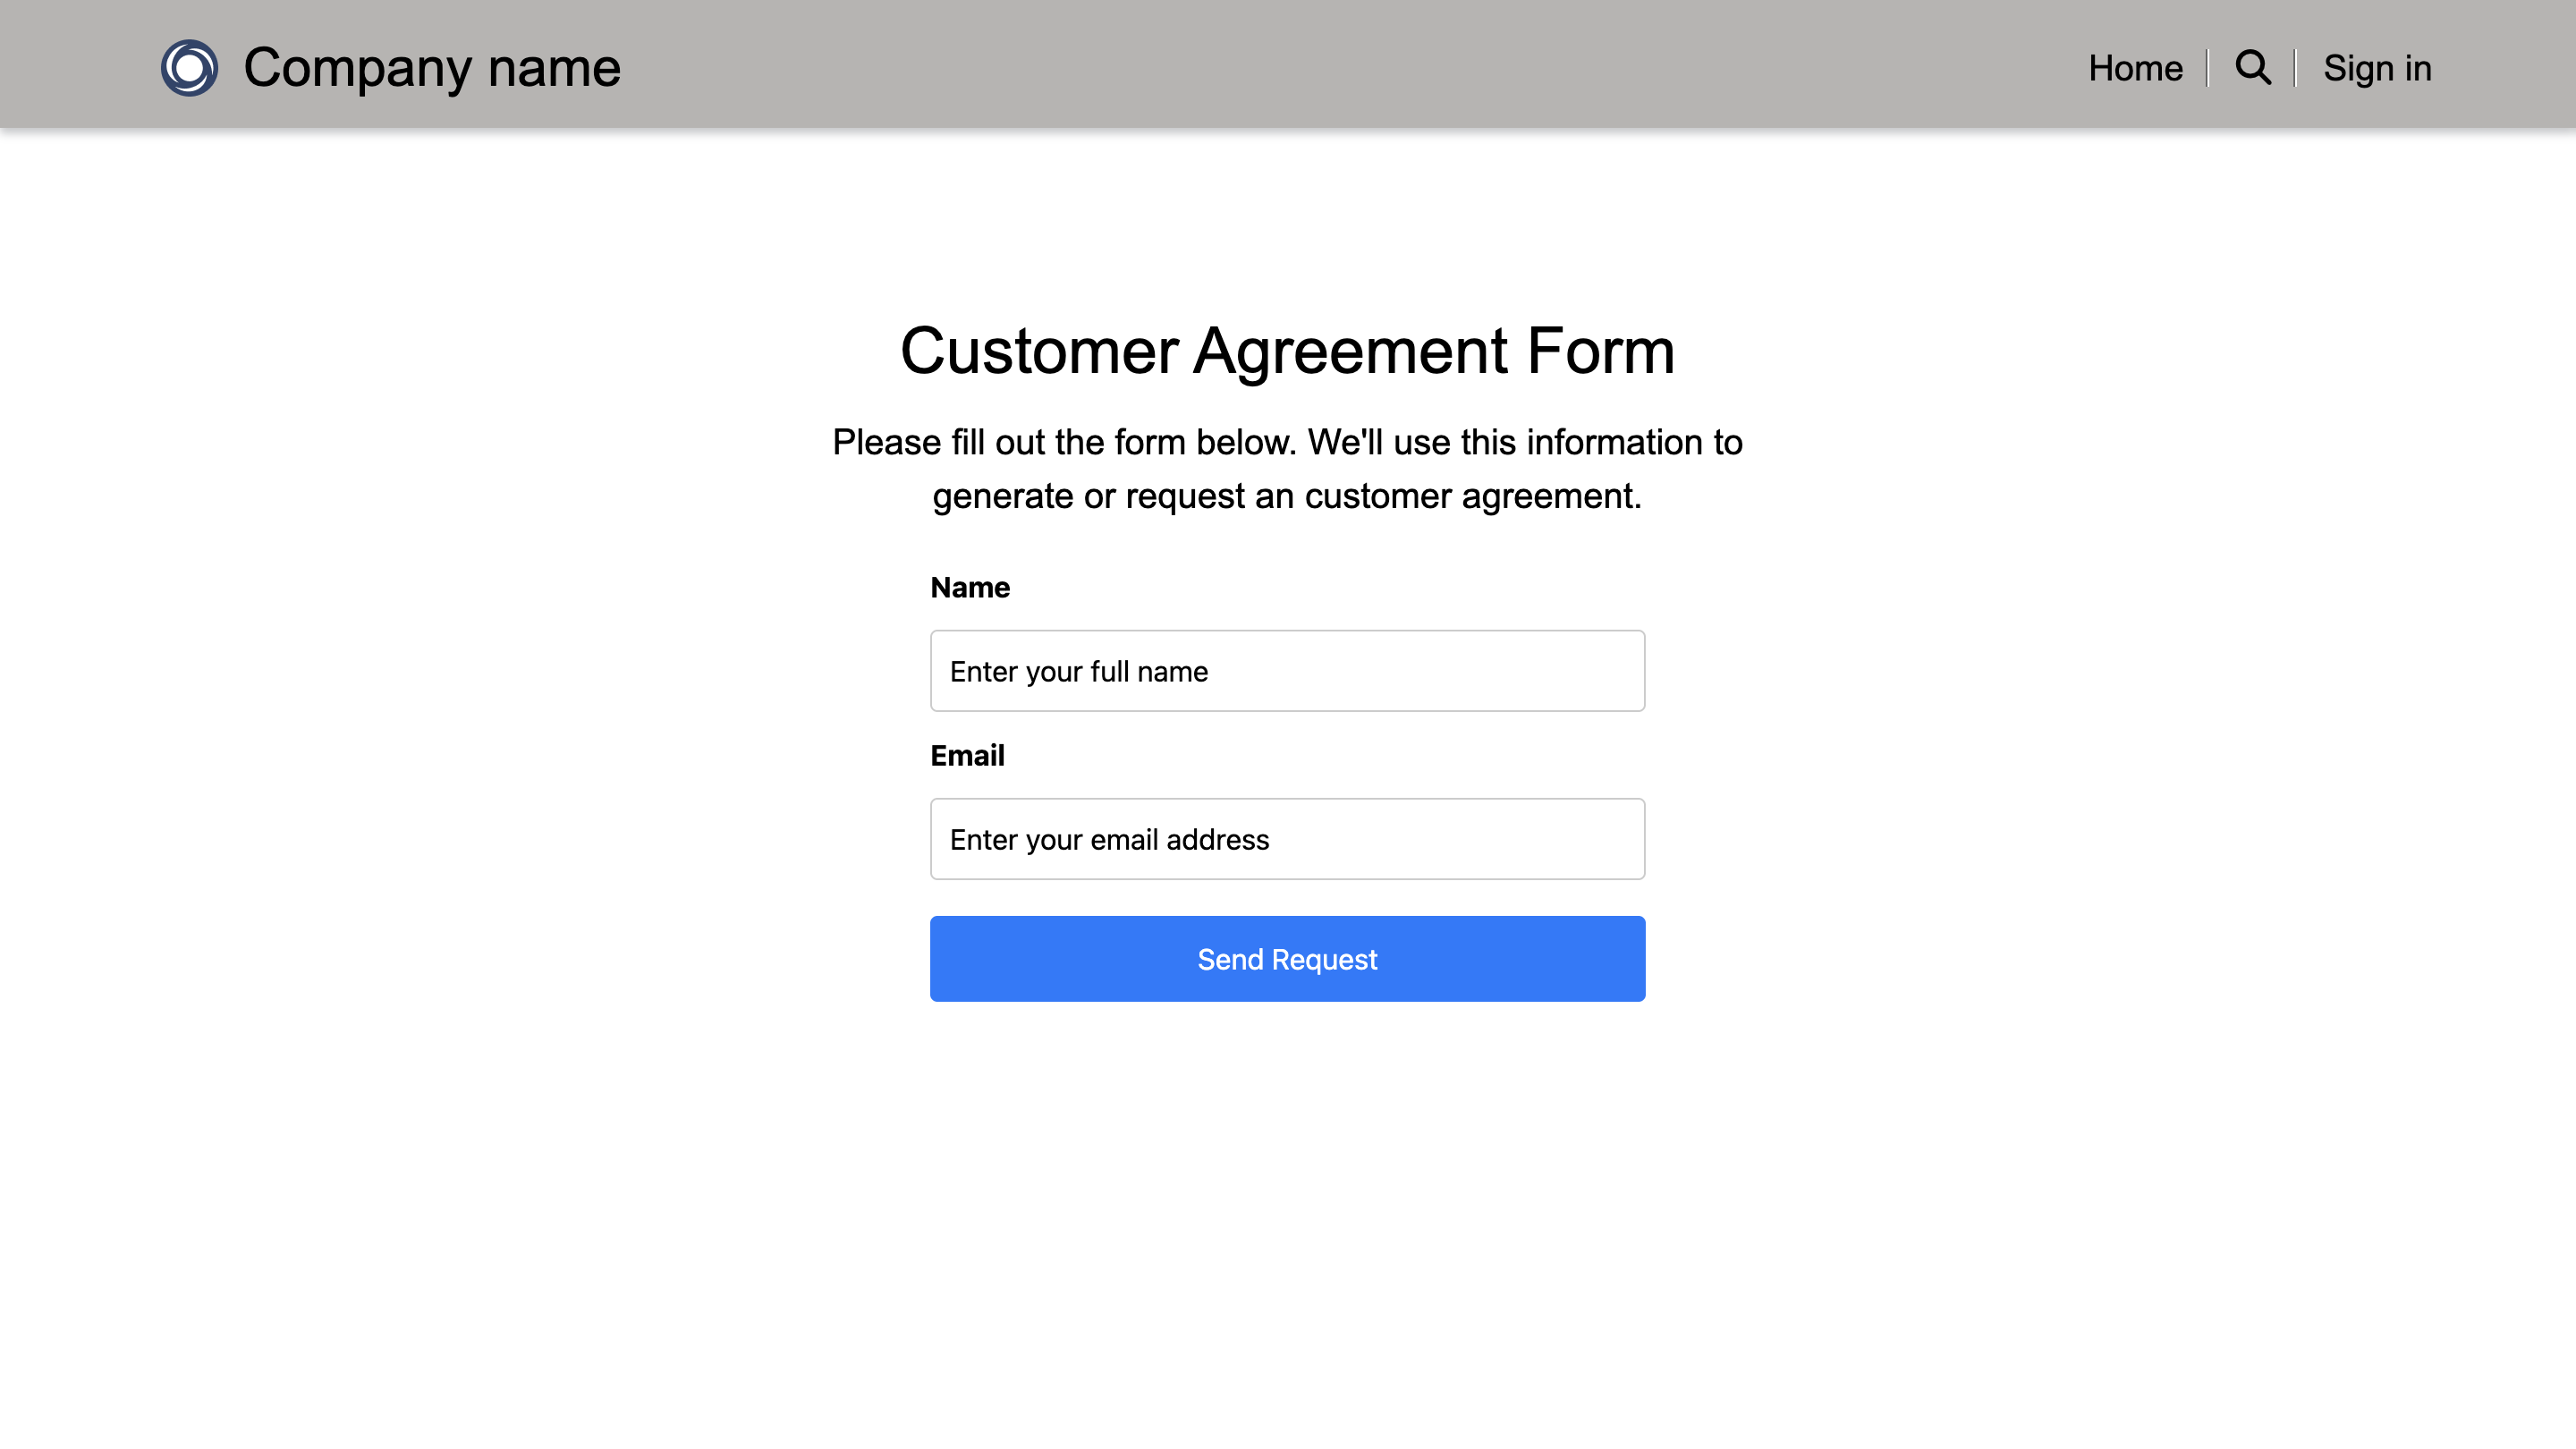
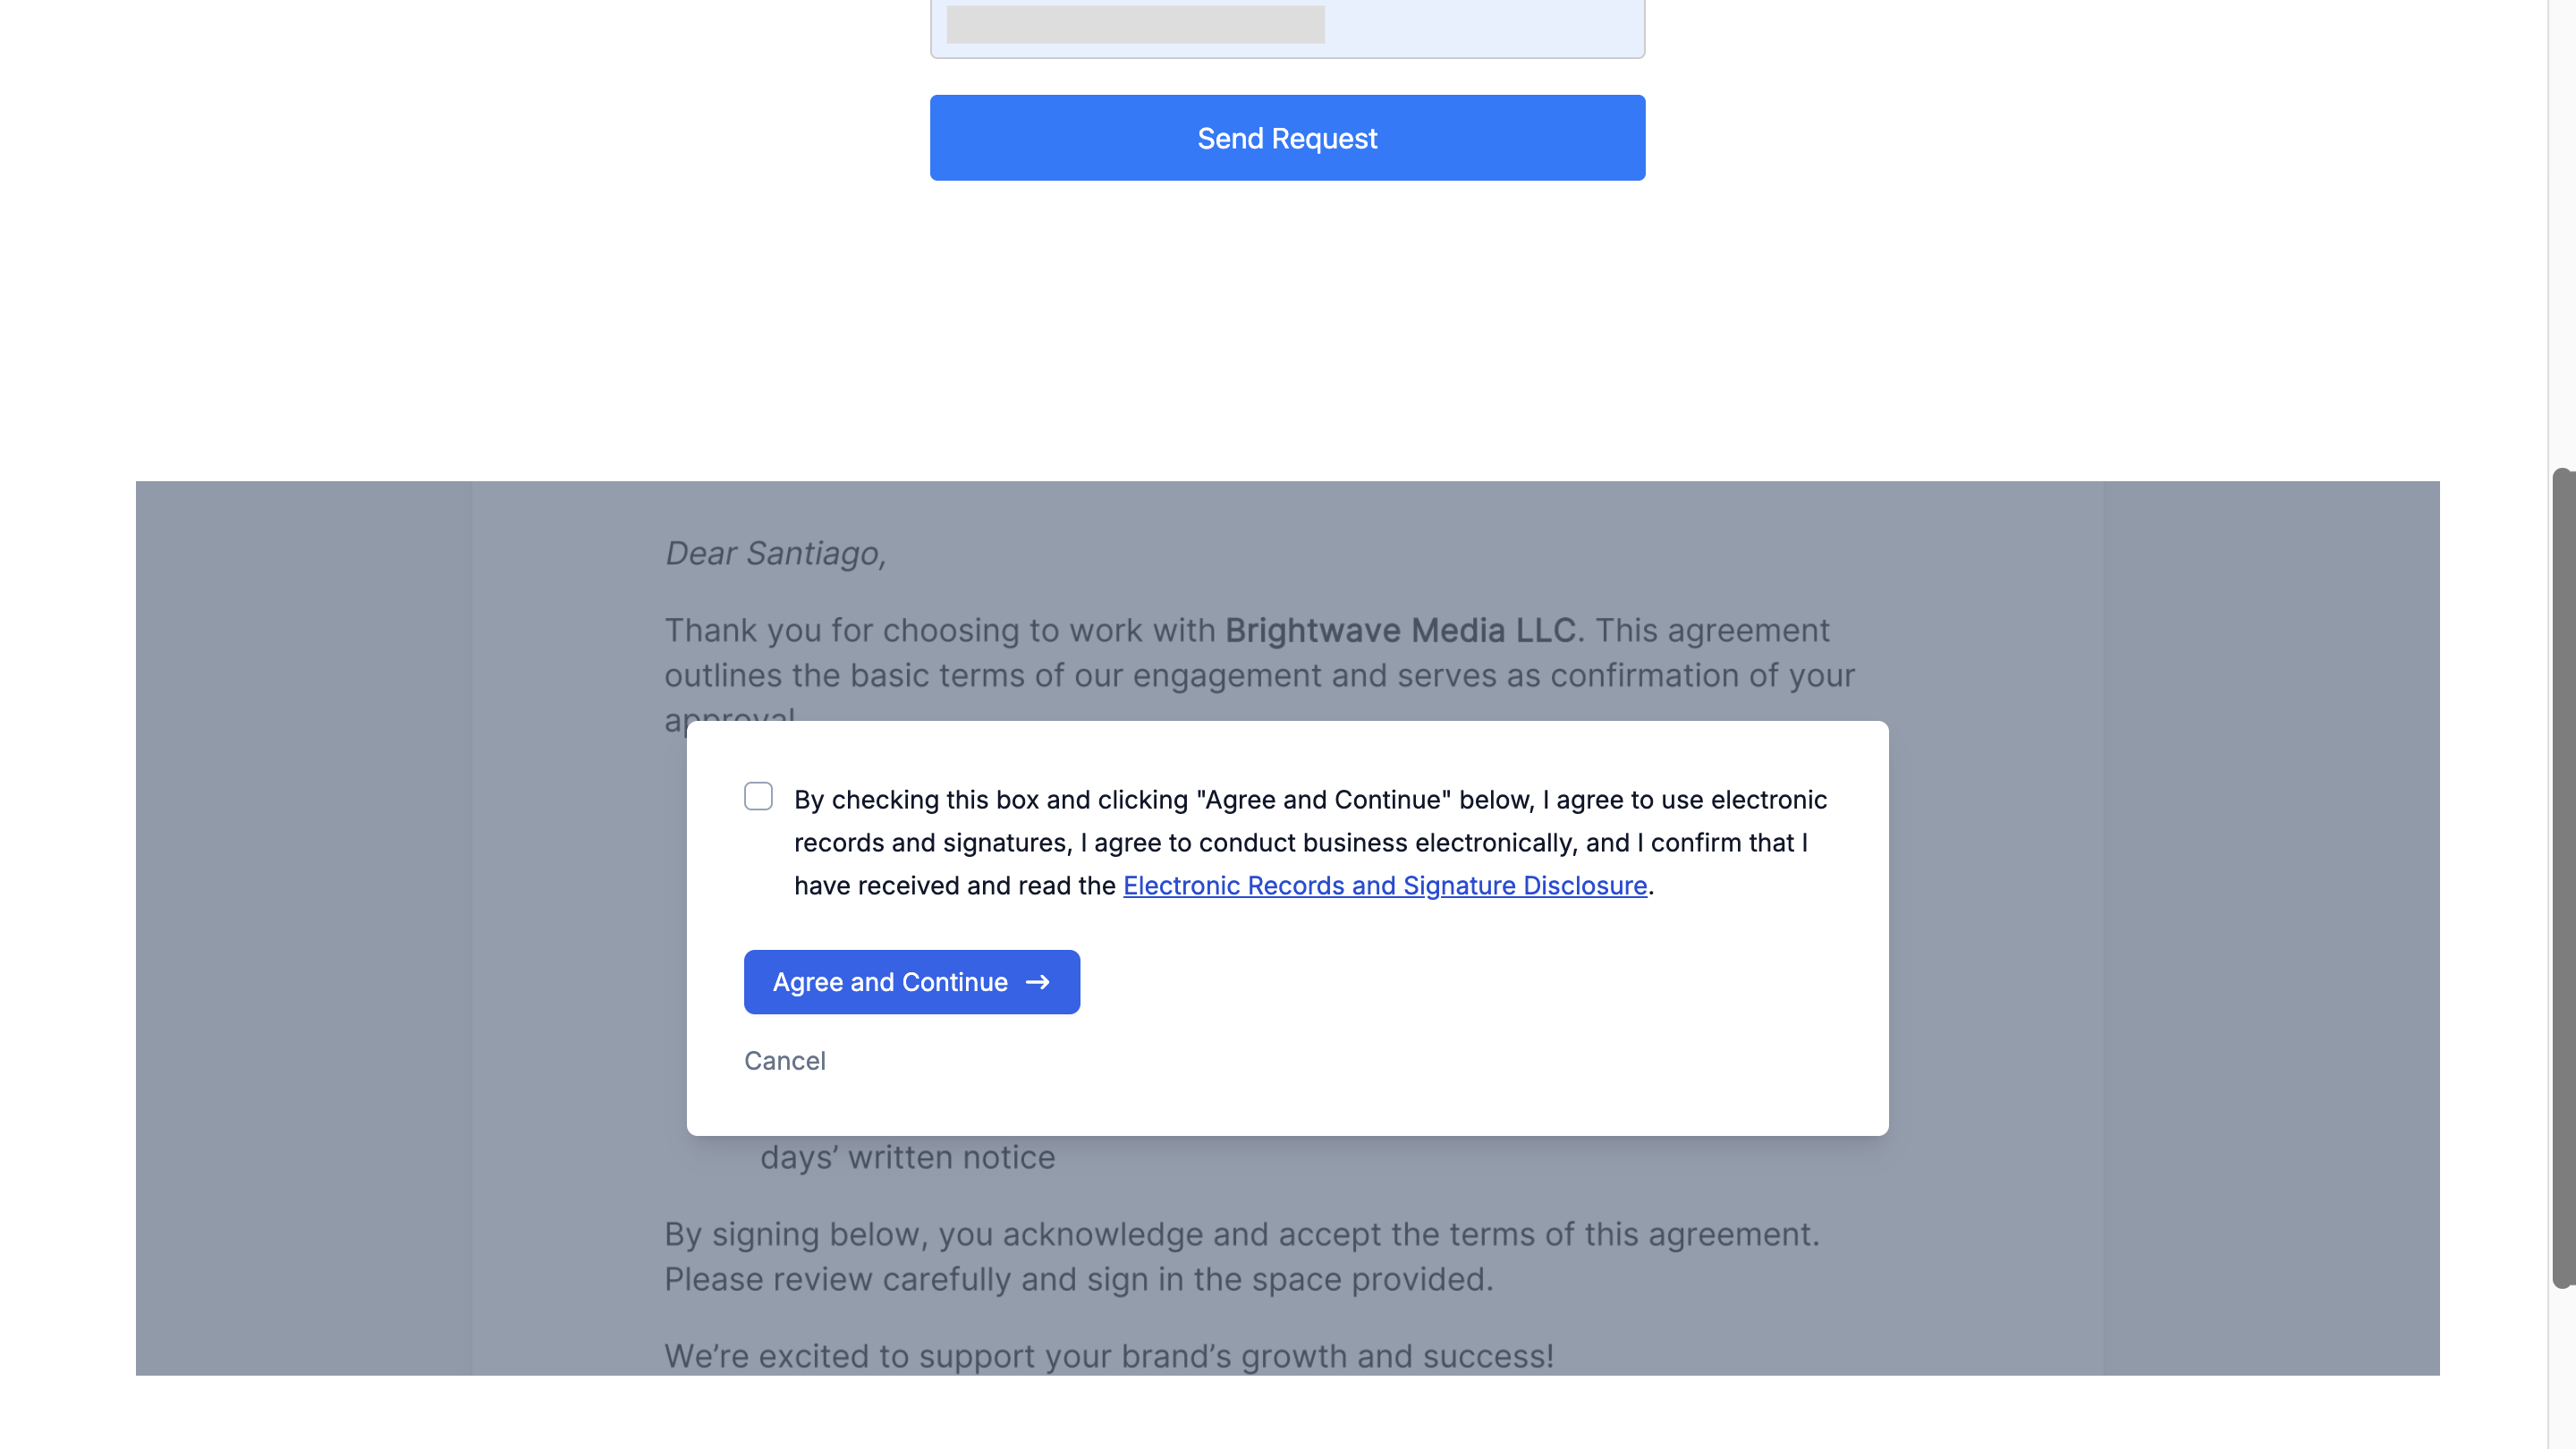
Fill out the form with a test name and email, then click Send Request. After a few seconds, the ceremony should appear embedded in the page.
- Verify the following:
- The ceremony is embedded and visible on the page.
- The ceremony loads correctly and allows the signer to complete the signature.
- The signed document appears in your SignatureAPI dashboard after completion.
Troubleshooting & FAQ
Common Issues:
- API Key Errors: Ensure your SignatureAPI key is correct and that the connection is authenticated in Power Automate.
- Dynamic Content Mapping: Double-check that placeholder names in your DOCX file match exactly with the dynamic content mappings in the flow.
- File Access Issues: Verify that permissions and file paths in OneDrive or SharePoint are configured correctly and accessible by the flow.
Frequently Asked Questions:
- What if the ceremony does not appear after form submission? Open your browser’s developer console to check for errors. Also verify that the flow ran successfully in Power Automate and that the ceremony URL was returned correctly.
- Can I adapt this for other document types or workflows? Yes. You can modify the DOCX template, add additional form fields, or change the flow logic to support different document-signing scenarios.
- How do I restrict which roles can trigger the flow? In the Power Pages flow settings (Step 6), configure the role permissions to allow only specific roles instead of granting access to all roles.
Best Practices & Security
- Always store API keys securely and avoid hardcoding them in client-side code. The flow URL should be the only value placed in the page script.
- Regularly monitor flow runs in Power Automate to catch and resolve errors early.
- Document any changes to your flow or template so your team can maintain the integration over time.