> ## Documentation Index
> Fetch the complete documentation index at: https://signatureapi-daf4ee54.mintlify.site/llms.txt
> Use this file to discover all available pages before exploring further.
# Manage Team Members
> Invite team members and assign roles to control access to your SignatureAPI account.
The Team page lets you invite team members to your Dashboard and control what each person can access. Every user gets their own login credentials and a role that determines their permissions.
To manage your team, go to [Settings > Team](https://dashboard.signatureapi.com/settings/team) in the Dashboard.
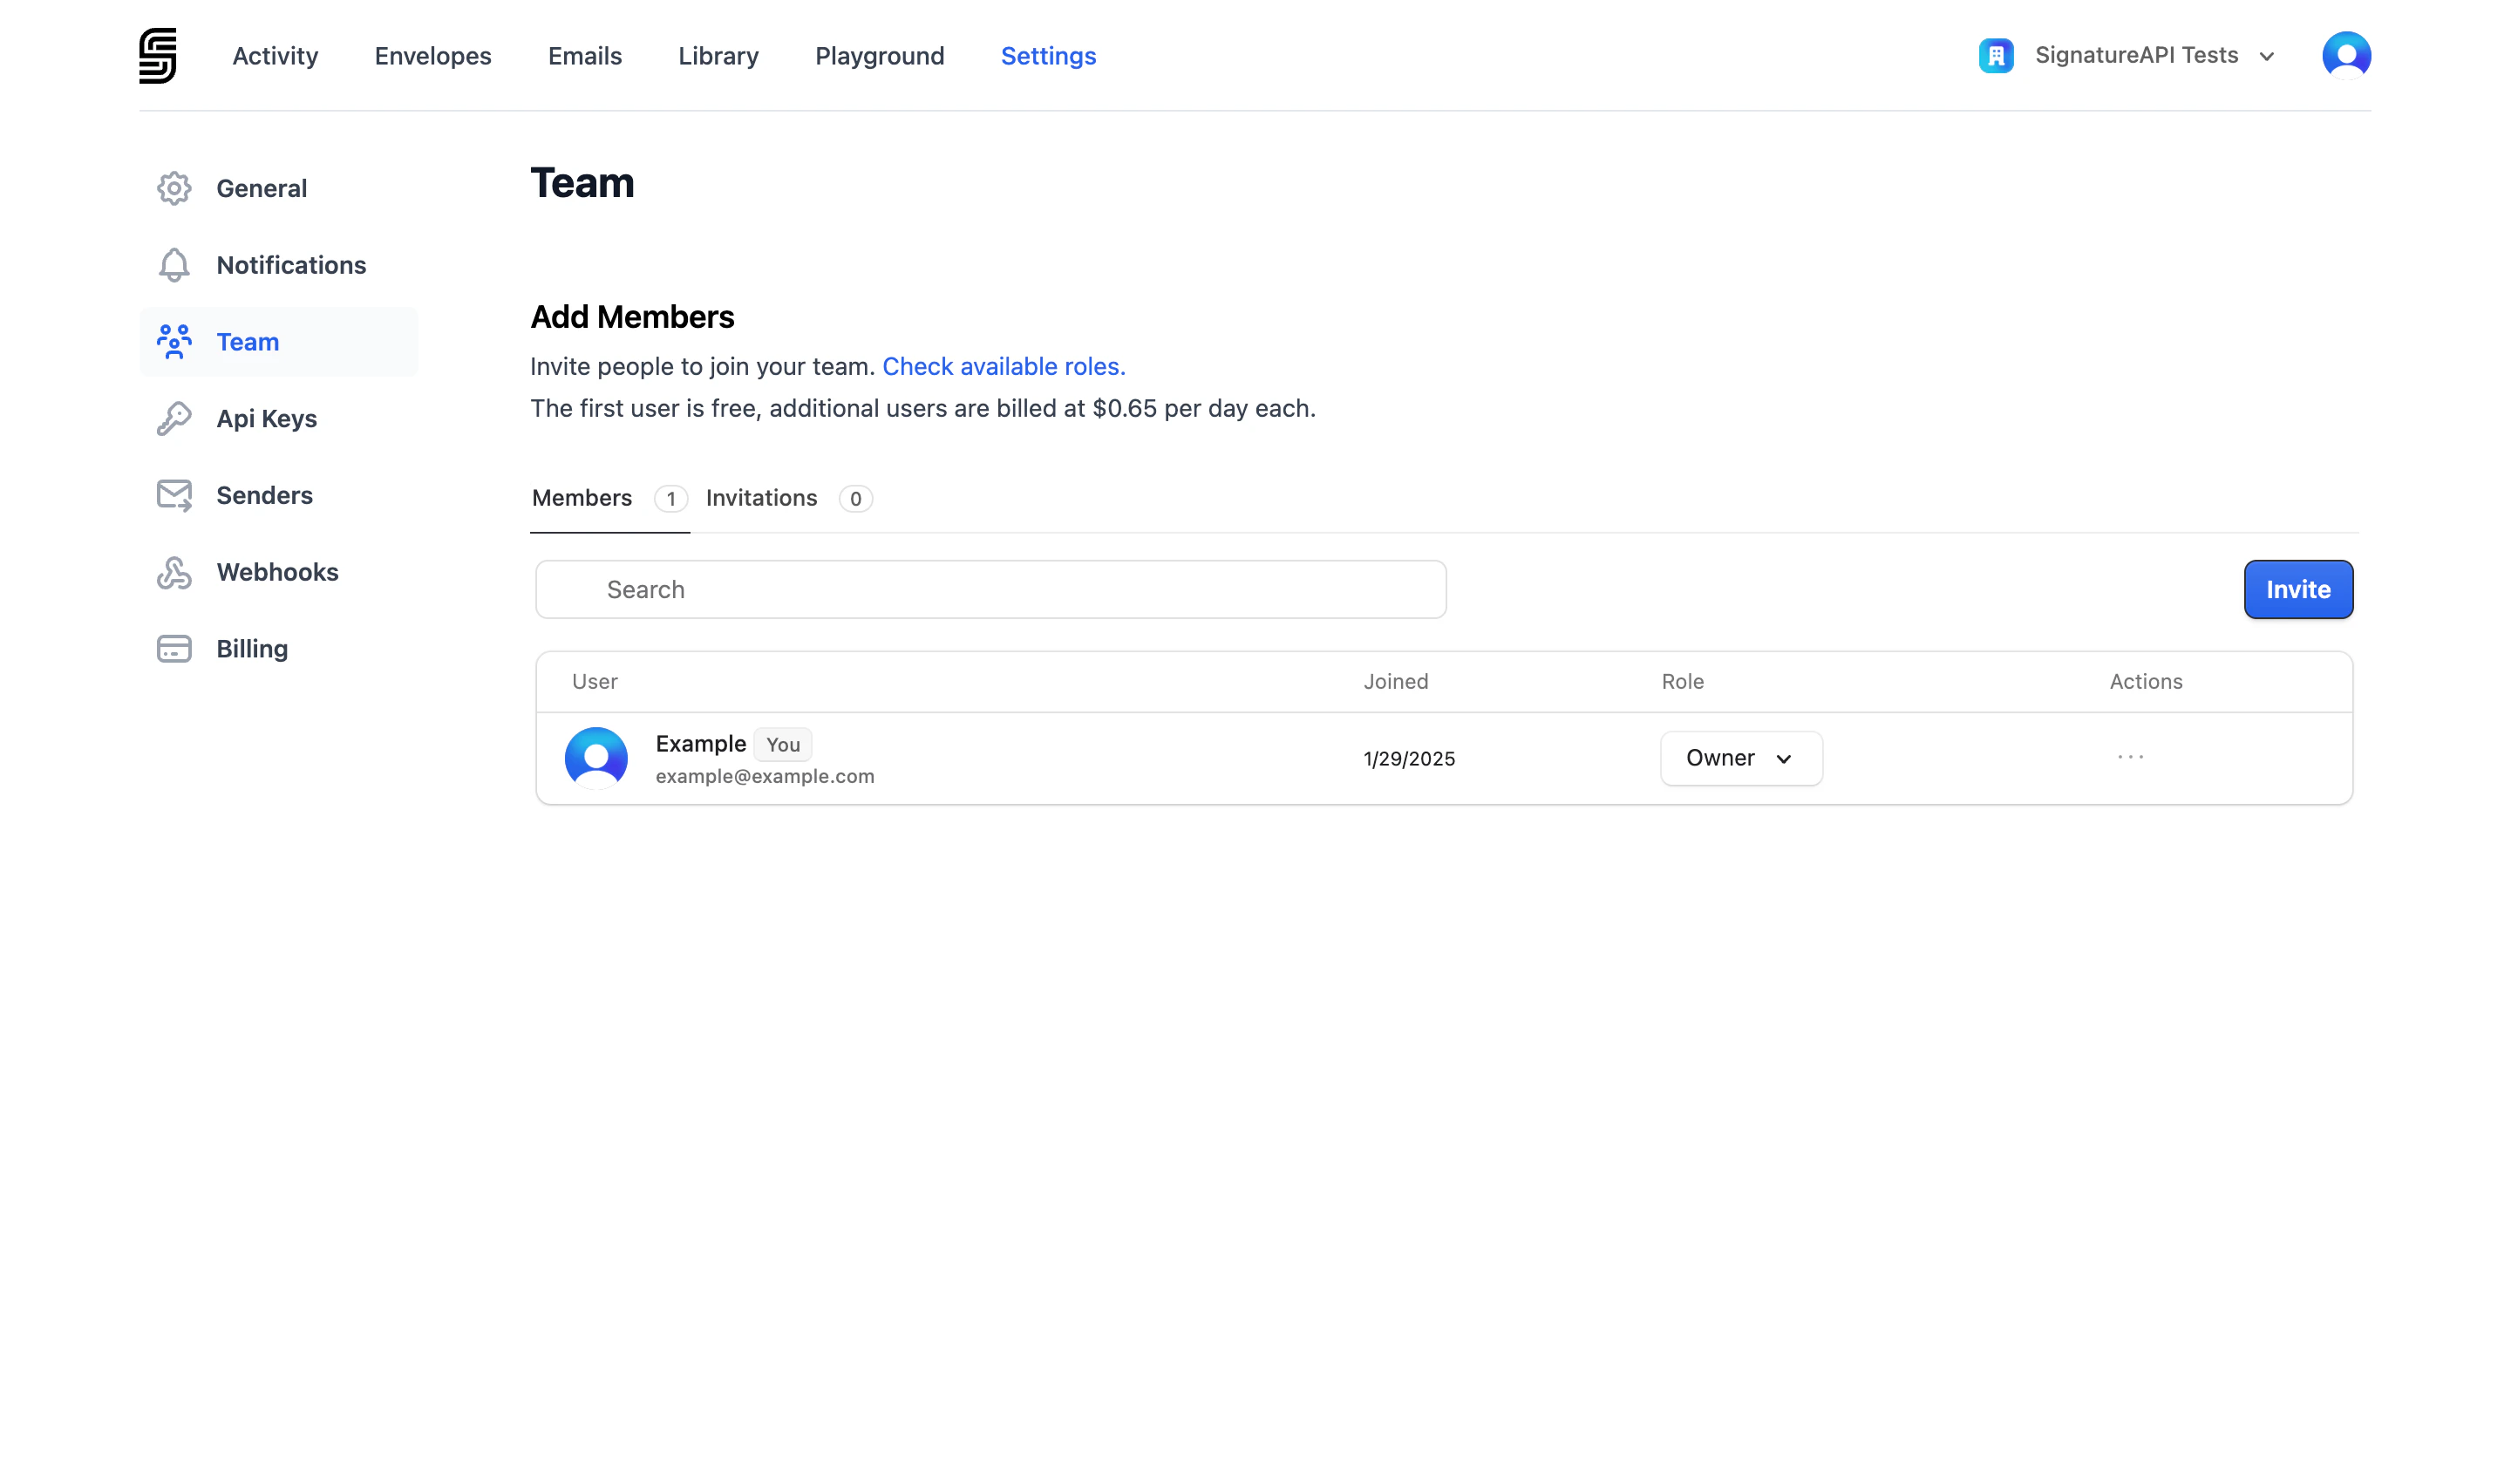 Your account includes one user (the account owner) at no extra cost. Each additional user costs $0.65 per day (about $20 per month).
## Inviting a team member
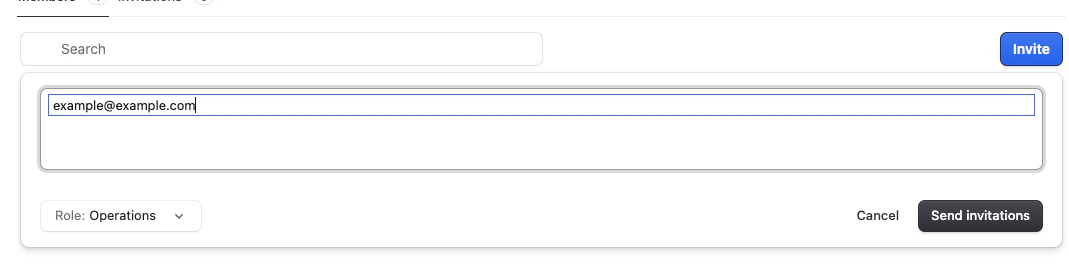
Go to [Settings > Team](https://dashboard.signatureapi.com/settings/team) and click **Invite User**.
Enter the team member's email address and select a role.
Your account includes one user (the account owner) at no extra cost. Each additional user costs $0.65 per day (about $20 per month).
## Inviting a team member
Go to [Settings > Team](https://dashboard.signatureapi.com/settings/team) and click **Invite User**.
Enter the team member's email address and select a role.
 The invited user receives an email with instructions to join your account. They do not need an existing SignatureAPI account.
You need the **Manage team** permission to invite or remove users.
## User roles
Each user is assigned one role. The role controls which areas of the Dashboard and API the user can access.
### Owner
Full access to everything. Every account has one owner. The owner role cannot be assigned to other users.
### Development
Access to test-mode resources only. Use this role for developers building and testing integrations.
* Manage envelopes, API keys, webhooks, API senders, and the document library in **test mode**
### Integration
Access to both test and live resources. Use this role for developers who deploy and maintain integrations in production.
* Everything in the Development role
* Manage envelopes, API keys, webhooks, and API senders in **live mode**
### Operations
Access to live envelopes only. Use this role for team members who monitor and manage envelopes in production but don't need developer tools.
* Manage envelopes in **live mode**
### Billing
Access to billing settings only. Use this role for team members who handle invoices and payment methods.
* Manage billing
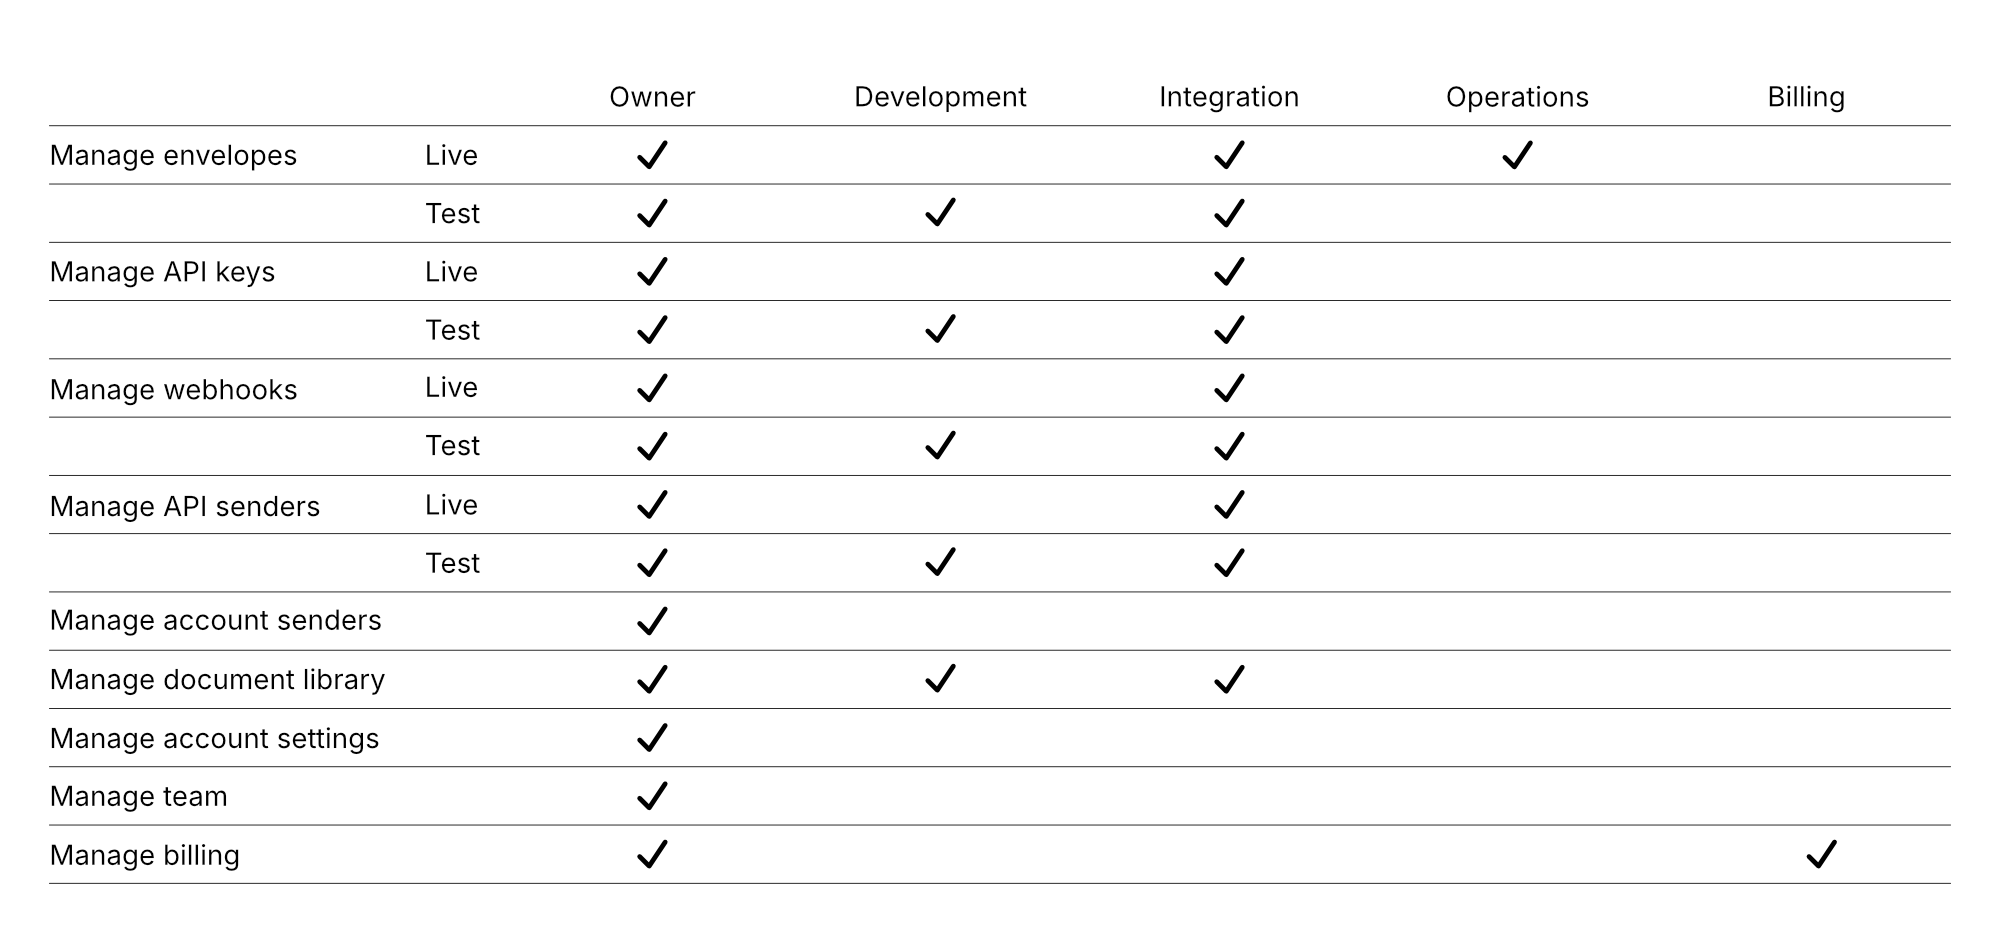
### Permissions reference
For a full breakdown of permissions by role, see the matrix below.
The invited user receives an email with instructions to join your account. They do not need an existing SignatureAPI account.
You need the **Manage team** permission to invite or remove users.
## User roles
Each user is assigned one role. The role controls which areas of the Dashboard and API the user can access.
### Owner
Full access to everything. Every account has one owner. The owner role cannot be assigned to other users.
### Development
Access to test-mode resources only. Use this role for developers building and testing integrations.
* Manage envelopes, API keys, webhooks, API senders, and the document library in **test mode**
### Integration
Access to both test and live resources. Use this role for developers who deploy and maintain integrations in production.
* Everything in the Development role
* Manage envelopes, API keys, webhooks, and API senders in **live mode**
### Operations
Access to live envelopes only. Use this role for team members who monitor and manage envelopes in production but don't need developer tools.
* Manage envelopes in **live mode**
### Billing
Access to billing settings only. Use this role for team members who handle invoices and payment methods.
* Manage billing
### Permissions reference
For a full breakdown of permissions by role, see the matrix below.
 ## Managing users
To change a user's role or remove them from your account, go to [Settings > Team](https://dashboard.signatureapi.com/settings/team) and click on the actions of the user you want to manage.
## Managing users
To change a user's role or remove them from your account, go to [Settings > Team](https://dashboard.signatureapi.com/settings/team) and click on the actions of the user you want to manage.
 Removing a user revokes their access immediately. They can be re-invited later with the same or a different role.